GUIDE
BAR, SAW CHAIN AND CHAIN
BRAKE
INSTALLATION
CAUTION:
Do not
attempt
to start or run the engine
until
the
BAR,
SAW CHAIN and CHAIN
BRAKE
have been installed.
WARNING: Handle the CHAIN
BRAKE
carefully when it is
removed
from
the saw because the lever is under tension.
Make certain the CHAIN
BRAKE
lever is pulled back to the
disengaged
position
when installing or removing the CHAIN
BRAKE.
WARNING: Always wear protective gloves when handling
chain.
INSTALLATION
1.
Remove the CHAIN
BRAKE
retaining nuts. Then remove
the CHAIN
BRAKE.
(Only
necessary
when installed on
saw).
2.
Remove and discard any spacing washers on the bar
bolts.
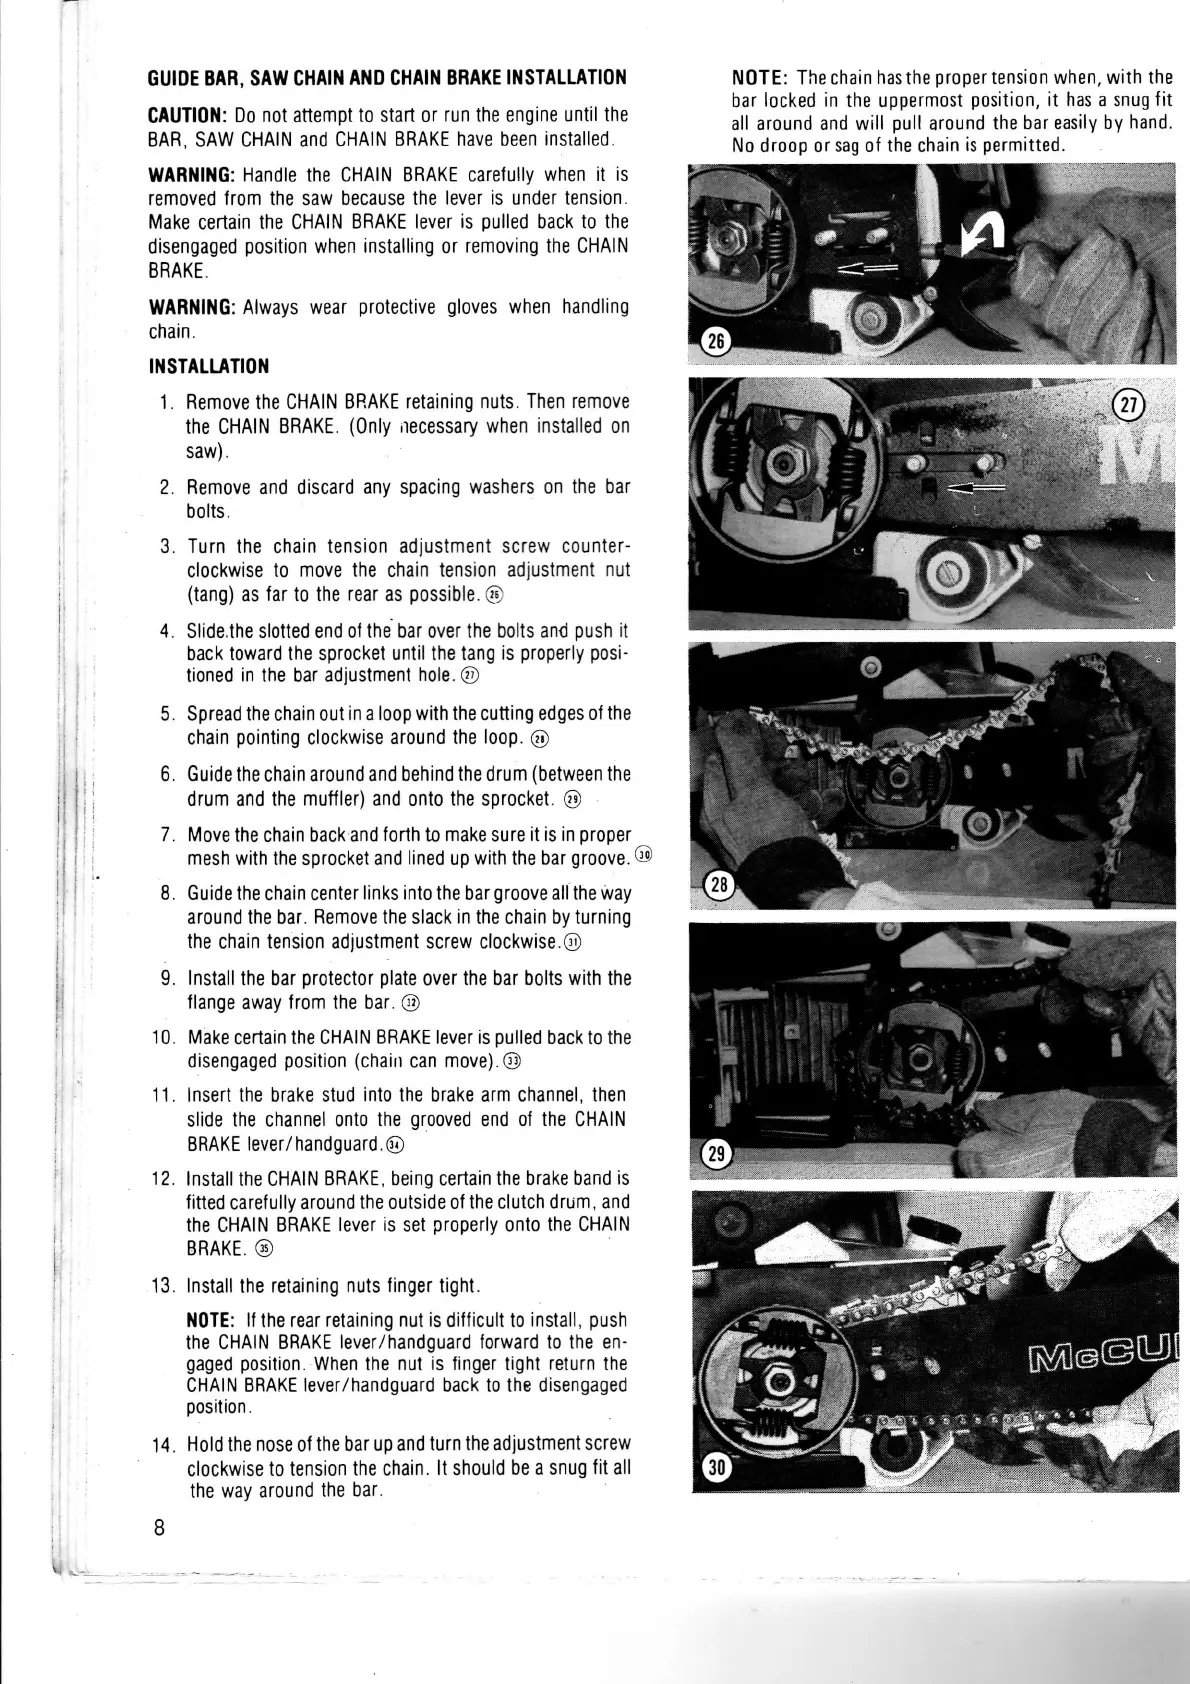
3.
Turn the chain tension adjustment screw counter-
clockwise
to move the chain tension adjustment nut
(tang) as far to the rear as possible. @
4.
Slide.the
slotted
end of the bar over the
bolts
and push it
back
toward the sprocket
until
the tang is properly posi-
tioned
in the bar adjustment
hole.®
5.
Spread
the chain out in
a
loop
with
the
cutting
edges of the
chain
pointing
clockwise around the
loop.
©
6.
Guide the chain around and behind the
drum
(between the
drum
and the muffler) and
onto
the sprocket. @
7.
Move the chain back and
forth
to make sure it is in proper
mesh
with
the sprocket and lined up
with
the bar groove. ®
8.
Guide the chain center links
into
the bar groove all the way
around the bar. Remove the
slack
in the chain by
turning
the chain tension adjustment screw
clockwise.®
9.
Install the bar
protector
plate over the bar
bolts
with
the
flange away
from
the bar. @
10.
Make certain the CHAIN
BRAKE
lever is pulled back to the
disengaged
position
(chain can
move).®
11.
Insert the brake stud
into
the brake arm channel, then
slide the channel
onto
the grooved end of the CHAIN
BRAKE lever/handguard.®
12.
Install the CHAIN
BRAKE,
being certain the brake band is
fitted
carefully around the outside of the clutch drum, and
the CHAIN
BRAKE
lever is set properly
onto
the CHAIN
BRAKE.
®
13.
Install the retaining nuts finger
tight.
NOTE:
If the rear retaining nut is
difficult
to install, push
the CHAIN
BRAKE
lever/handguard forward to the en-
gaged position. When the nut is finger
tight
return
the
CHAIN
BRAKE
lever/handguard back to the disengaged
position.
14.
Hold
the nose of the bar up and
turn
the adjustment screw
clockwise
to tension the chain. It should be a snug fit all
the way around the bar.
NOTE:
The chain
has
the proper tension when,
with
the
bar locked in the uppermost position, it has a snug fit
all around and
will
pull
around the bar easily by hand.
No
droop
or
sag
of the chain is permitted.
8