AUTOMATIC
CHAIN
OILER
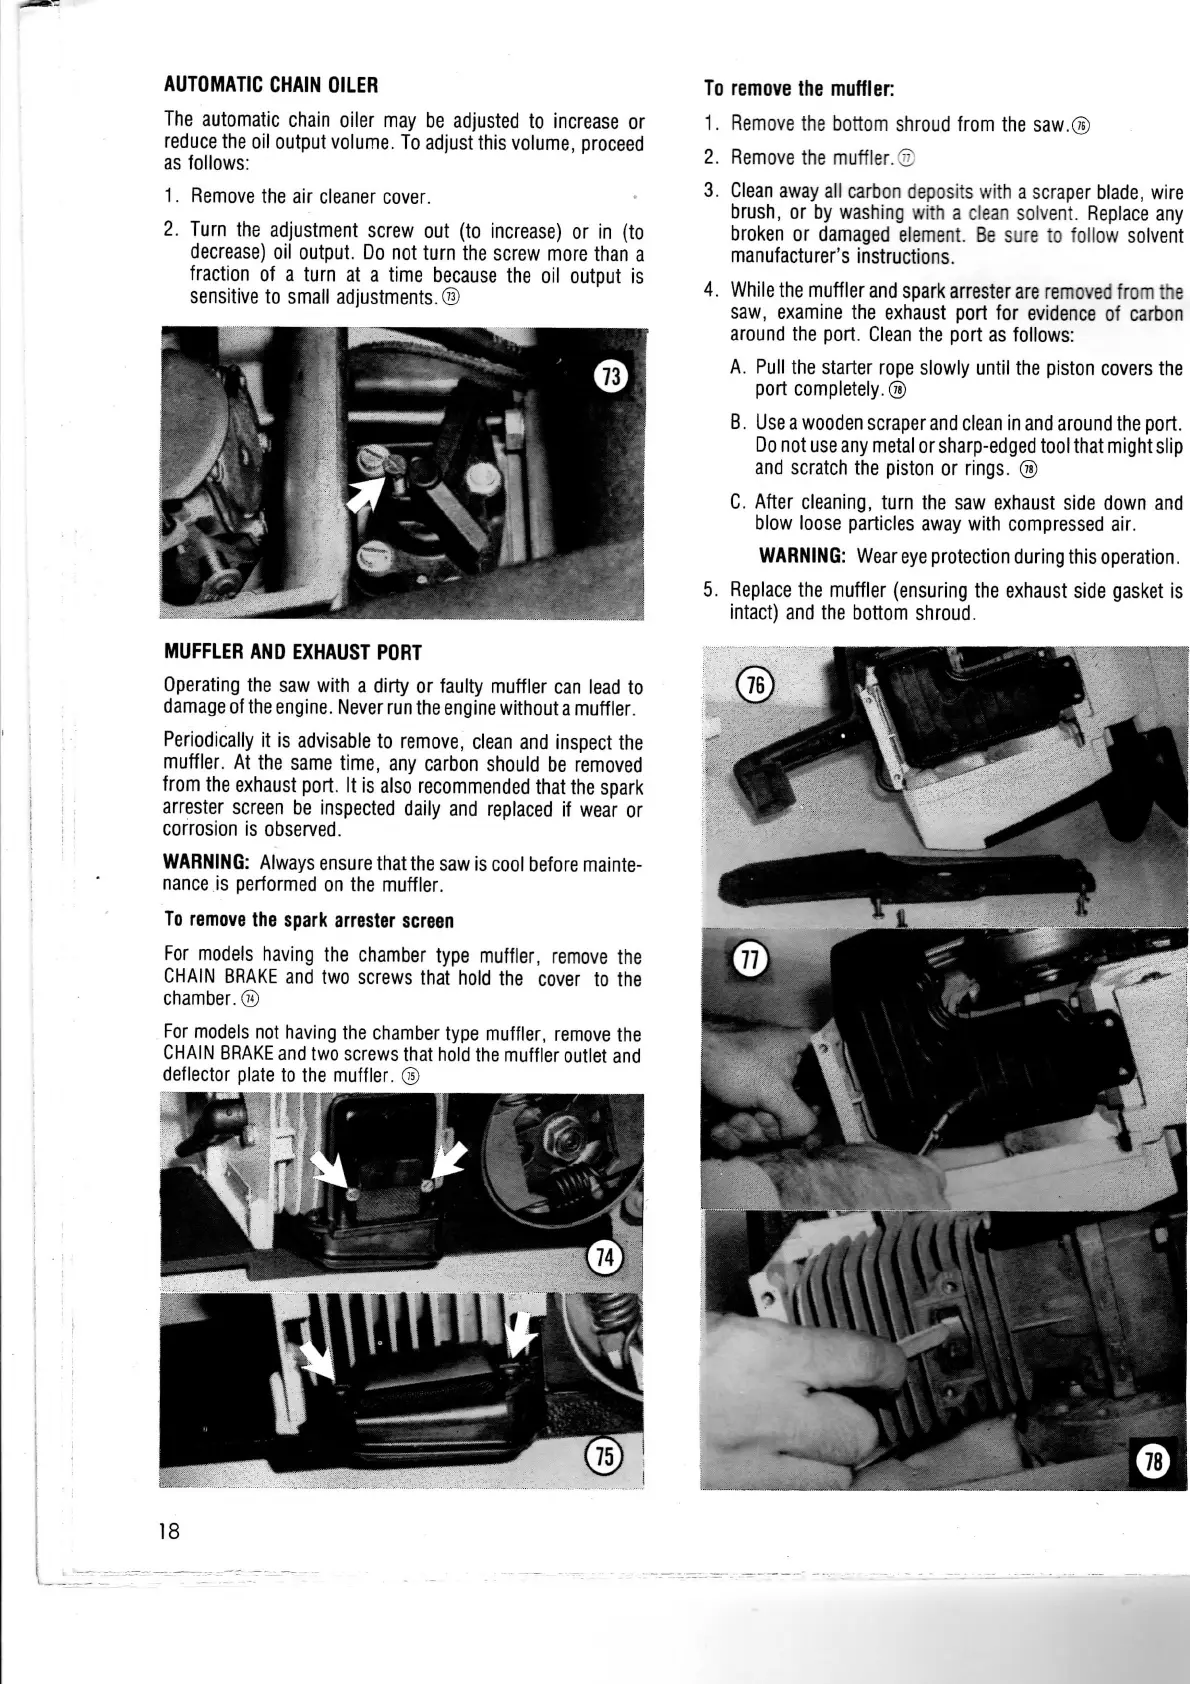
To
remove the muffler:
The
automatic chain oiler may be adjusted to
increase
or
reduce
the oil
output
volume. To adjust this volume, proceed
as
follows:
1.
Remove the air cleaner cover.
2.
Turn the adjustment
screw
out (to
increase)
or in (to
decrease)
oil
output.
Do not
turn
the
screw
more than a
fraction of a
turn
at a time
because
the oil
output
is
sensitive
to small
adjustments.®
MUFFLER
AND
EXHAUST
PORT
Operating the saw
with
a
dirty
or faulty muffler can lead to
damage
of the
engine.
Never run the engine
without
a
muffler.
Periodically
it is advisable to remove, clean and inspect the
muffler. At the
same
time, any carbon should be removed
from
the exhaust
port.
It is
also
recommended that the spark
arrester
screen
be inspected daily and replaced if wear or
corrosion is observed.
WARNING:
Always
ensure
that the saw is cool before mainte-
nance
is performed on the muffler.
To
remove the spark arrester
screen
For
models having the chamber type muffler, remove the
CHAIN
BRAKE
and two
screws
that
hold
the cover to the
chamber.
®
For
models not having the chamber type muffler, remove the
CHAIN
BRAKE
and two
screws
that
hold
the muffler
outlet
and
deflector plate to the muffler. ®
1.
Remove the
bottom
shroud
from
the
saw.®
2.
Remove the muffler. 2
3.
Clean
away
all carbon deposits
with
a
scraper
blade, wire
brush,
or by washing
with
a clean solvent.
Replace
any
broken or damaged element. Be
sire
to
follow
solvent
manufacturer's
instructions.
4.
While the muffler and spark arrester
are
removed
from
the
saw,
examine the exhaust
port
for evidence of carbon
around the
port.
Clean
the
port
as follows:
A.
Pull the starter rope slowly
until
the piston covers the
port
completely.®
B. Use a
wooden
scraper
and
clean in and around the
port.
Do not
use
any metal or
sharp-edged
tool
that
might
slip
and
scratch the piston or rings. ®
C.
After cleaning,
turn
the saw exhaust side down and
blow loose particles
away
with
compressed air.
WARNING:
Wear
eye
protection during this operation.
5.
Replace
the muffler (ensuring the exhaust side gasket is
intact) and the
bottom
shroud.
18