Firmware Upgrades
39
Replacing Microchips
1. Make certain power to the SmarTraq inverter drive is shut off.
2. Remove the four screws securing the cover on the drive enclosure. Remove the cover. If
the inverter drive is equipped with an ON/OFF switch, place it in the OFF position.
3. Remove the four screws securing the upper board to its
stand-offs. Hold the stand-offs so that they do not
unscrew from the lower board.
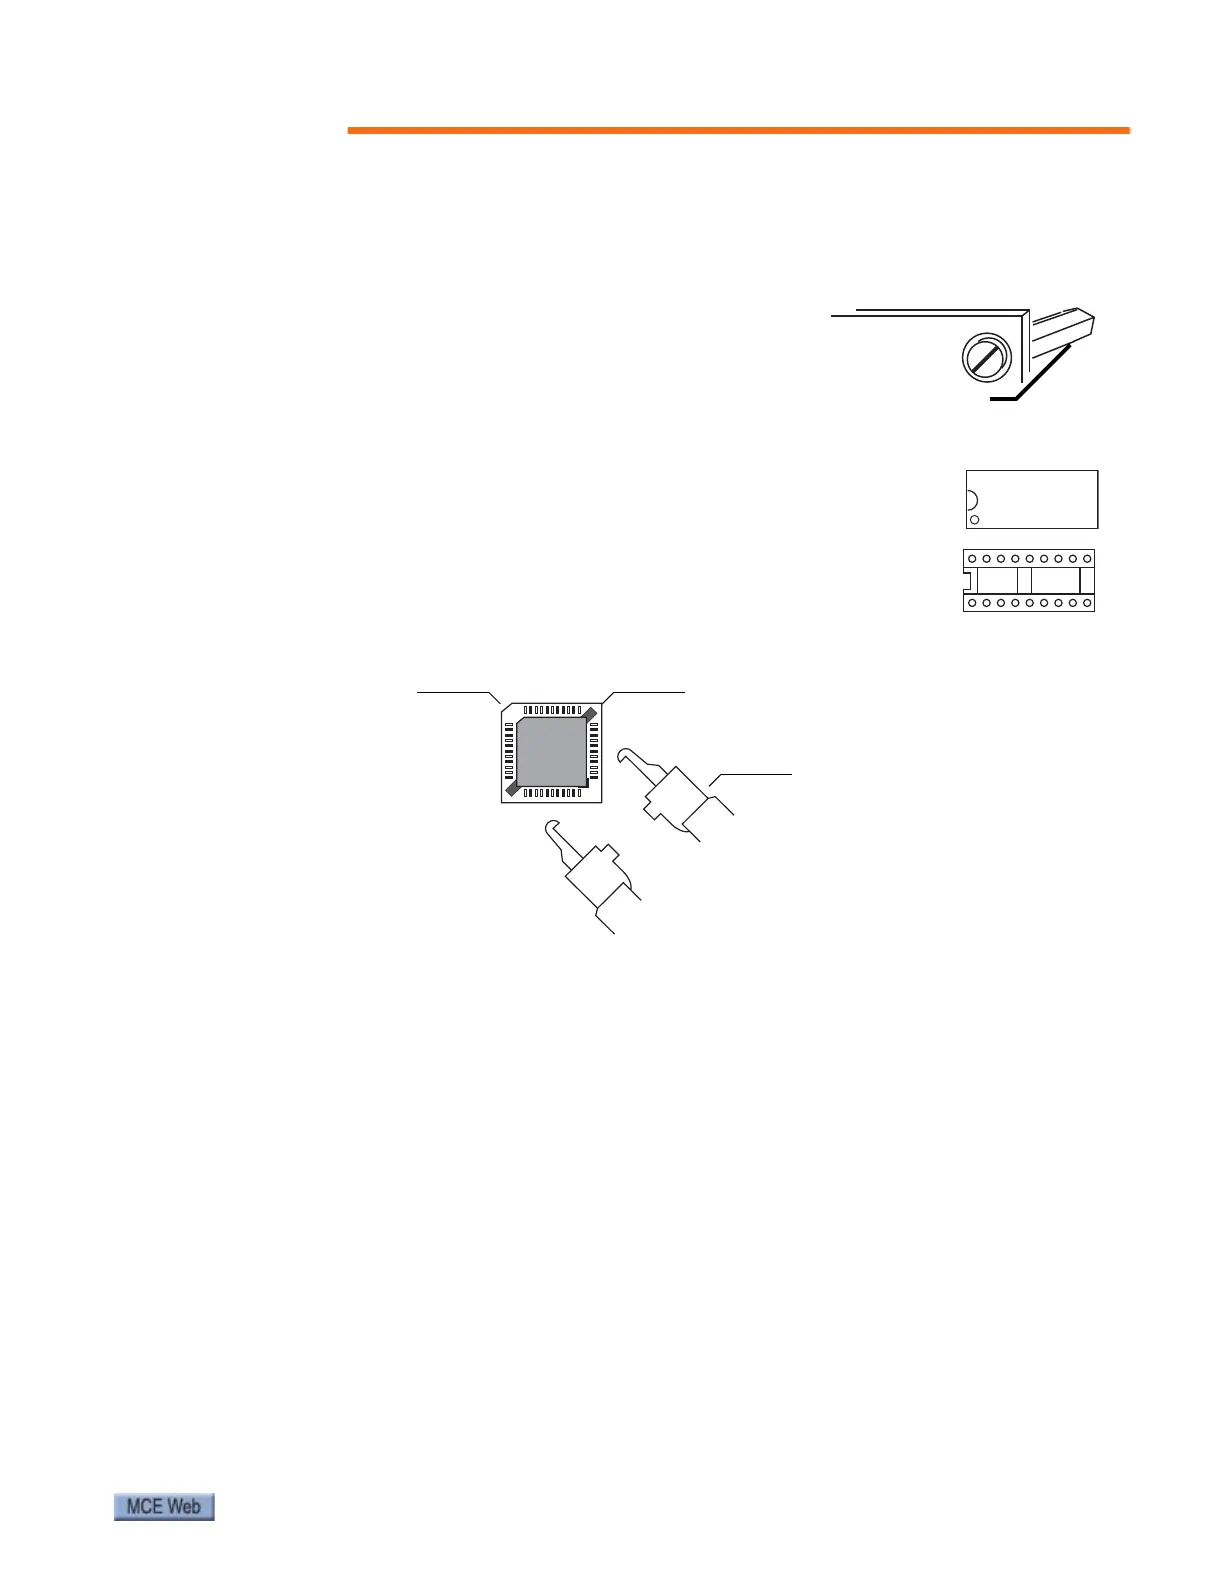
4. Using a small (preferably plastic) screwdriver, carefully
lever the programmer chip out of its socket, raising first
one end and then the other in stages to avoid damaging pins and socket.
5. Note that the chip must be correctly inserted in the socket
with the notch at one end of the chip matched to the notch at
one end of the socket. Insert the new chip gently, taking care
not to bend the pins. Make certain the chip is completely
seated in the socket.
6. Next, use the special tool included with this kit to carefully
remove the microprocessor chip from its socket on the lower board. Be careful not to
damage the socket or bend the pins on the chip.
7. Note that the microprocessor must be correctly inserted in the socket with the angled
corner of the chip aligned with the angled corner of the socket. Insert the new micropro-
cessor chip using EXTREME CARE not to bend the pins. If a pin is bent, the IC must be
replaced. It is very easy to break a pin, so be careful. Make certain the microprocessor
chip is completely seated in the socket.
8. Reinstall the upper board on its stand-offs. Take care not to overtighten the screws.
9. If the inverter drive is equipped with an ON/OFF switch, place it in the ON position.
Reinstall the cover on the drive enclosure.
10. Restore power to the inverter drive. Refer to earlier sections of this guide for operating
and adjusting instructions.
Chip notchChip notch
Socket
notch
Extraction tool jaw notches
Correct insertion
indicated by angled
corner on socket and
on chip
Extraction
tool jaws