8
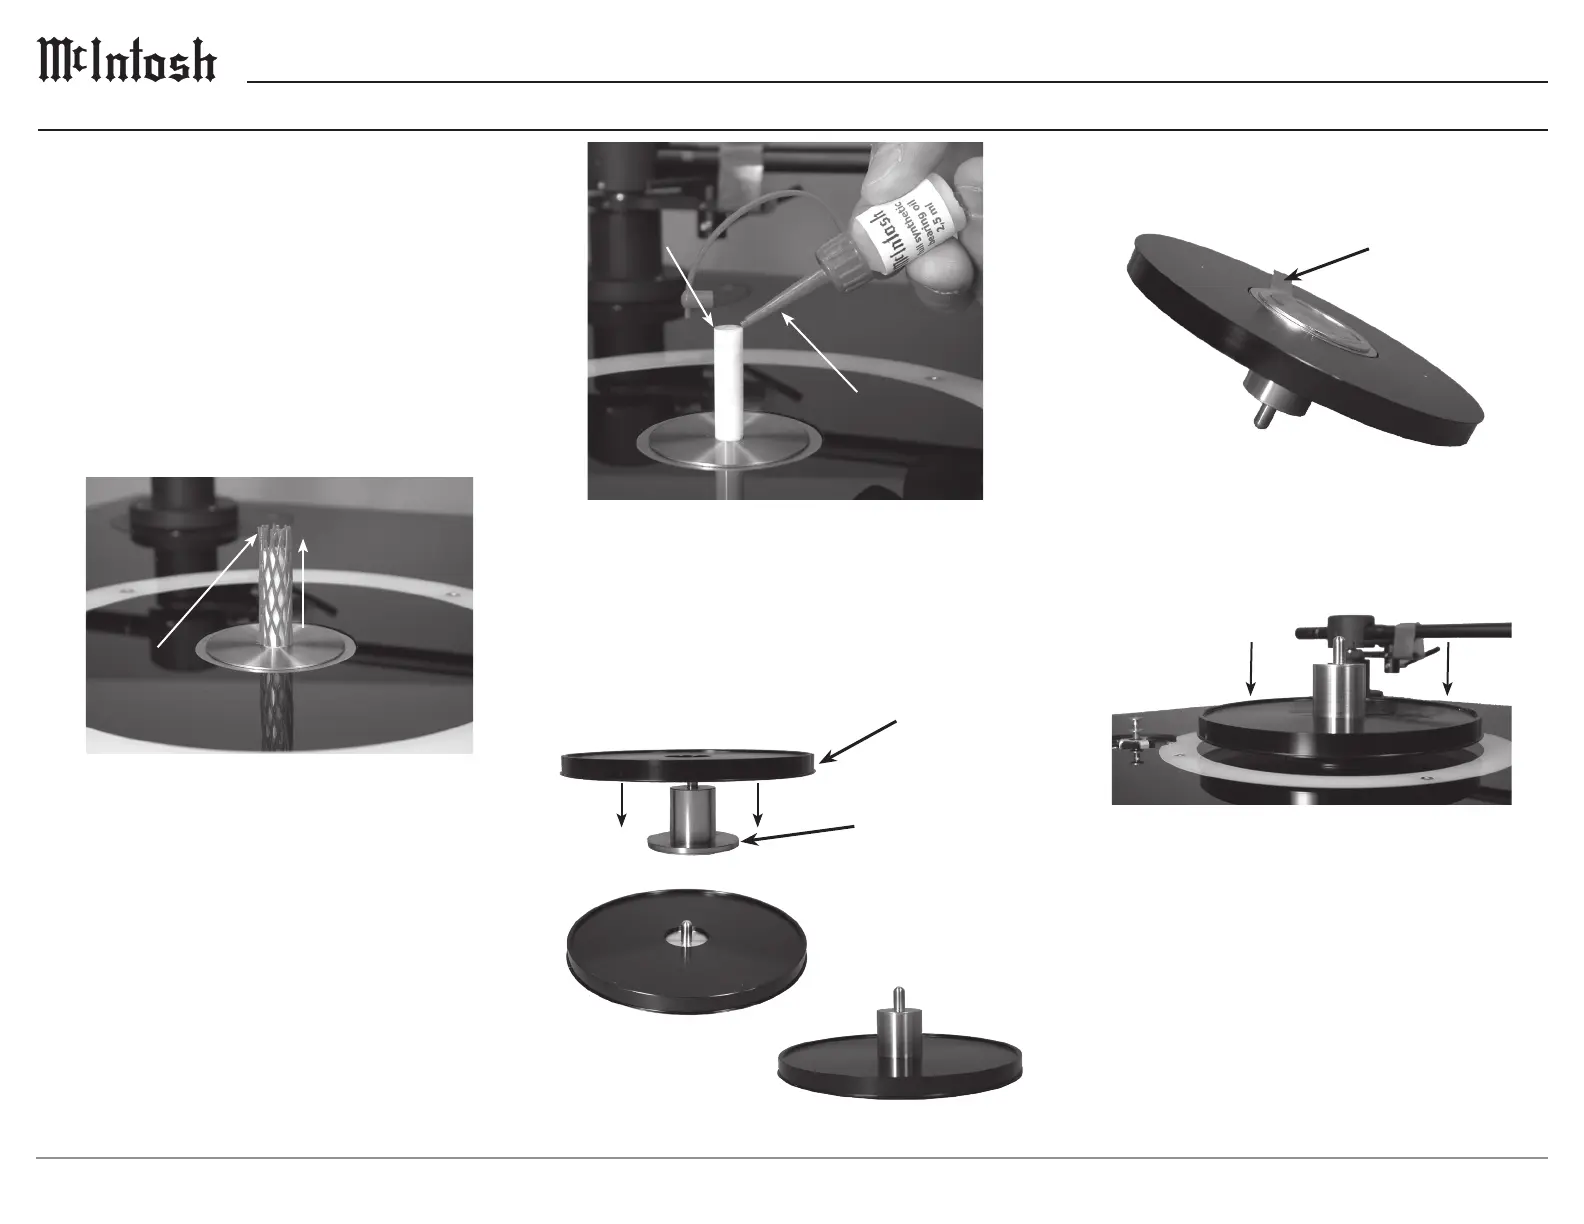
5. Invert the just assembled spindle/inner platter and
remove the protective film from the bottom. Refer
to figure 6.
6. Very carefully lower the assembled spindle/inner
platter onto the Ceramic Vertical Bearing Shaft,
keeping the platter parallel with the top surface of
the Turntable. Refer to figure 7.
Note: The Ceramic Vertical Bearing Shaft of the McIntosh
MT5 Precision Turntable is very durable in actual
use, however it can be damaged during the assembly
process if care is not taken.
7. Using the supplied cloth gloves, place the belt
onto the circumference of the inner platter and
then onto the pulley of the motor. Rotate the inner
platter by hand while seating the belt into it. Refer
to figure 8.
3. Locate the Center Spindle and Inner Platter.
4. Place the bottom of the Center Spindle on the
prepared flat surface. Line up the center opening
of the Inner Platter with the Center Spindle and
carefully lower the Inner Platter onto the Center
Spindle. Refer to figures 3, 4 and 5.
Place the Turntable in the location where it will
be used. Please keep in mind; the turntable should
be the greatest possible distance from the system
loudspeakers to reduce the chance of acoustic
feedback. To minimize the possibility of the cartridge
stylus jumping record grooves, place the turntable
on a mechanically stable surface such as wall shelv
-
ing anchored to wall studs. Perform the following
assembly steps:
Note: It is recommended the installation and adjustment of
the McIntosh MT5 Precision Turntable be performed
by the Professionals at your McIntosh Dealer.
1. Remove the protective mesh from the Turntable
Vertical Bearing Ceramic Shaft. Refer to figure 1.
2. Locate the supplied Turntable Bearing Oil and
place two small drops of Oil on the top sides of
the Ceramic Vertical Bearing Shaft. Refer to
figure 2.
Assembling the Turntable
Ceramic
Vert ical
Bearing
Shaft
Supplied
Oil
Figure 2
Figure 6
Remove
Protective
Film
Figure 1
Remove
Protective
Mesh
Figure 4
Figure 5
Inner Platter
Center Spindle
Figure 3
Figure 7