48 AGZ 035A through 065A IOMM AGZ-3
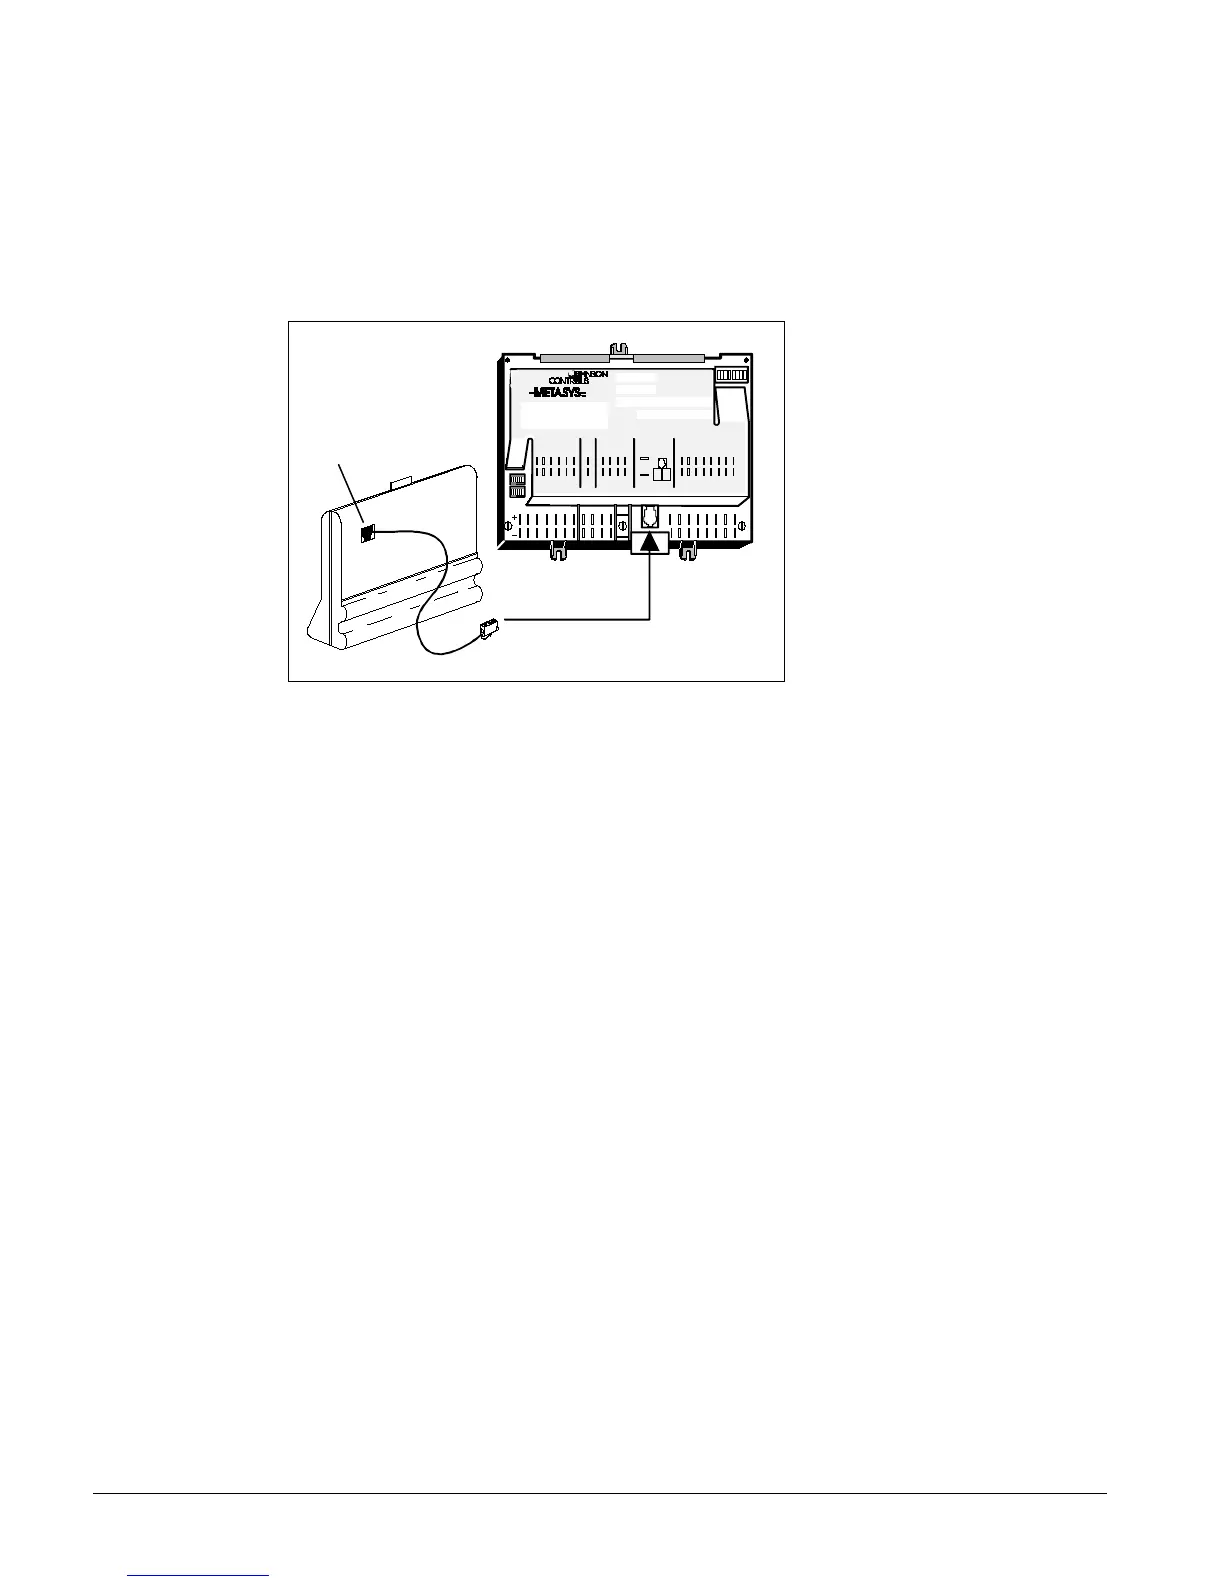
CONNECTING THE ZONE TERMINAL
You can unit mount the ZT, or use it as a portable tool for convenient access to any chiller
information.
McQuay Global Scroll Controller Connection
A standard telephone-style jack connects the ZT to a McQuay Chiller Controller directly.
Figure 26, Connecting ZT to a Global UNT Controller Using 6 to 8 Pin Cable
Connect ZT
here.
BINARY INANALOG INPUTS
BIN ARY OUTPUTS
OFF
1 2 3 4 5 6 7 8
AS-UNT330-1
BINARY INANALOG INPUTS
1 2 3 4 5 6 1 2 3 4
ANALOG INPUTS
COMMON
BINARY COM
+15VDC
COM
PW R
IN
24V
AC
TO
ZONE
STA T
BINA RY OUTPUT
24VAC TO LOADS
1 2 3 4 5 6 7 8
6 Pin
Connection
8 Pin
Connection
ALARM STATUS
The ZT indicates an alarm as follows:
•
The warning signal (s) flashes to the right of the Display Indicator dot ( l ) if the system operating
values are in alarm.
•
The On/Off Status bar ( | ) or circle ( m ) flashes when an On/Off status is in alarm.
•
The red alarm light to the right of the Mode Selector Panel flashes when any of the above items
are in alarm.
Alarms cannot be cleared with the ZT. The problem must be corrected by maintenance or repair of
the affected item.
MAKING ZONE TERMINAL ADJUSTMENTS
Adjusting Control Settings
1. You can adjust only a flashing number with the ZT. If the number does not flash, that item is a
monitor only item. Adjust Control Settings in Display 1, 2, or 3 as follows:
2.
Press the Mode Selector Button until the green Mode Indicator Light moves next to the word
Adjust.
3.
Press either Display Button 1, 2, or 3 to locate adjustable items, which are indicated by flashing
numbers.
If you continue pressing the display buttons, the dot (
| ) in each display changes positions and the
corresponding number appears.
4.
Press the Up () or Down () Arrow key until you reach the number you want to enter. If you
hold down the Up (
) or Down () Arrow keys, you can speed through the numbers more
quickly.
Press Enter. After you press Enter, the numbers stop flashing for a few seconds. This pause tells
you the ZT has processed your adjustment.
5.
Press any of the Display Buttons to make other adjustments, and repeat Steps 2 and 3.
 Loading...