EasyManua.ls Logo

McQuay AGR 100AS - User Manual

McQuay AGR 100AS
106 pages
Print Icon
To Next Page IconTo Next Page
Loading...
Installation, Operation and Maintenance Manual
IOMM AGR
Group: Chiller
Part Number: 074641101
Effective: June 1998
Supersedes: IOM 690
690None
© 1997 McQuay International
Air-Cooled Reciprocating Chiller
AGR 055AS through 100AS
60 Hertz, English and Metric
Global Chiller Line

Other manuals for McQuay AGR 100AS

Questions and Answers

  • D
    downsjamesAug 16, 2025
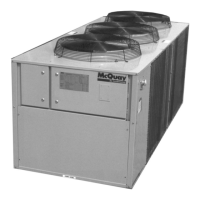
    What to do if the McQuay AGR 100AS Chiller compressor will not run?
    • I
      ichenAug 17, 2025
      If the McQuay Chiller's compressor won't run, several issues could be the cause. First, check if the main switch or circuit breakers are open and close the switch. Also, check for blown fuses, shorts, or grounds in the electrical circuits and motor windings. If thermal overloads have tripped, give the unit a close inspection when restarting. Other potential causes include a defective contactor or coil (repair or replace), system shutdown by safety devices (determine the cause and correct it before resetting), a liquid line solenoid that won't open (repair or replace), motor electrical trouble (check for opens, shorts, or burnout), or loose wiring (check and tighten all wire junctions). If no cooling is required, wait for the load.
  • M
    Maria LoveAug 19, 2025
    Why is the discharge pressure high in my McQuay AGR 100AS?
    • P
      Paul DeckerSep 12, 2025
      High discharge pressure in your McQuay Chiller can stem from several causes. Start by cleaning dirty condenser coils. Ensure the fan is operating correctly by checking the fan motor, contactor, contactor coil, and fan pressure switch, repairing or replacing any defective parts. Verify ambient conditions against design specifications. If the return water temperature is too high, try disabling a compressor on each. An overcharge of refrigerant or the presence of non-condensables can also cause this issue; remove the excess charge or non-condensables accordingly. Lastly, check if the discharge valve is partially closed and back seat the valve.
  • V
    Vanessa PachecoAug 22, 2025
    What to do if McQuay AGR 100AS compressor overloads or circuit breakers open?
    • R
      Russell HuertaAug 22, 2025
      If your McQuay Chiller experiences compressor overloads or open circuit breakers, several factors could be at play. Begin by checking the incoming line voltage and report any issues to your electrical supplier. High compressor amps could be the cause, so determine the underlying reason and correct it. Ensure all power wiring connections are tight. High condenser pressures could also trigger this issue; refer to the troubleshooting steps for high condenser pressure. Finally, check for single phasing and replace fuses or breakers as needed.
  • A
    April CarterAug 26, 2025
    Why is the suction pressure low in my McQuay AGR 100AS Chiller?
    • A
      anthonypachecoAug 26, 2025
      Low suction pressure in your McQuay Chiller can be caused by several factors: * A low refrigerant charge (add refrigerant). * A defective expansion valve (check operation, repair or replace). * A dirty filter drier (replace cores). * Reduced water flow (increase water to design GPM). * A hot gas bypass valve not set properly (set valve for a higher pressure). * A liquid line solenoid valve not opening (repair or replace). * A defective UNT controller (check water sensor, set point dial, control band dial; calibrate, repair, or replace). * Gasket failure in evap head ring (replace gasket).
  • E
    Emily GuzmanAug 28, 2025
    What causes low discharge pressure in a McQuay AGR 100AS?
    • J
      James MooreAug 29, 2025
      Low discharge pressure in a McQuay Chiller can occur due to several reasons. The fan contactor might have failed in the closed position, requiring repair or replacement. A defective fan pressure switch should be replaced. Low ambient temperatures can also cause this; consider installing a SpeedTrol Kit. Other potential causes include a low refrigerant charge (add refrigerant), reduced chilled water flow (check flow and correct), or the system operating on hot gas bypass with no load (adjust hot gas bypass to maintain a higher evaporator pressure).
  • M
    mason99Aug 31, 2025
    What causes high suction pressure in a McQuay Chiller?
    • D
      David HallAug 31, 2025
      High suction pressure in a McQuay Chiller can be attributed to a few key issues. An excessive load, indicated by high return water temperature, can be a cause; check water flow and reduce the load. The controller might not be staging up correctly, so check the UNT controller and replace it if defective. Reduced compressor capacity could also be the culprit, necessitating compressor replacement. High condenser pressure can also be associated with this issue; investigate the causes of high condenser pressure.
  • C
    christopherrodriguezSep 3, 2025
    Why does the freeze protection trip on my McQuay AGR 100AS Chiller?
    • J
      jacobmccoySep 3, 2025
      Freeze protection trips in your McQuay Chiller can be triggered by several issues. Defective pressure transducers may be the cause; compare their output to actual refrigerant pressures. Check for low water flow (correct water GPM) or low/erratic water flow (check pump operation, water strainer, and air handler control valves). The controller stage timing might be off (check and reset as necessary). A defective TXV (check, repair, or replace), an improperly set hot gas bypass (set the hot gas bypass), or low ambient operation (install SpeedTrol, wind baffles) can also cause freeze protection trips.
  • I
    ivan96Sep 6, 2025
    What causes erratic loading and unloading in a McQuay AGR 100AS Chiller?
    • D
      Danny CarpenterSep 6, 2025
      Erratic loading and unloading in your McQuay Chiller can stem from several causes. The chilled water flow might be erratic; check for the reasons and correct them. An erratic system load could also be the issue; check the water flow control valve operation. A bad water sensor should be replaced. The reset function calibration may be off and needs recalibration. Lastly, a defective UNT controller should be replaced.
  • C
    Christopher LamSep 9, 2025
    What causes compressor oil loss in my McQuay Chiller?
    • L
      Larry RiversSep 10, 2025
      Compressor oil loss in your McQuay Chiller can be due to excessive refrigerant flood back (check TXV, repair or replace), a defective crankcase heater (replace heater), a low refrigerant charge (add refrigerant), or an improperly set hot gas bypass (increase hot gas flow).
  • D
    daniel51Sep 12, 2025
    What causes the compressor internal motor switch to open in a McQuay AGR 100AS Chiller?
    • C
      Christopher MillerSep 12, 2025
      If the compressor internal motor switch opens in your McQuay Chiller, it could be due to high compressor amps (refer to troubleshooting for high compressor amps) or a damaged motor winding (check motor winding resistance; replace if defective).

Summary

Air-Cooled Reciprocating Chiller

Introduction

General Description

Provides an overview of the chiller's components and operation.

Inspection

Covers pre-operation checks upon arrival and for damage.

Installation

Handling

Provides guidelines for safe movement and lifting of the chiller unit.

Location

Unit Placement

Recommendations for foundation and site selection for optimal installation.

Clearances

Specifies required space around the unit for airflow and servicing.

Sound Isolation

Discusses methods to minimize noise transmission from the unit.

Service Access and Clearances

Details access points required for unit maintenance and servicing.

Vibration Isolators

Water Piping

Flow Switch

Water Connections

Refrigerant Charge

Glycol Solutions

Evaporator Water Flow and Pressure Drop

Physical Data

Table 7, AGR 0550 AS - 070 AS

Technical specifications and dimensions for AGR 055AS through 070AS models.

Table 8, AGR 075 A - 085 A

Technical specifications and dimensions for AGR 075A through 085A models.

Table 9, AGR 090 A - 100 A

Technical specifications and dimensions for AGR 090A through 100A models.

Electrical Data

Field Wiring

Instructions for connecting external electrical power and wiring to the unit.

Table 10, 60 Hz, Single Point Power Electrical Data

Electrical specifications for single point power connections at 60 Hz.

Table 11, 60 Hz, Compressor And Condenser Fan Motor Amp Draw

Motor amp draw data for compressors and condenser fans at 60 Hz.

Table 12, 60 Hz Single Point Power, Field Wiring Data

Field wiring specifications for single point power connections at 60 Hz.

Field Wiring Diagrams

Figure 9, Typical Field Wiring with Global UNT Controller

Wiring schematic for the Global UNT controller installation.

Figure 10, Typical Field Wiring Diagram with MicroTech Controller

Wiring schematic for the MicroTech controller installation.

Figure 11, Standard Single-Point Connection with FanTrol

Wiring diagram illustrating standard single-point connection with FanTrol.

Figure 12, Standard Single-Point Connection with Optional SpeedTrol

Wiring diagram for standard single-point connection with SpeedTrol.

Control Schematics

Figure 13, Unit Control Schematic (2 compressor UNT)

Schematic illustrating the unit control for a 2-compressor UNT system.

Figure 14, Staging Schematic (2 compressor 4-stage UNT)

Schematic showing the staging logic for a 2-compressor, 4-stage UNT.

Figure 15, Staging Schematic (2 compressor 6-stage UNT)

Schematic showing the staging logic for a 2-compressor, 6-stage UNT.

Figure 16, MicroTech Controller Schematic

Schematic diagram of the MicroTech controller's internal workings.

Figure 17, Unit Control Schematic (MicroTech)

Schematic illustrating the unit control logic for MicroTech systems.

Figure 18, Staging Schematic (4-stage MicroTech)

Schematic showing staging logic for MicroTech 4-stage systems.

Figure 19, Staging Schematic (6-stage MicroTech)

Schematic showing staging logic for MicroTech 6-stage systems.

Figure 20, Unit Control Schematic (2 compressor MicroTech)

Schematic illustrating unit control for MicroTech 2-compressor systems.

Instrument Layouts

Figure 21, UNT Instrument Layout

Layout of the UNT controller interface panel and components.

Figure 22, MicroTech Instrument Layout

Layout of the MicroTech controller interface panel and components.

Component Layouts

Figure 23, AGR Power Side Component Layout

Layout of components on the power side of the AGR unit.

Figure 25, MicroTech Sensor Layout

Diagram showing sensor placement for MicroTech controller systems.

Dimensional Data

Figure 26, Dimensions AGR 055 AS through 070 AS

Physical dimensions and weight for AGR 055AS through 070AS models.

Figure 27, Dimensions AGR 075 AS through 100 AS

Physical dimensions and weight for AGR 075AS through 100AS models.

AGR Unit Start-Up

Pre start-up

Initial checks and inspections before starting the chiller.

Water piping checkout

Procedures for checking the water piping system before operation.

Refrigerant piping checkout

Procedures for inspecting refrigerant lines for leaks and proper installation.

Electrical Check Out

Steps for verifying electrical connections and voltages before start-up.

Start-Up

Step-by-step guide for initiating the chiller's cooling operation.

Shutdown

Procedures for temporary and extended shutdowns of the chiller.

AGR Unit Operation

Sequence of Operation

Describes the sequence of events during chiller operation and staging.

Standard Controller Setpoints

Lists factory default setpoints for the UNT controller.

Optional Features

Hot Gas Bypass (Optional)

Explanation of the hot gas bypass function for low load operation.

Filter Driers

Information on filter-drier selection, function, and replacement.

System Adjustment

Liquid Sightglass and Moisture Indicator

How to interpret the sightglass for system refrigerant and moisture status.

Refrigerant Charging

Guidance on adding refrigerant to the system.

Thermostatic Expansion Valve

Description of the thermostatic expansion valve's function.

Superheat and Subcooling

How to set and check superheat and subcooling for optimal operation.

Crankcase Heaters

Explanation of the function of compressor crankcase heaters.

Water Cooler

UNT Controller Operation

General Description

Overview of the Global UNT controller's capabilities and interface.

Optional Sensors

Description of available sensor packages for enhanced monitoring.

Sensors and Transducers

Details on sensor types, connections, and replacement.

Control Wiring

Information on low voltage control wiring installation and testing.

External Voltage Inputs

Handling and connection of external voltage signals for control.

Interlock Wiring

Wiring requirements for interlocks such as flow switches and time clocks.

Controller Setup and Wiring

Unit Set Points and Calibration

Procedures for checking and adjusting controller set points and calibration.

Field Wiring

General considerations and components for field wiring.

Power Wiring

Requirements for contractors regarding unit power wiring to the controller.

Power Supplies

Details on internal power supplies used by the controller.

Analog input signals

Instructions for wiring analog input signals from sensors.

Digital input signals

Instructions for wiring digital input signals from devices.

Controller Inputs;Outputs

Remote Stop;Start

Procedure for enabling remote start/stop control of the chiller.

Chilled Water Flow Switch

Connection details for the chilled water flow switch input.

Digital Outputs

Description of the controller's digital output signals and relays.

External Alarm Annunciator Circuitry

Information on connecting an audible alarm to the controller.

PC Connection

Instructions for connecting a PC for monitoring and software updates.

Software Identification

How to identify the installed controller software version.

Analog Inputs

Description and list of analog inputs for sensors and signals.

MicroTech Controller Inputs;Outputs

Digital Inputs

Description and list of digital inputs for switches and status signals.

Relay Outputs

Description of the controller's relay outputs and their functions.

Reset Options

Available reset options for the MicroTech controller.

Outside Air Reset

Description of the Outside Air Reset function for temperature control.

Controller Reset Functions

Return Water Reset (optional Return Water Sensor is required)

Description of the Return Water Reset function for temperature control.

Zone Temperature (optional Zone Temperature Sensor )

Description of the Zone Temperature Reset function for temperature control.

Remote Reset (2 to 10 VDC input)

How remote reset signals are used to adjust chiller temperature setpoints.

Demand Limit (0 to 10 VDC input)

How demand limit signals adjust chiller cooling capacity.

Additional Global UNT Controller Features

Remote Stop;Start

Functionality of remote stop/start commands.

Unoccupied Mode

How the chiller operates when in unoccupied mode.

Soft Start

Limits the number of stages during startup to prevent power surges.

Compressor Staging

Explanation of how compressors stage for cooling capacity.

Pumpdown Control

Freezestat Control

Starting Timers

Head Pressure Control

Optional Head Pressure Control (SpeedTrol)

Alarms

Circuit Alarm Conditions

Specific alarms that affect a single refrigerant circuit.

System Alarm Conditions

ZONE TERMINAL (optional)

Figure 31, Zone Terminal

Diagram illustrating the Zone Terminal interface and its components.

OPERATING MODES

Explanation of the Monitor and Adjust modes for the Zone Terminal.

Monitor Mode

How to use the Zone Terminal to view chiller settings and values.

Adjust Mode

How to use the Zone Terminal to modify chiller settings.

DISPLAYS, SYMBOLS, KEYS, AND BUTTONS

Table 17, Displays, Symbols, Keys, Buttons

Detailed explanation of Zone Terminal interface elements.

INSTALLING THE PLASTIC LABELS

Procedure for installing the plastic label on the Zone Terminal.

CONNECTING THE ZONE TERMINAL

McQuay Global Reciprocating Controller Connection

How to connect the Zone Terminal to the Global UNT controller.

ALARM STATUS

How the Zone Terminal indicates alarm conditions.

MAKING ZONE TERMINAL ADJUSTMENTS

Step-by-step guide for adjusting settings using the Zone Terminal.

Adjusting Control Settings

Specific steps for adjusting control settings via the Zone Terminal.

Adjustable Points

Table 18, Adjustable Points

Table detailing adjustable parameters and their ranges.

Zone Terminal Glossary

Global UNT Controller Troubleshooting Chart

MicroTech Controller Installation and Operation

General Description

Overview of the MicroTech controller's features and interface.

Optional Sensor Packages

Description of optional sensor packages for the MicroTech controller.

Installation

Considerations for installing the MicroTech controller and its components.

Sensors and transducers

Details on sensors and transducers connected to the MicroTech controller.

Control wiring

Information on low voltage control wiring for the MicroTech system.

MicroTech Controller Wiring and Setup

Remote 4-20 milliamp signals

Using 4-20mA signals for remote reset or demand limit control.

Interlock wiring

Wiring requirements for interlocks connected to the MicroTech controller.

Unit set points and calibration

Checking and setting unit parameters and calibration for the MicroTech controller.

Modem kit

Optional modem kit for remote monitoring via McQuay Monitor software.

Optional sensors

Description of optional sensors compatible with the MicroTech controller.

MicroTech Field Wiring

Field Wiring

General instructions for field wiring connections to the control panel.

Power Wiring

Requirements for contractors regarding unit power wiring to the controller.

Power Supplies

Details on internal power supplies for the MicroTech controller.

Analog Input Signals

Instructions for wiring analog input signals to the MicroTech controller.

Digital Input Signals

Instructions for wiring digital input signals to the MicroTech controller.

Remote Stop;Start

Procedure for enabling remote stop/start control for the MicroTech unit.

Chilled Water Flow Switch

Connection details for the chilled water flow switch input to MicroTech.

MicroTech Digital Outputs and Alarms

Digital Outputs

Description of the MicroTech controller's digital output signals.

Chilled Water Pump Relay

Optional relay connection for the chilled water pump.

External Alarm Annunciator Circuitry

Information on connecting an audible alarm to the MicroTech controller.

PC Connection

Instructions for connecting a PC for monitoring MicroTech systems.

Telephone line

Requirement for a telephone line for remote access.

Software Identification

How to identify the MicroTech controller software version.

Controller Inputs;Outputs

Analog Inputs

Description and list of analog inputs for sensors and signals on MicroTech.

Digital Inputs

Description and list of digital inputs for switches and status on MicroTech.

Relay Board Outputs

Description of the MicroTech controller's relay outputs.

MicroTech Relay Outputs and Options

Table 21, Relay Board Outputs

List of relay outputs controlled by the MicroTech controller.

Reset Options

Available reset options for the MicroTech controller.

Soft Loading

Manual Operation

Compressor Staging

How compressors stage for cooling capacity in manual mode.

Head Pressure Control

Control of condenser fans for head pressure in manual operation.

Pumpdown Control

Safety Systems

MicroTech Operation Sequences

Circuit Alarm Conditions

Specific alarms that affect a single circuit in MicroTech systems.

System Alarm Conditions

System-wide alarms that affect all compressors or the entire MicroTech unit.

Sequence of Operation

Describes the operation modes and sequences for the MicroTech controller.

Off Conditions

States the conditions under which the MicroTech controller will keep the unit off.

Start-Up and Shutdown Procedures

Pre-Start Checkout

Initial checks and verifications before powering up the controller.

Setting of the HEX Address Switches

How to set network addresses using hex switches.

Control Switches

Verification of control switch positions before applying power.

Ribbon Cables

Checking the integrity of ribbon cable connections.

Powering the MicroTech Controller

Power-up sequence and interpretation of MicroTech controller LEDs.

Temporary Shutdown

Procedure for performing a temporary shutdown of the chiller.

Extended Shutdown

Procedure for performing an extended shutdown, including freezing protection.

Keypad; Display

Description of the MicroTech controller's keypad and LCD display.

MicroTech Menu Structure

Status category

Menus providing information on unit status and operating conditions.

Control category

Menus for adjusting unit control parameters and set points.

Alarm category

Menus for viewing current and previous alarm conditions.

Display Format

How information is presented on the controller's LCD display.

MicroTech Menu Structure

Overview of the hierarchical structure of the MicroTech controller menus.

Password Information

Procedure for entering the password to change settings.

Keypad Key Functions

Category Group

Keys for quick access to main menu categories (Status, Control, Alarms).

Menu Group

Keys used for navigating between menus in the controller's tree structure.

Item Group

Keys used for navigating between items within a menu.

Action Group

Keys used for making changes to parameters or clearing alarms.

Menu Descriptions

Status Menus

Description of menus displaying unit status and sensor readings.

Control Menus

Description of menus used for adjusting control parameters and set points.

MicroTech Menu Settings

Menu #15: Softload Set Points

Setting parameters for soft loading to limit startup stages.

Menu #16: Compressor Set Points

Setting compressor staging order and interstage timers.

Menu #17: Head Pressure Set Points

Setting parameters for head pressure control via condenser fans.

Menu #18: Demand Limit

Setting the maximum cooling stages based on demand limit input.

Menu #19: Time;Date

Setting the internal clock for automatic operation scheduling.

Alarm Menus

Trouble Analysis for the AGR MicroTech Controller

Microprocessor Control Board

Description of the Microprocessor Control Board (MCB) and its functions.

Digital Inputs Connection

How digital inputs are connected to the MCB via the ADI board.

Analog Inputs Connection

How analog inputs are connected to the MCB via the ADI board.

Digital Outputs Connection

How the MCB sends signals to output devices.

Power In Connector

Description of the power connection to the MCB.

Power Fuses

Location and function of power fuses for the MCB.

Microprocessor Status LEDs

Interpretation of the MCB's status LEDs (Green, Red, Amber).

MCB LED Diagnostics

Table 53, Green and Red Status LED Indication

Table explaining the meaning of Green and Red MCB status LEDs.

Table 54, Amber Status LED Indication

Table explaining the meaning of the Amber MCB status LED.

Keypad;LCD Display Connection

How the keypad and LCD display connect to the MCB.

Hex Switches

Setting network addresses using hex switches.

MCB Interfaces and Ports

Figure 37, Hex Switches

Diagram illustrating the MCB hex switches for network addressing.

Communication Ports

Description of the MCB's communication ports (A and B) and standards.

Output Board

Description of the Output Board's functionality and components.

Power

Details on power terminals available on the Output Board.

Test Procedures

Status LED Diagnostics

Using MCB status LEDs to diagnose controller issues.

Red LED Remains On

Troubleshooting procedure when the red LED remains on.

Red and Green LEDs Off

Troubleshooting procedure when red and green LEDs are off.

Troubleshooting Power Problems

Procedures to diagnose and resolve power supply issues affecting the MCB.

MCB Interface Troubleshooting

Figure 38, MCB Power Supply Terminals

Diagram showing MCB power supply terminals and fuses.

Troubleshooting the Keypad;Display Interface

Procedures for diagnosing and resolving issues with the keypad/display.

Display is Hard to Read

Steps to adjust display contrast for better readability.

Back Light Not Lit

Troubleshooting steps when the display back light does not illuminate.

Display is Blank or Garbled

Procedures for resolving a blank or garbled display.

MCB Input;Output Troubleshooting

Troubleshooting Analog Inputs

Procedures for diagnosing issues with analog input signals.

Analog Input not Read by the MCB

Troubleshooting steps when analog input data is not received by the MCB.

Troubleshooting Digital Inputs

Procedures for diagnosing issues with digital input signals.

Digital Input not Read by the MCB

Troubleshooting steps when digital input data is not received by the MCB.

Troubleshooting Output Boards

Procedures for diagnosing issues with the controller's output boards.

Output Board Troubleshooting

Figure 39, Output Board Relay Socket

Diagram of the output board relay socket connections.

One LED Out

Troubleshooting steps when a single LED on the output board fails to illuminate.

All LEDs Out

Troubleshooting steps when all LEDs on the output board are not lit.

Output Board Specific Issues

LED Lit, Output not Energized

Troubleshooting when an output LED is lit but the load is not energized.

Output Energized, LED not Lit

Troubleshooting when the load is energized but the output LED is not lit.

Contact Chatter

Diagnosing and resolving issues related to contact chatter.

Troubleshooting Solid-State Relays

Figure 40, Testing a Typical Relay Circuit

Diagram illustrating a typical relay circuit test setup.

Figure 41, Testing a Relay Circuit with a Disconnection

Diagram illustrating a relay circuit test with a disconnection.

Unit Maintenance

General

General maintenance checks and log recommendations.

Compressor Maintenance

Information regarding compressor maintenance requirements.

Lubrication

Details on lubrication requirements for unit components.

Electrical Terminals

Maintenance procedures for electrical terminals.

Condensers

Instructions for cleaning and maintaining the air-cooled condensers.

Refrigerant Sightglass

How to observe the sightglass for refrigerant charge and moisture status.

Preventative Maintenance Schedule

Unit Service

Filter-Driers

Information and procedures for replacing filter-driers.

Liquid Line Solenoid Valve

Maintenance and replacement procedures for liquid line solenoid valves.

Evaporator and Refrigerant Charging

Evaporator

Description of the evaporator's construction and function.

Refrigerant Charging

Detailed procedures for charging refrigerant into the system.

AGR Troubleshooting Chart

McQuay AGR 100AS Specifications

General IconGeneral
BrandMcQuay
ModelAGR 100AS
CategoryChiller
LanguageEnglish

Related product manuals