Operation
20
Printing
The following notes describe the
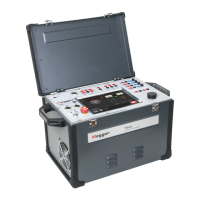
OTS60PB
software routines for use with an external printer. It will also
assist when setting up the printer. Refer also to the instruction leaflet provided with the printer.
Charging the Printer
The printer requires a 9 – 12 V d.c. supply to charge its internal Nicad battery. A charger is supplied in the
printer kit, which operates from a mains supply of 115 – 230 (85 – 265)V a.c. (50/ 60Hz). For safety, the
power supply must be earthed, therefore only use a power socket with a protective earth.
As supplied, the printer batteries may be discharged. A full charge takes approximately 14 hours, however
the printer is usable after 20 minutes of charging.
Configuring the Printer
As supplied, the printer will normally have the following default settings:
Data bits: 8
Parity: None
Baud-rate: 9600
Country: U.K.
Print mode: Text
Auto-off: 5 Min.
Emulation: Standard
DTR: Normal
The above default settings are suitable for the
OTS60PB
, with the exception of the baud rate, which should
be set to 1200. This can be achieved as follows.
Hold down the SET UP button and briefly press the ON button. The printer will enter its program mode and
print a list of its current settings. Pressing the paper FEED button will advance through the list of
parameters and pressing the SET UP button will change the individual parameter through the allowed
range of values.
If no buttons have been pressed for 15 seconds, program mode is ended and any changes will be lost. To
end programme mode and save the settings, press SET UP and FEED simultaneously.
The Auto off setting may be changed. The optional values are 1 minute, 5 minutes or disabled. Be aware
that this has a direct effect on usable battery life.
Connecting to the OTS60PB
The
OTS60PB
includes a special lead to connect to the printer to the
OTS60PB
. This uses the 4-pin socket
on the rear of the oil test set.
Configuring the Oil Test Set
The
OTS60PB
needs very little configuration for printing, since the RS232 parameters are preset to the
following values:- Data bits: 8
Parity: None
Baud-rate: 1200