Rev 1.0
Mellanox Technologies
2
Tools and Parts
Tools required and customer supplied parts
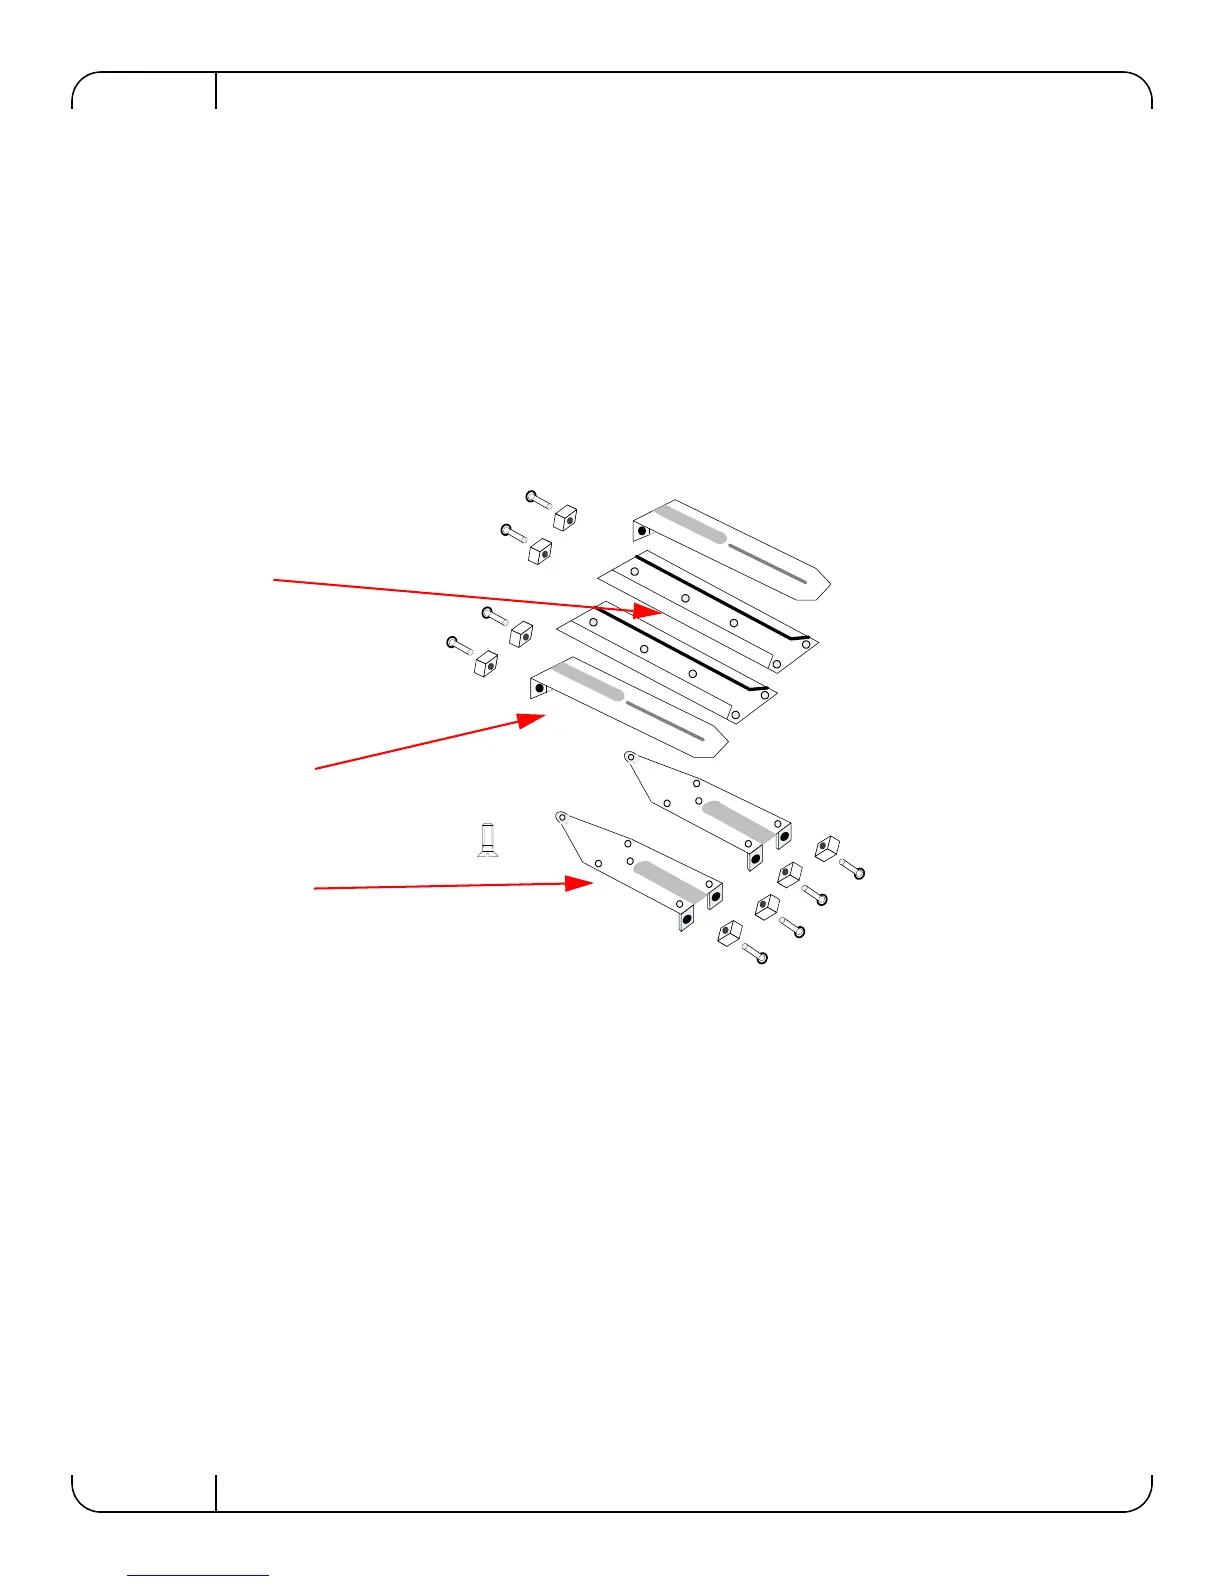
Parts Included in the Installation Kit:
Figure 1: Rack Installation Kit Parts
Before you install your new switch, unpack the system and check to make sure that all the parts have been
sent, check this against the parts list. Check the parts for visible damages that may have occurred during
shipping.
Note: If anything is damaged or missing, contact your customer representative immediately.
Procedure
Step 1. Place the ESD mat on the floor where you will be working and put on the ESD strap. Make
sure the ESD strap is touching your skin and that the other end is connected to a verified
ground.
Step 2. Choose which side of the switch you want even with the vertical rack support. Either
the side with the power supply units or the side with the IB connectors can be even
with the vertical rack support. The other side of the switch will be further inside of the
rack.
Things to consider before choosing where to mount the rails and rail slides.
• Phillips Screwdrivers #1 and #2 • Grounding screw
• ESD Strap • Grounding wire sufficient to reach a valid ground
• ESD mat
• 2 rails • 18 recessed flat head screws
• 2 rail slides • 8 caged nuts
• 2 brackets • 8 pan head screws M6
 Loading...