FUEL AND OIL
eng 49
Since sealed fuel tanks are not openly vented, they will expand
and contract as the fuel expands and contracts during heating
and cooling cycles of the outside air. This is normal.
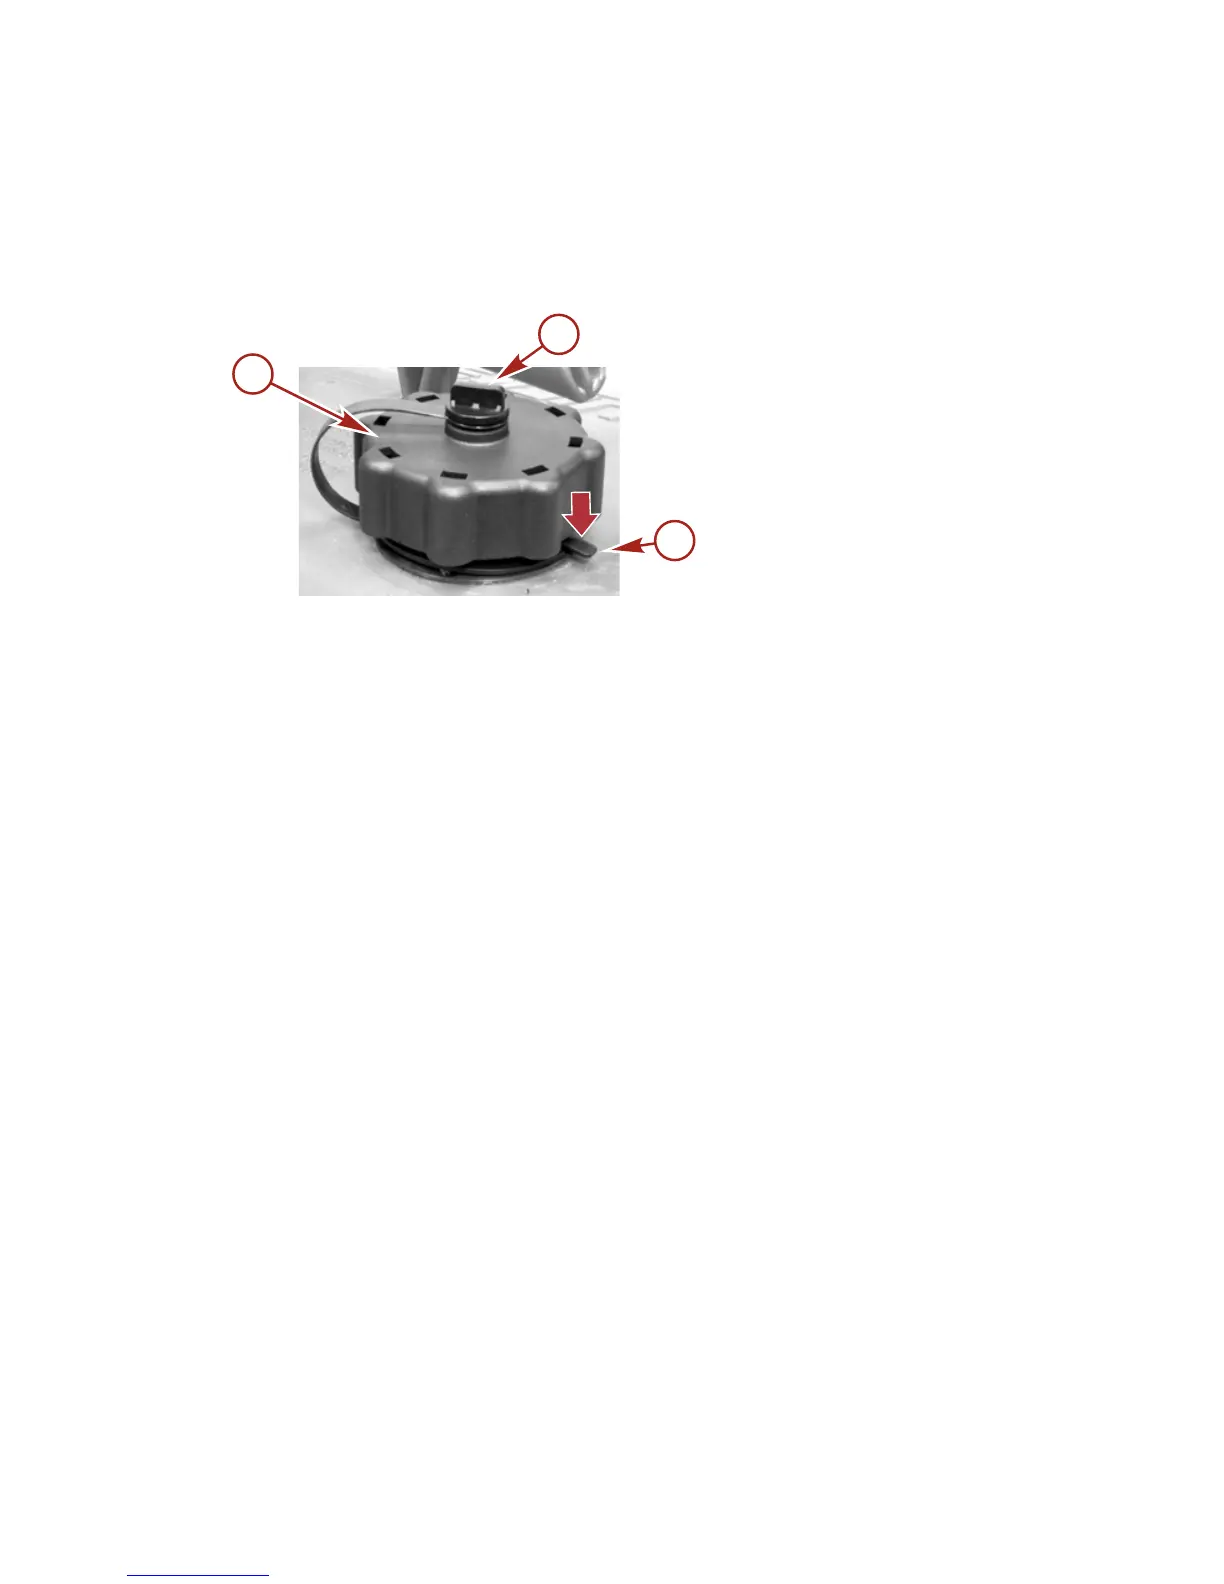
REMOVING THE FUEL CAP
a - Fuel cap
b - Manual vent screw
c - Tab lock
IMPORTANT: Contents may be under pressure. Rotate the fuel
cap 1/4 turn to relieve pressure before opening.
1. Open the manual vent screw on top of the fuel cap.
2. Turn the fuel cap until it contacts the tab lock.
3. Press down on the tab lock. Rotate the fuel cap 1/4 turn to
relieve the pressure.
4. Press down on the tab lock again and remove the cap.
DIRECTIONS FOR USING THE PRESSURIZED PORTABLE
FUEL TANK
1. When installing the fuel tank cap, turn the cap to the right
until you hear a click. This signals that the fuel cap is fully
seated. A built‑in device prevents overtightening.
2. Open the manual vent screw on top of the cap for operation
and cap removal. Close the manual vent screw for
transportation.
3. For fuel hoses that have quick disconnects, disconnect the
fuel line from the engine or fuel tank when not in use.
4.
Follow Filling Fuel Tank instructions for refueling.
Filling Remote Oil Tank
Remove filler cap and fill with the specified oil. Oil tank capacity
is 11.5 liters (3 gallons). Replace filler cap and tighten securely.
 Loading...