225 (4-STROKE) INSTALLATION MANUAL
Page 4 of 16
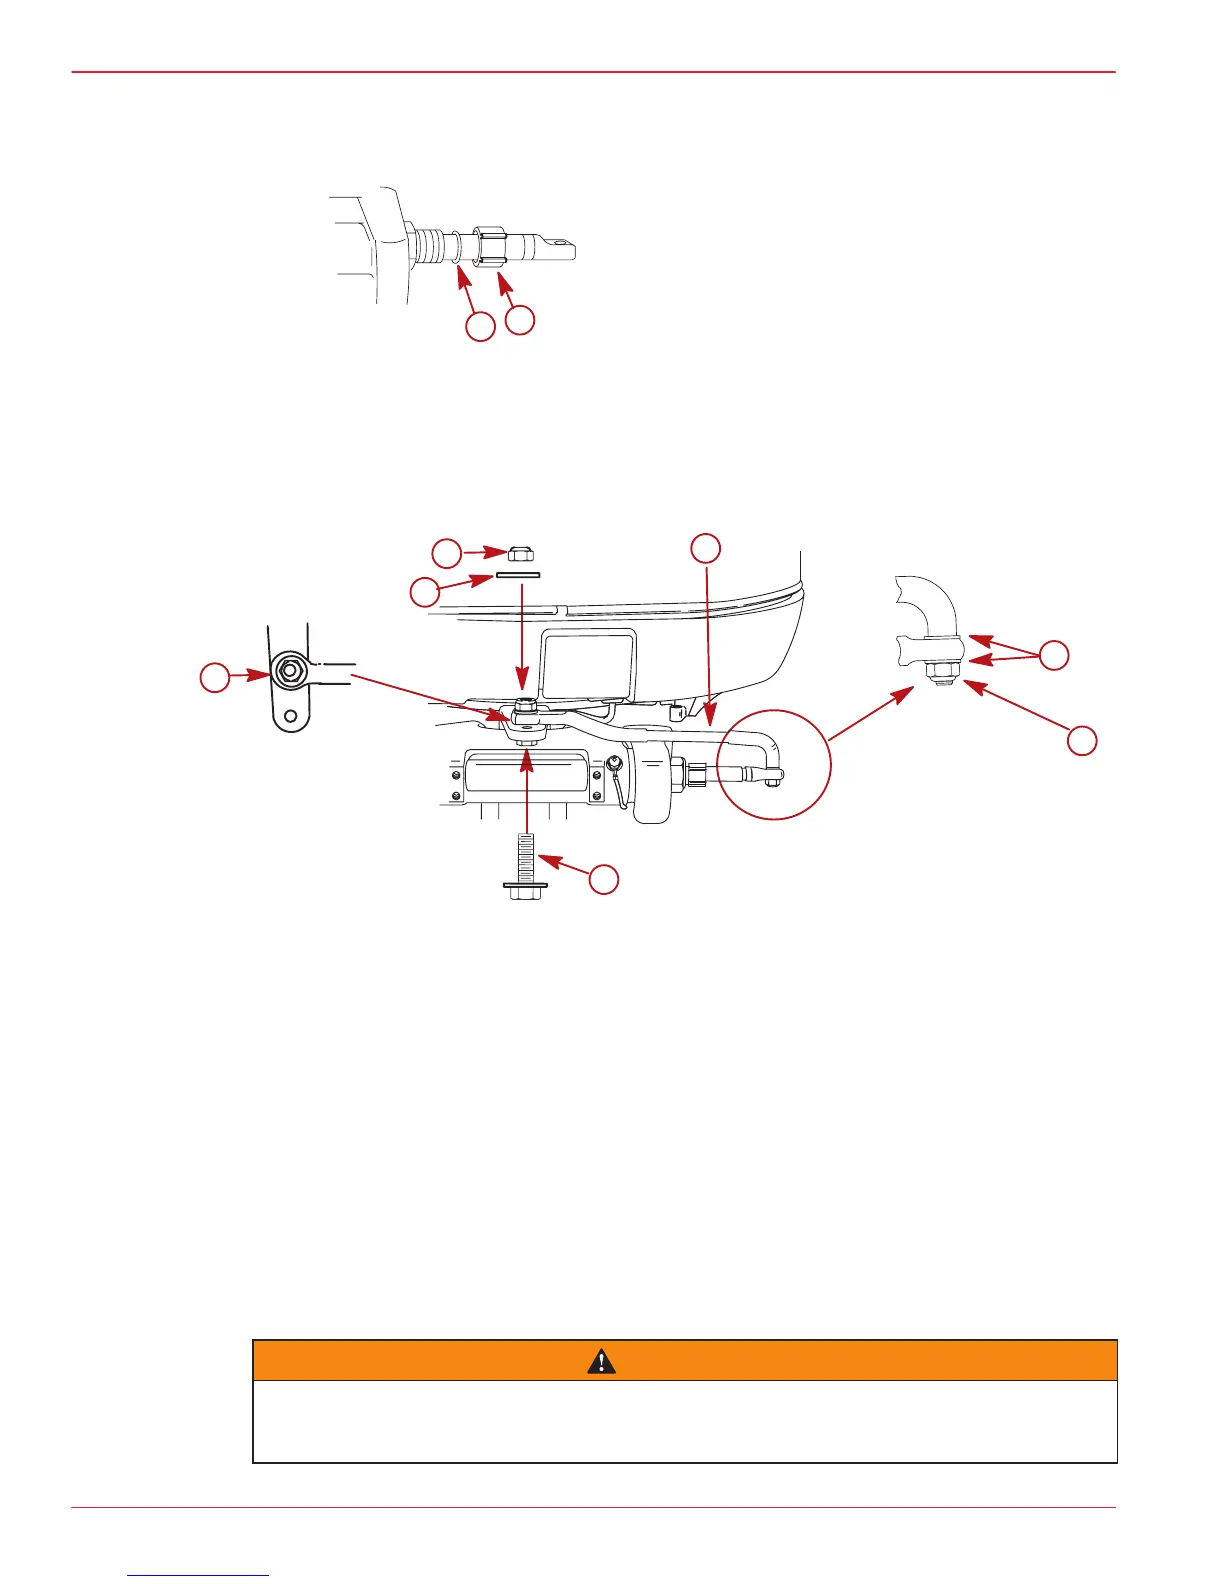
Steering Cable Seal
Install O-Ring seal and cap.
b
a
a-O-Ring Seal
b-Cap
Steering Link Rod
1. Install steering link rod to rear hole (f) on steering arm per illustration.
a
c
d
b
f
g
e
a-Special Bolt (10-856680) Torque to 20 lb. ft. (27.1 N·m)
b-Nylon Insert Locknut (11-34932) Torque to 20 lb. ft. (27.1 N·m)
c-Flat Washer
d-Nylon Insert Locknut (11-826709113) Tighten Locknut Until it Seats, Then Back
Nut Off 1/4 Turn
e-Flat Washer (2)
f-Install Steering Link Rod into Rear Hole
g-Steering Link Rod
IMPORTANT: The steering link rod that connects the steering cable to the engine
must be fastened using special washer head bolt (“a” – Part Number 10-856680) and
self locking nylon insert locknut (“d” - Part Number 11-826709113) and self locking
nylon insert locknut (“b” – Part Number 11-34932). These locknuts must never be re-
placed with common nuts (non locking) as they will work loose and vibrate off freeing
the link rod to disengage.
WARNING
Disengagement of a steering link rod can result in the boat taking a full, sudden,
sharp turn. This potentially violent action can cause occupants to be thrown over-
board exposing them to serious injury or death.
 Loading...