EasyManuals Logo

Mercury 225 HP User Manual

Mercury 225 HP
16 pages
To Next Page IconTo Next Page
To Previous Page IconTo Previous Page
Page #8 background imageLoading...
Page #8 background image
225 (4-STROKE) INSTALLATION MANUAL
Page 8 of 16
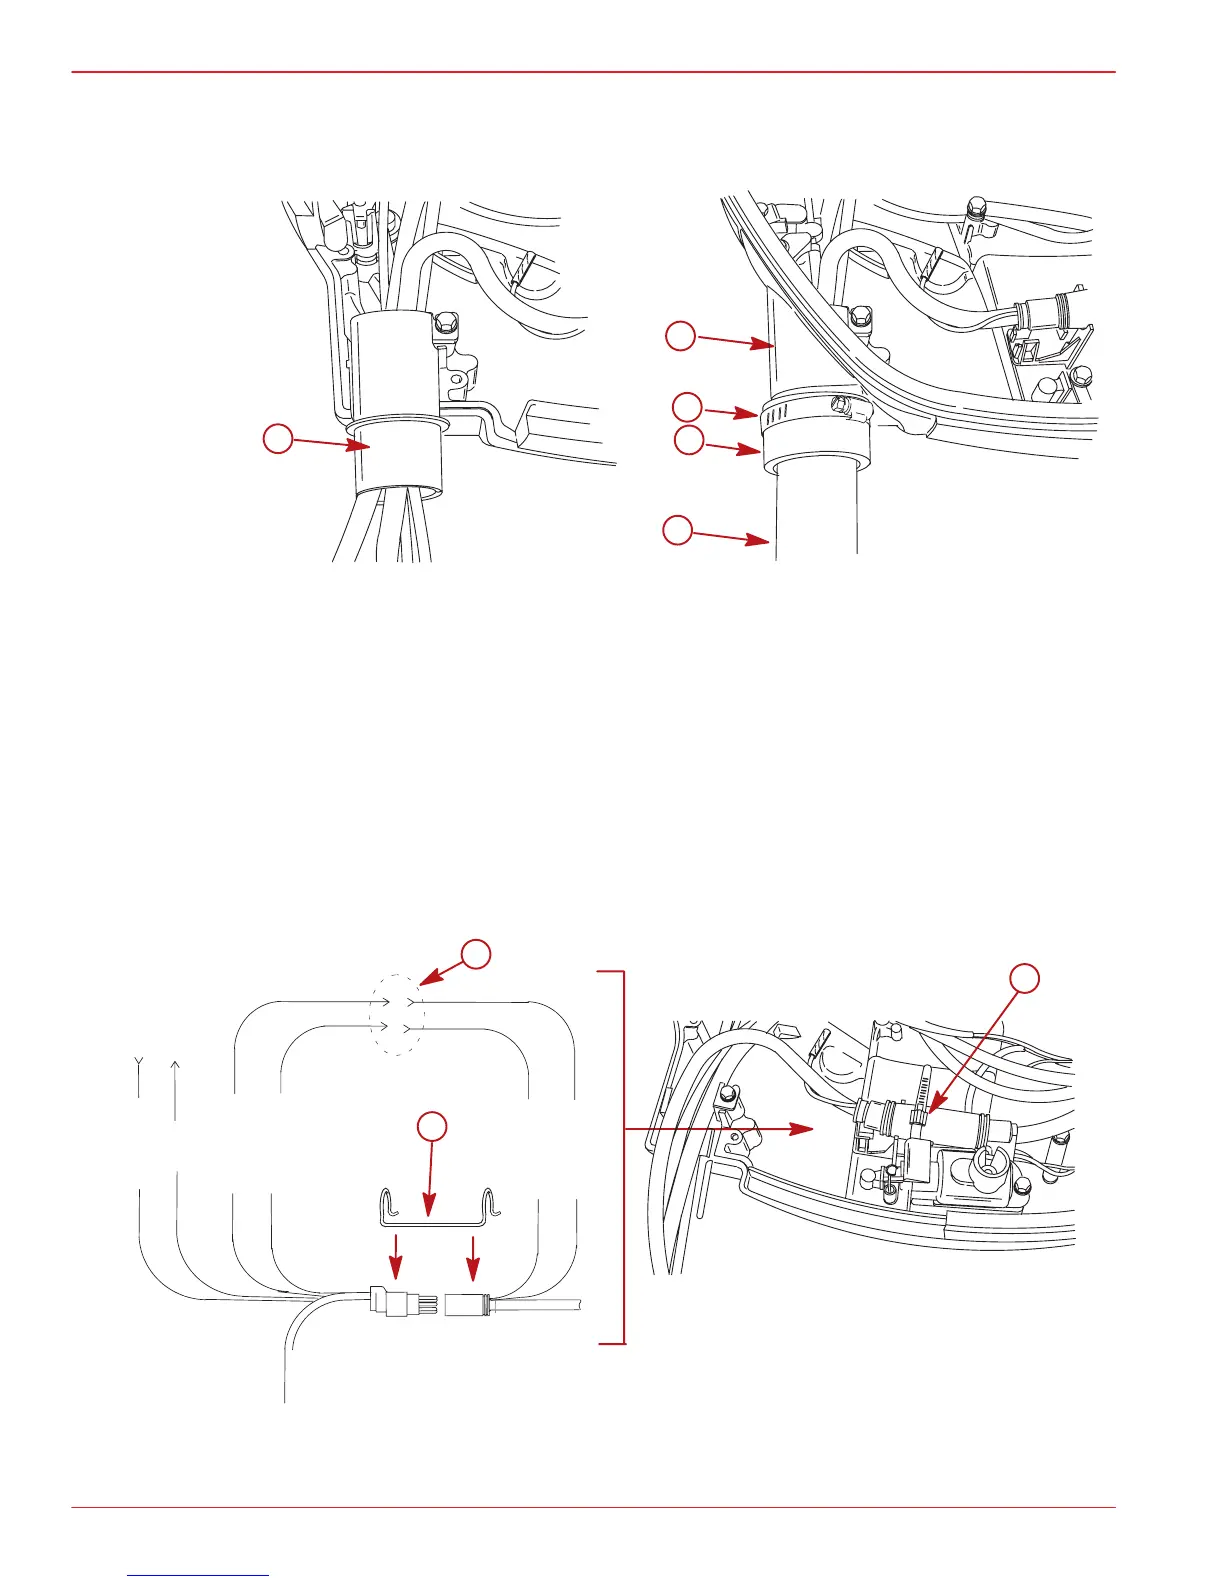
4. Install the top half of the cable clamp and reinstall the cowl bracket.
5. Slide the rigging tube onto the cable clamp and fasten with collar and hose clamp.
a
b
c
d
e
a-Top Half Cable Clamp
b-Cowl Bracket
c-Rigging Tube
d-Collar
e-Hose Clamp
Remote Wiring Harness
Route wiring harness through the front cable clamp. Connect wiring. Push the retainer over
the ends of the connectors. This will hold the connectors together. Secure connection in the
cowl with the releasable cable tie.
a
BLU/WHT
GRN/WHT
BRN/WHT
TAN
BLU/WHT
GRN/WHT
b
c
a-Power Trim Connections
b-Retainer – Push Over Connector Ends
c-Releasable Cable Tie

Questions and Answers:

Question and Answer IconNeed help?

Do you have a question about the Mercury 225 HP and is the answer not in the manual?

Mercury 225 HP Specifications

General IconGeneral
Engine TypeV6
Displacement3.4L
Full Throttle RPM5000-5800
Fuel Induction SystemElectronic Fuel Injection (EFI)
StartingElectric
Gear Ratio1.85:1
Horsepower225 HP
Cylinders6
ExhaustThrough Prop
SteeringHydraulic
Shaft Length20 in / 25 in / 30 in
Weight505 lbs (229 kg)

Related product manuals