2. Insert the lower alignment pin on the grommet into the hole in the lower
cover. Ensure the lettered side of the grommet is facing out.
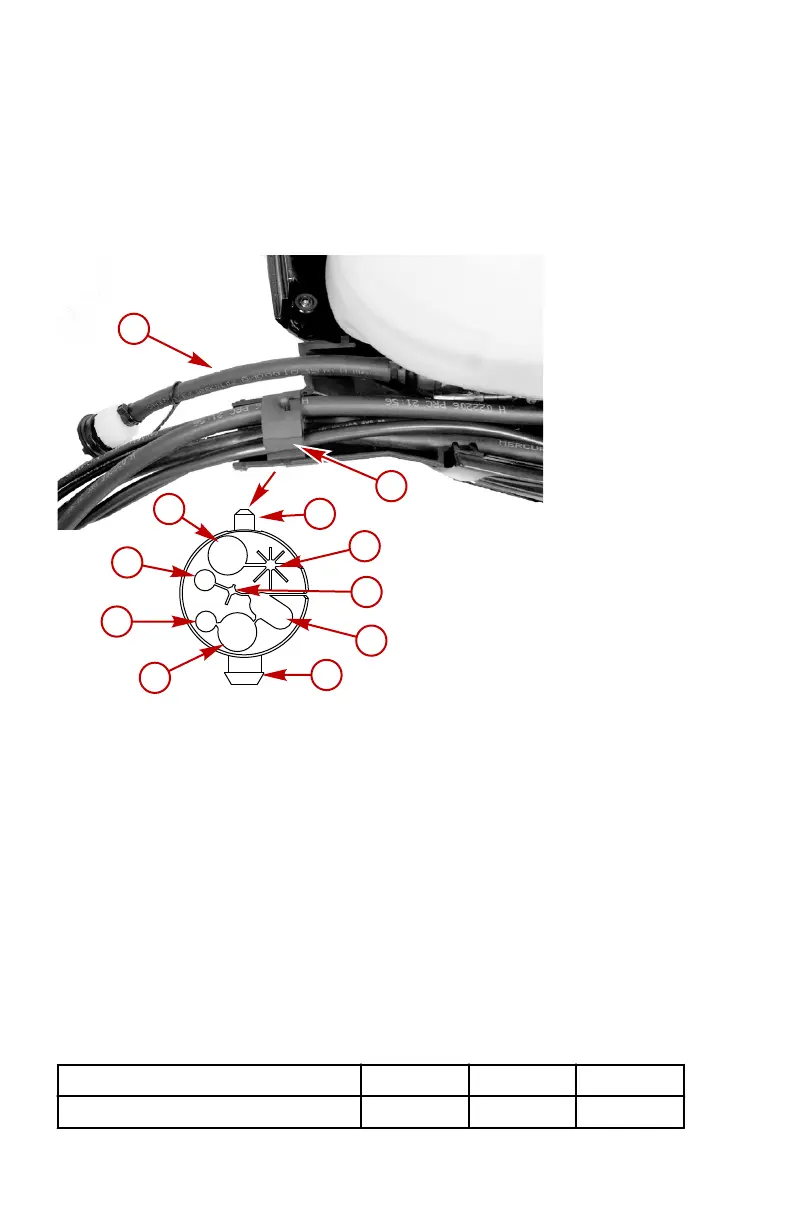
3. Route the hoses, wiring, and cables through the correct opening in the
grommet, as shown.
4.
Install the flush hose after removing the knockouts. Refer to Flush Hose
Routing.
a - Flush hose
b - Grommet
c - Remote boat harness
d - Not used
e - Throttle cable
f - Fuel hose
g - Upper alignment pin
h - SmartCraft harness or additional harness opening
i - Water pressure tube
j - Battery cables
k - Lower alignment pin
5. Install the access cover with two screws. Tighten the screws to the
specified torque.
Description
Nm lb‑in. lb‑ft
Access cover screws 7.3 65 –
OUTBOARD INSTALLATION
134 eng
 Loading...