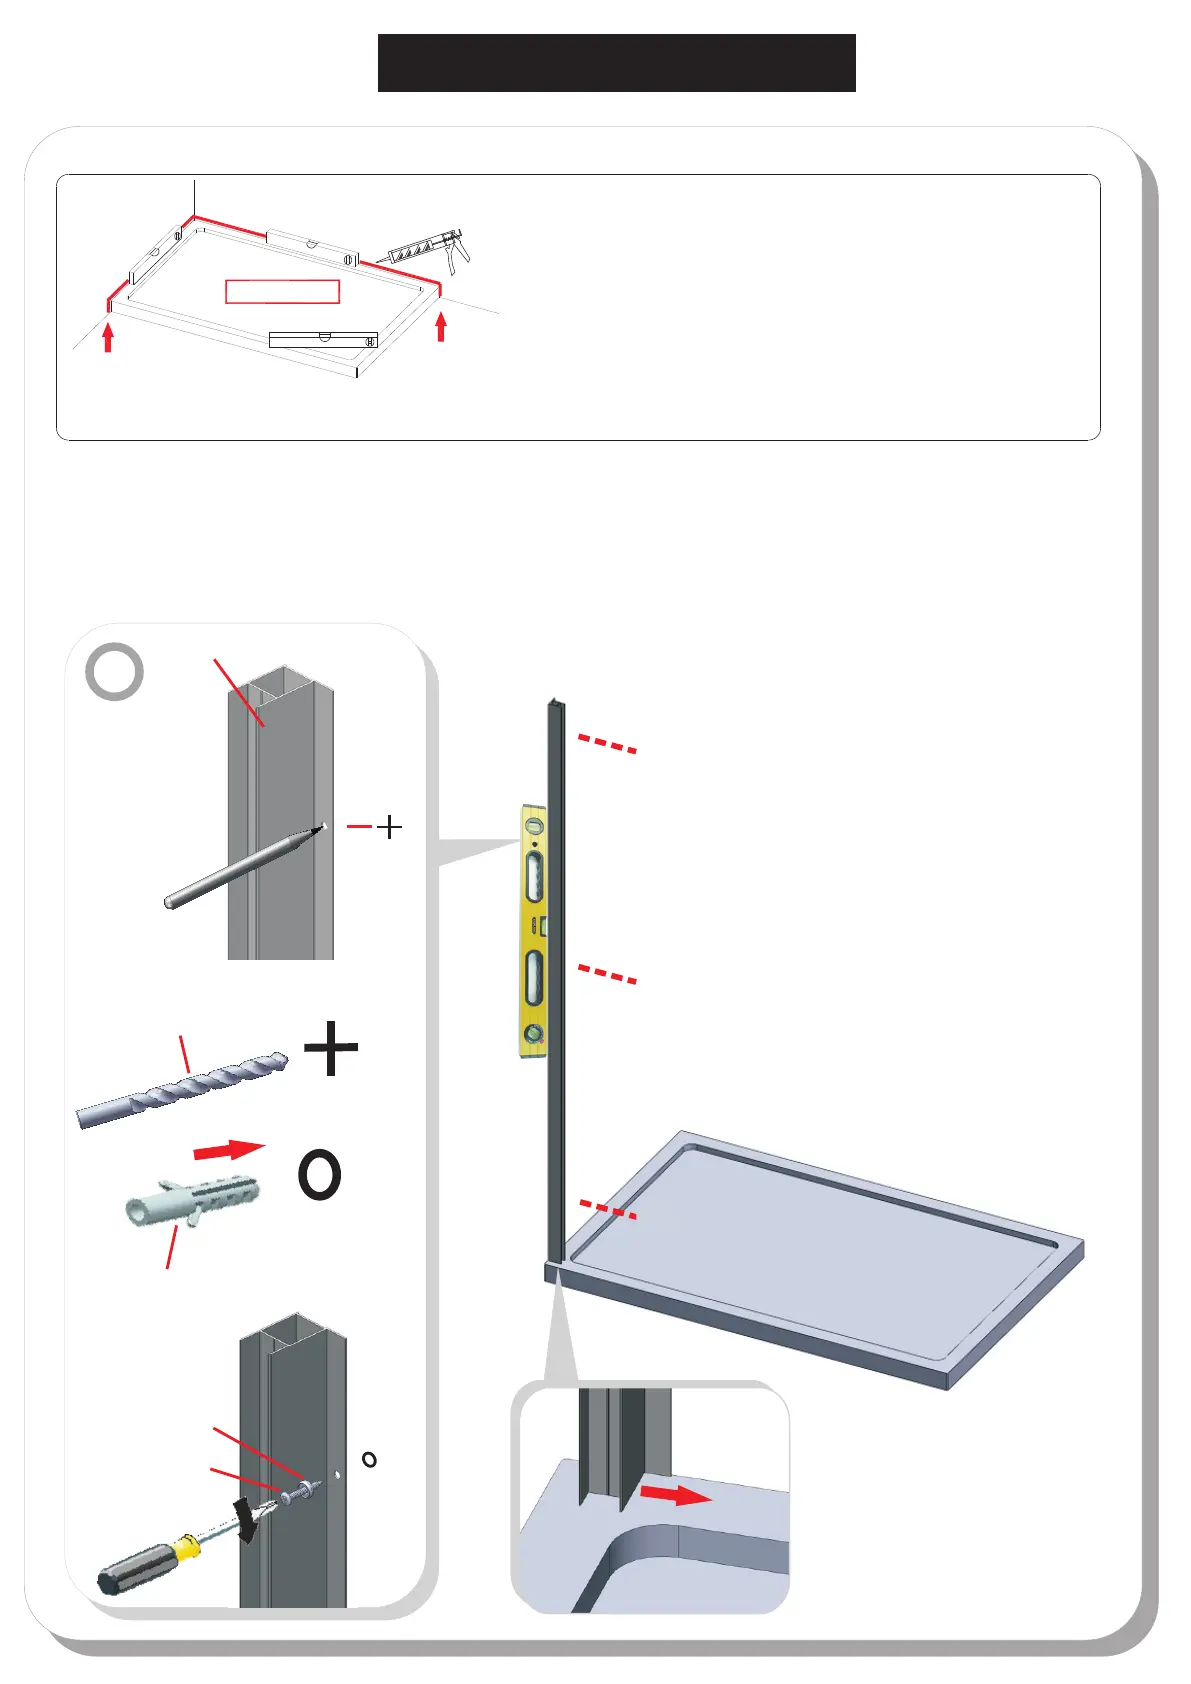
FITTING WALL PROFILE
3
PROCEDURE
100% level
TRAY MUST BE 100% LEVEL IN ALL DIRECTIONS
Ensure the shower tray is level in all directions and is
properly sealed to the wall. The wall must be tiled down to
the top edge of the tray. Do not angle out bottom tile.
TRAY MUST BE SEALED FULLY AROUND WHERE THE
TRAY MEETS THE WALL.
V6113
Inside
∅6mm masonry bit
V6BM31950
V4111
V2114
M
A
X
.
9
5
0
mm
Step 1.
The max. distance from the inside face of the profile to the wall is 950mm. Place the wall profile in from the front edge
of the shower tray, plumb, mark & drill holes.
Step 2 .
Fix the wall profile into position with wall plugs and screws V4111
Do not silicone behind wall profile to wall, see sealing section.
V6113 .
2
 Loading...