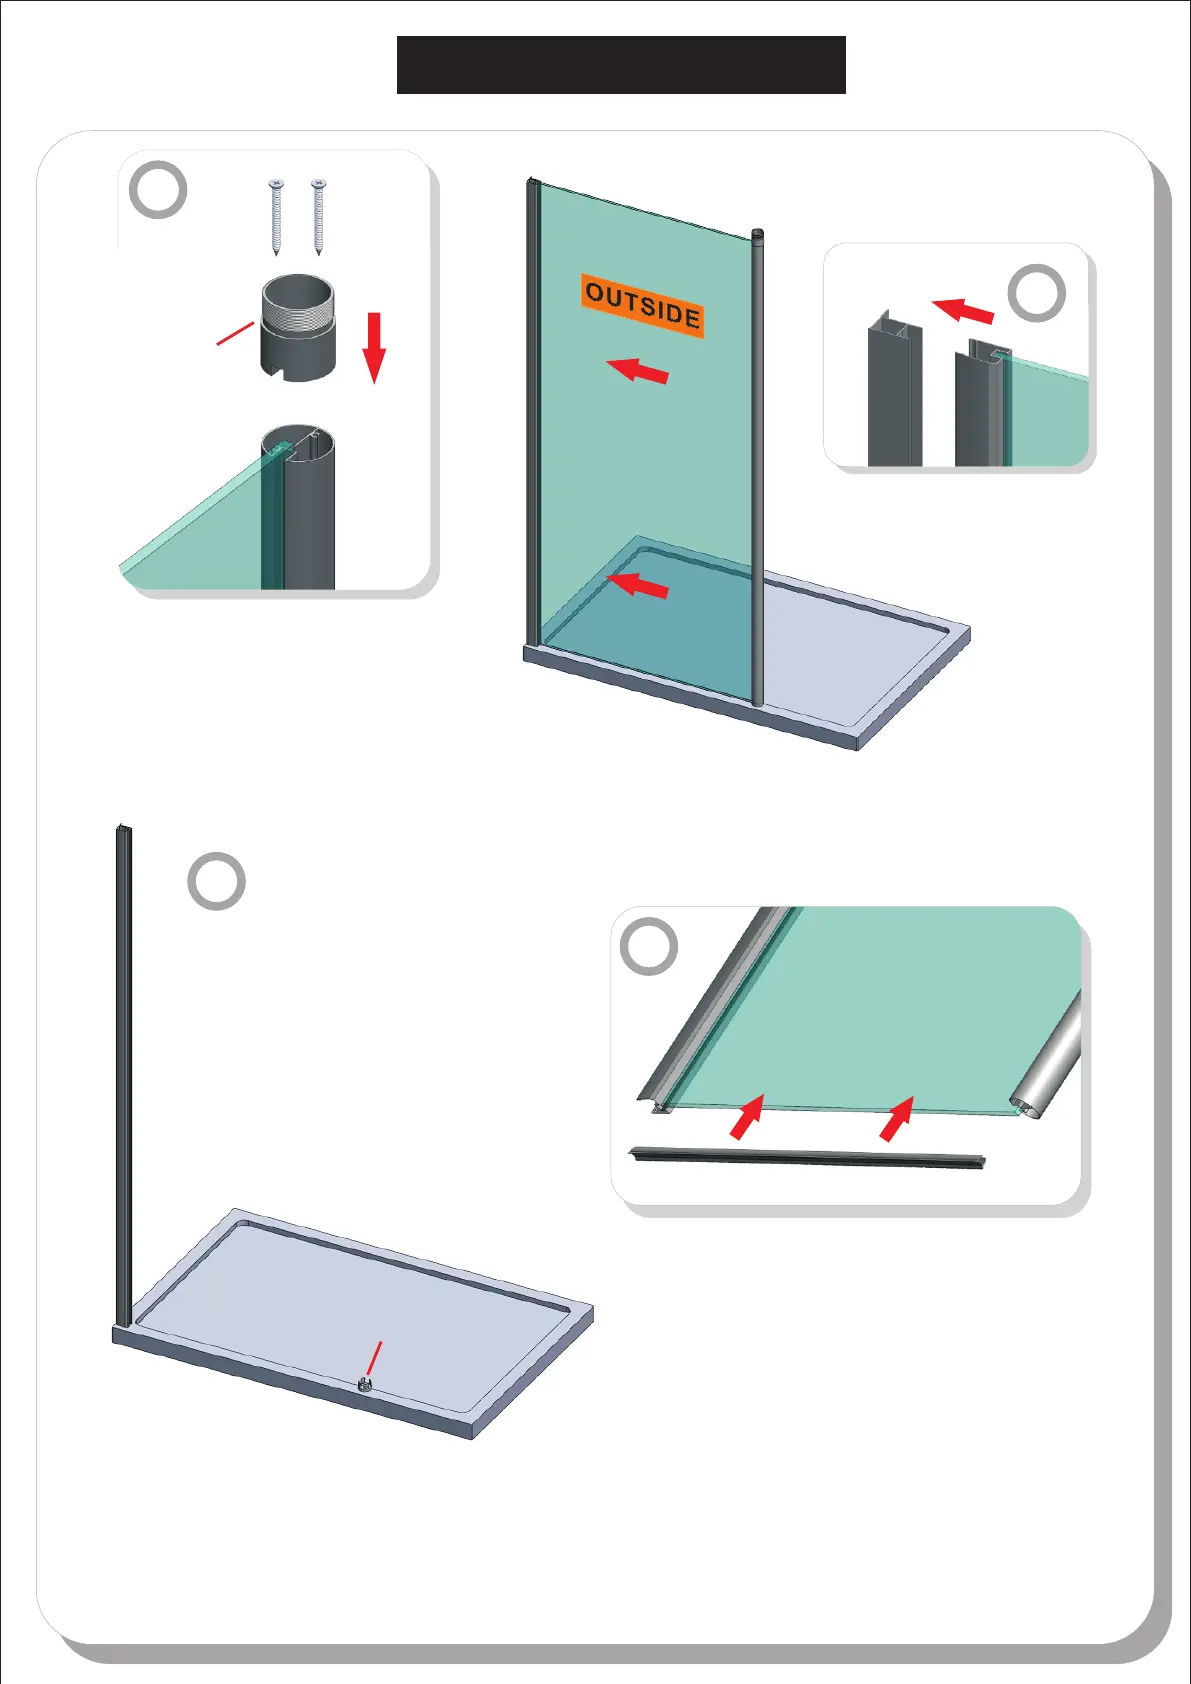
FITTING DOOR PANEL
4
Step 3.
Identify the top of the panel column, by
ensuring the screw holes line up with the
panel correctly, and secure the support bar
ferrule V6S6SW05 with 2 screws V6ST4X40.
Step 4.
Position floor support ferrule V8123 on bottom of panel A and
slide it into the wall profile.
Note: Ensure glass is fitted with label showing from
outside.
Step 5.
Note: If fitting on a tiled floor ONLY, option to screw
floor. Position panel A into wall profile and mark position on
floor V8123 remove panel and fix V8123 to floor using plugs
V8125
V8123 to
and screws V4115. ANTI-SLIP PADS V8126 & V8127
ARE OPTIONAL.
Step 6.
Press the seal gasket V6H081100 onto the bottom
edge of the glass.
NOTE: This can be sealed to the floor/tray with
silicone if required or omitted and use silicone
only as required.
3
4
5
V8123
V6H081100
V6ST4 40X
V6S6SW05
6
 Loading...