20
ENGLISH
4. Secure outfeed table (54) with both
lock levers (55).
5. Crank thicknesser bed up to
120 mm height.
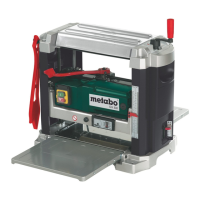
6. Place dust collector connector (this
is not the chip chute mentioned in
step 1!) below the infeed table into
the machine. Observe correct posi-
tion of the dust collector connector:
− suction port points outwards;
− slide dust collector connector in
until the point of intersection of
shaft and axis below the infeed
table (arrow) is exactly above the
matching seat of the dust collec-
tor connector.
7. Crank the thicknesser bed carefully
up to secure the dust collector con-
nector in position.
8. Connect a suitable dust collector to
the suction port of the dust collector
connector.
A
Danger!
Some types of wood dust (e.g. oack,
ash) may cause cancer when inhaled:
When working indoors work only with a
suitable dust collector connected to the
machine:
− Fitting the outer diameter of the
suction port (100 mm);
− air flow volume ≥ 550 m
3
/h;
− vacuum at suction port of
machine ≥740 Pa;
− air speed at suction port of
machine ≥20 m/s;
A
Caution!
Operation without a dust collector is only
possible:
− Outdoors;
− if only a minimum of chips is gen-
erated (with narrow stock and lit-
tle chip removal);
− with dust respirator.
6.2 Surface Planing and
Edge Jointing
A
Danger!
− Risk of serious personal injury by
rotating cutterblock! Always
cover the part of the cutterblock
that is not covered by the work
piece with the cutterblock guard
extrusion. Adjust the cutterblock
guard extrusion exactly to the
dimension of the work piece.
− Never reach with your hands
under the cutterblock cover when
guiding the work piece!
− Use a feeding aid (push block)
when planing small workpieces,
which can not be guided with a
sufficient safety distance to the
cutterblock.
− Use the jointer fence when edge
jointing to have safe lateral sup-
port and guiding. Use an auxiliary
fence when planing thin or nar-
row stock, to have your hands at
a sufficient safety distance to the
cutterblock.
− Use a stop block behind the work
piece for set-in work, to keep the
work piece from being thrown
back against the direction of feed.
− Use a work piece support (e.g.
roller stand) to keep long stock in
balance.
− Do not pull the work piece back
over the unguarded cutterblock!
− Use if necessary:
Dust collection device (optional
accessory);
sliding wax to enhance the glid-
ing of work pieces across the
infeed and outfeed table.
1. Assume proper operating position:
− on the switch side;
− head-on to the machine;
2. Set jointer fence as required.
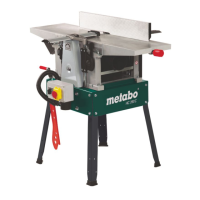
3. Set depth of cut with starknob screw
(56) on the infeed table.
3
Note:
The machine can remove 3 mm
maximum in a single pass. This meas-
ure, however, shall only be used:
− with very sharp planer knives;
− for soft woods;
− if the full planing width is not utilized.
Otherwise there is a risk of overloading
the machine.
It is best to make several passes to bring
the work piece down to the desired thick-
ness.
4. Place work piece against jointer
fence (if required, use auxiliary
fence).
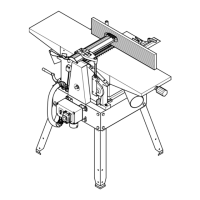
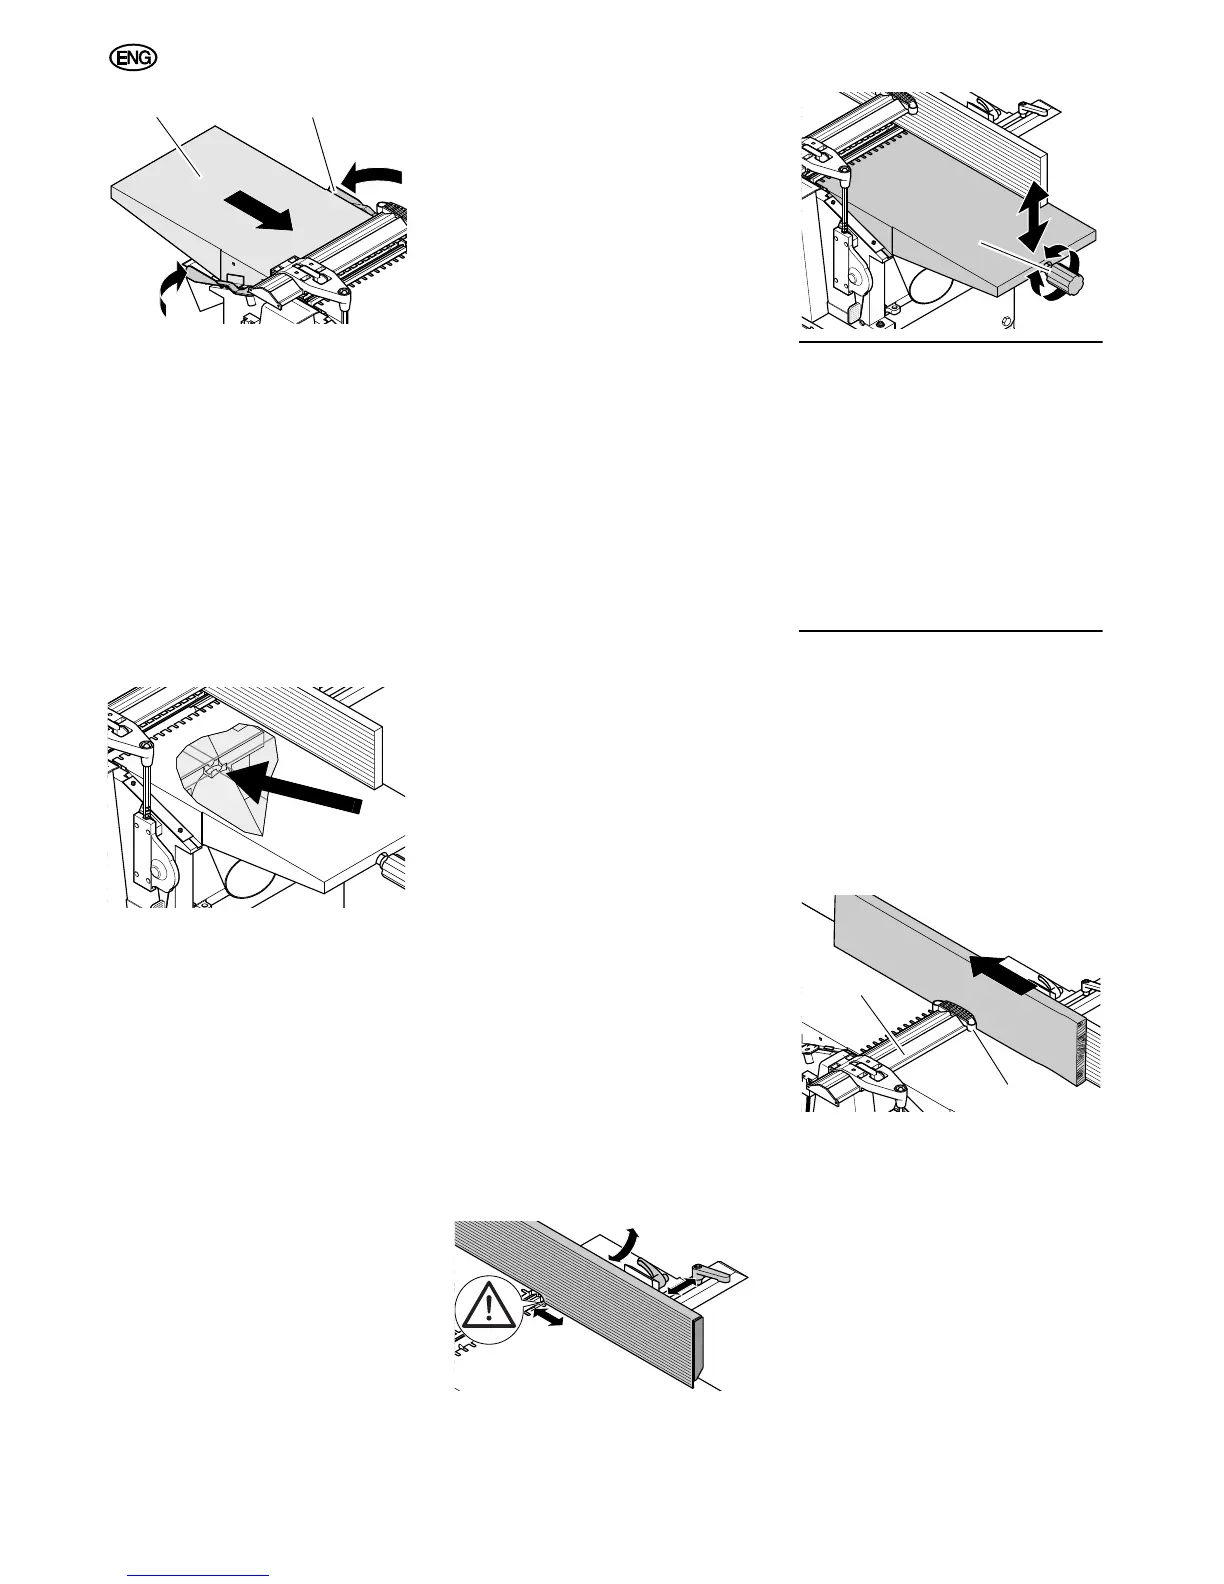
5. Adjust cutterblock guard extrusion:
− Planing small edges (jointing):
Slide the cutterblock cover extru-
sion (57) from the side against
the work piece – the spring (58)
at the end of the cutterblock
cover extrusion should be slightly
depressed.
− Planing wide surfaces:
Lower the cutterblock cover
extrusion (59) from above onto
the work piece.
54
55
5656
57
58

 Loading...