10
Das Softstartventil der ONE ist gänzlich verschieden, von denen, die
gegenwärtig auf dem Markt bekannt sind. Der Druck steigt unabhängig
vom Durchfluss der Aktoren allmählich an.
Wenn das Magnetventil (bei der elektrische Variante) oder das manuelle
V3V-Ventil (bei der nichtelektrischen Variante) auf On betätigt wird,
beginnt der Ausgangsdruck zu steigen.
Wenn er etwa 30-40% des geregelten Wertes erreicht, öffnet sich das
Ventil vollständig und der Druck steigt bis zum geregelten Wert an.
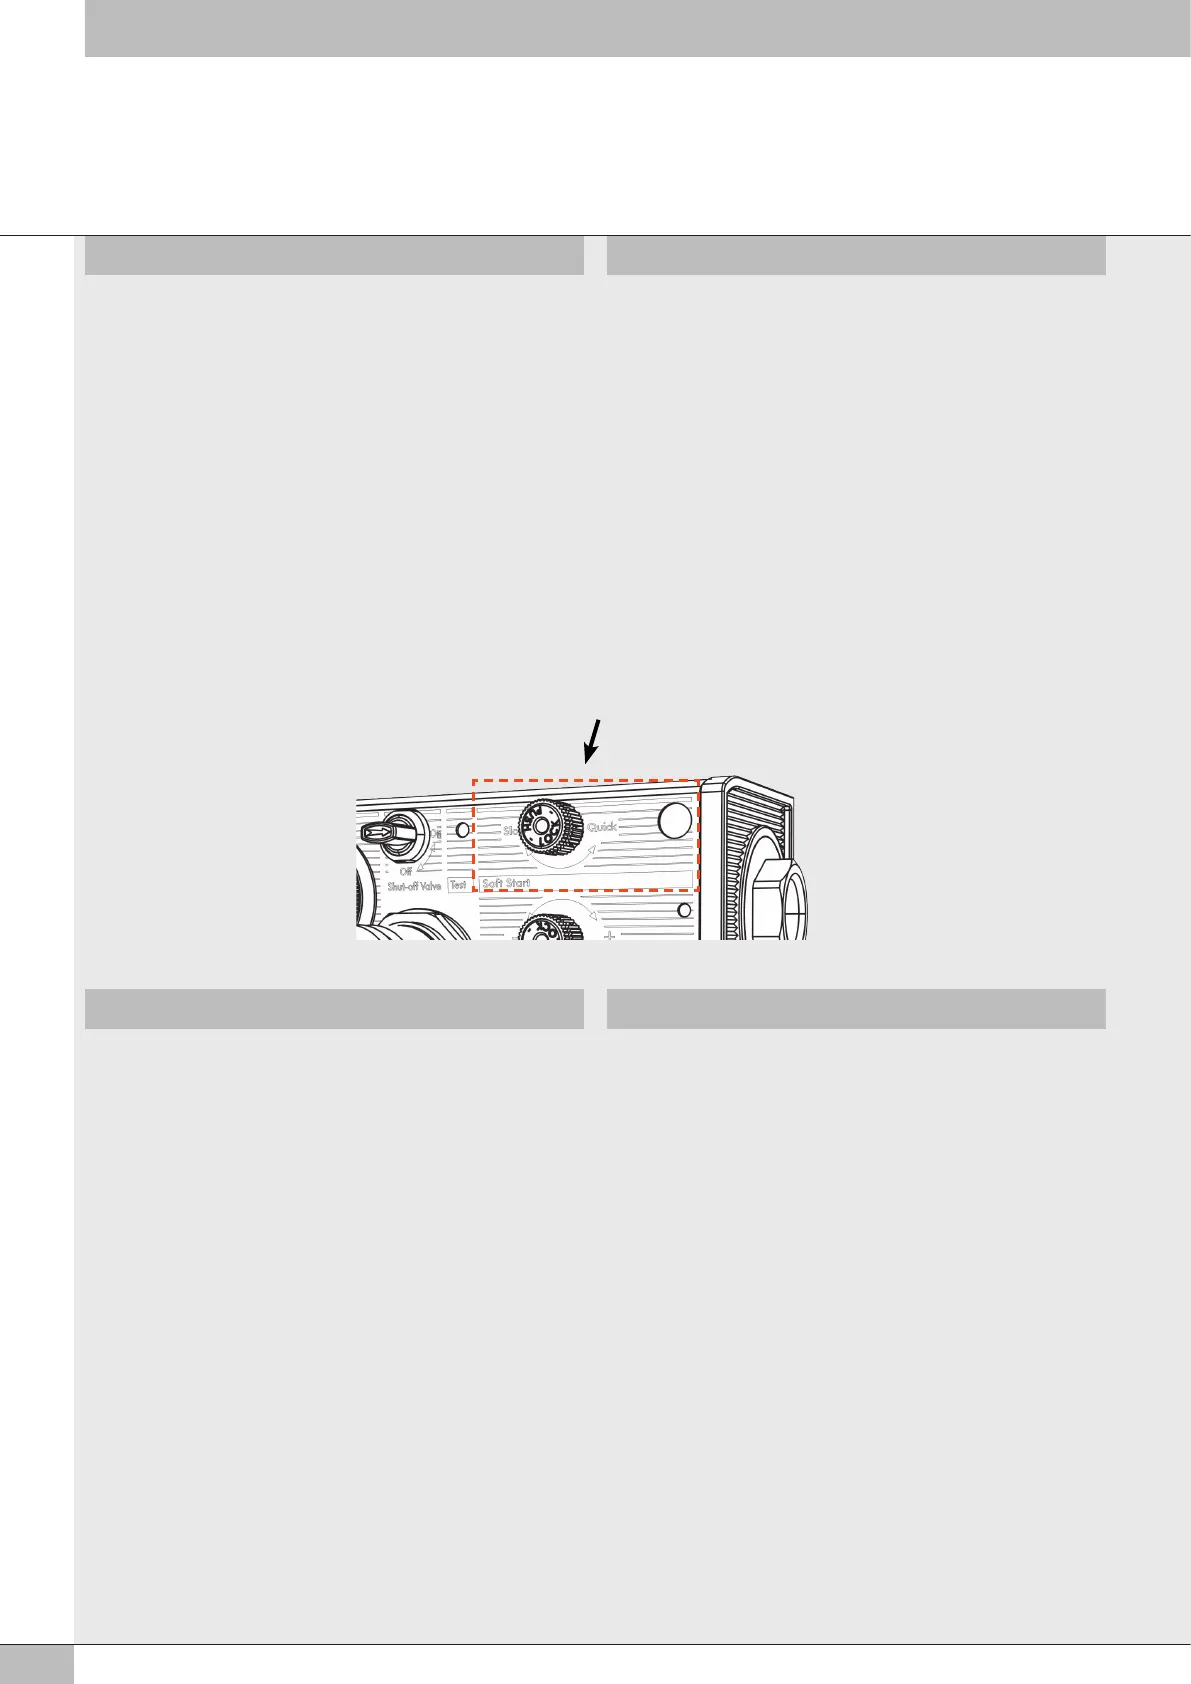
Die Flanke des Druckanstieges kann exakt mit dem Drehknopf vorn
eingestellt werden.
1. In Richtung “Slow” erhöht sich die Zeit des Druckaufbaues.
Bei Drehung bis zum Anschlag bleibt der Ausgangsdruck auf Null und
der Druck erhöht sich nicht.
2. In Richtung “Quick” verkürzt sich die Zeit bis das Ventil vollständig
öffnet. Bei Drehung bis zum Anschlag öffnet das Ventil nahezu sofort.
Die Softstartfunktion ist dann deaktiviert.
Nach der Einstellung ist der Drehknopf hineinzudrücken, um diesen zu
verrasten.
SOFTSTARTVENTIL (APR) SOFT START VALVE (APR)
ONE’s soft start valve is completely new compared to others currently on
the market. The pressure is increased gradually whatever the flow rate of
the utilities.
When the solenoid valve is powered on (if there is an electric soft start
valve) or you turn the manual V3V valve to On (if there is a non-electric
soft start valve), the downstream pressure starts to increase.
When it reaches about 30-40% of the set value, the valve opens
completely and the pressure rises to the set value.
The pressure increase can be regulated with precision on the knob on the
front:
1. Turn in the “Slow” direction to increase the ramp time.
If you rotate as far as it will go, this cuts off the flow of air completely,
and the pressure does not increase.
2. Turn in the “Quick” direction to decrease the time it takes to open the
valve. If you rotate as far as it will go, the valve will open almost
immediately, deactivating the progressive actuator function.
After regulation, press the knob to lock it.
Der Druckschalter hat elektrische Schaltkontakte, die es ermöglichen
zwischen “normal offen” oder “normal geschlossen” zu wählen.
Die Anzeige dazu erfolgt über die LEDs NC und NO, die ansprechen,
wenn der tatsächliche Druck kleiner oder größer als der eingestellte Wert
ist. Die LEDs sprechen nur an, wenn die elektrische Versorgung (max 0.5 A)
angeschlossen ist (siehe Abschnitt zu LEDs).
Der elektrische Kreis des Druckschalters ist durch eine rücksetzbare
Sicherung vor Überlastung geschützt. Wird die Sicherung ausgelöst, wird
das elektrische Signal unterbrochen, die LEDs bleiben aber eingeschaltet.
Zur Wiederherstellung des Betriebs muss die Stromversorgung unterbro
-
chen und der Grund der Störung behoben werden.
Die Einstellung erfolgt mit einer Rändelschraube. In Richtung “+” erhöht
sich der Ansprechdruck und umgekehrt.
Für eine korrekte Einstellung ist folgendes zu beachten:
- Die Schraube bis zu Anschlag nach “-“ drehen.
- Einstellen des Druckwertes, bei dem der Druckschalter ansprechen soll
und Ablesen des gewünschten Druckes. Die gelbe LED leuchtet und die
rote LED leuchtet nicht.
- Den Dehknopf in Richtung “+” drehen bis rote LED aufleuchtet.
- Drehknopf drücken, um ihn zu verrasten
- Mit dem Regler zum normalen Betriebsdruck zurückkehren.
DRUCKSCHALTER PRESSURE SWITCH
The pressure switch has a switching contact, which means you can have
a normally-open signal or a normally-close signal. It is also connected
to the NC and NO LEDs which come on if the actual pressure is less or
greater than the set pressure, respectively.
The LEDs only come on if an electric charge (max 0.5 A) is connected to
them, as shown in the diagram (see subsection on LEDs).
The electrical circuit of the pressure switch is protected against overloads
by a resettable fuse. In the case of intervention, the electrical signal is
interrupted but the LEDs stay on. To restore operation, disconnect the
power supply and remove the cause of failure.
Regulation is by means of the knurled knob. Turn towards “+” to increase
the pressure and vice versa.
Proceed as follows to make a correct setting.
- Turn the knob towards “-“ as far as it will go.
- Set on the pressure regulator the value at which you wish the pressure
switch to activate and read it on the gauge. The NO LED is on and the
NC LED is off.
- Turn the knob towards “+” until switching takes place.
- Press the knob to lock it.
- Reset the desired value for normal operation on the pressure regulator.
 Loading...