14
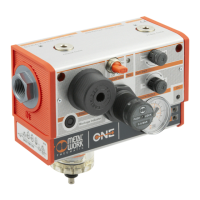
1. Die Mutter am Reglerknopf entfernen (A)
2. Den Filterdeckel entfernen (B)
3. Den Knopf des Softstartventiles (C) und des Druckschalters (D)
herausziehen, wobei die Feder am Druckschalter nicht beschädigt
werden darf. Um dies zu sichern, ist der Knopf beim Ziehen auch
seitwärts zu bewegen.
4. Den Schalldämpfer aus der Entlüftung herausschrauben (E)
5. Alle 1/4” A7 Stöpsel (F)
oder andere an den zusätzlichen Luftabnahmen
montierte Fittings entfernen
6. Die 2+2+2 - Schrauben (G) an den 3 Seiten der Abdeckung
herausschrauben
7. Die Abdeckung entfernen (H), indem sie nach vorn abgezogen wird
8. Die Montage erfolgt in umgekehrter Reihenfolge
ENTFERNEN UND MONTIEREN DER ABDECKUNG HOW TO REMOVE AND REMOUNT THE GUARD
1. Unscrew the regulator ring nut (A)
2. Unscrew the filter plug (B)
3. Pull out the soft start valve knob (C) and the pressure switch knob
(D) taking care not to damage the small spring in the pressure
switch. To do this, grip the knob and pull it outwards with force,
helping yourself by pushing sideways.
4. Unscrew the silencer on the exhaust (E)
5. Remove the 1/4” A7 plugs (F) or any fittings mounted from the
supplementary outputs
6. Unscrew the 2+2+2 screws (G) on the three sides of the guard
7. Remove the guard (H) by pulling it from the front
8. Remount the guard following the above operations in the reverse
order
B
C
F
A
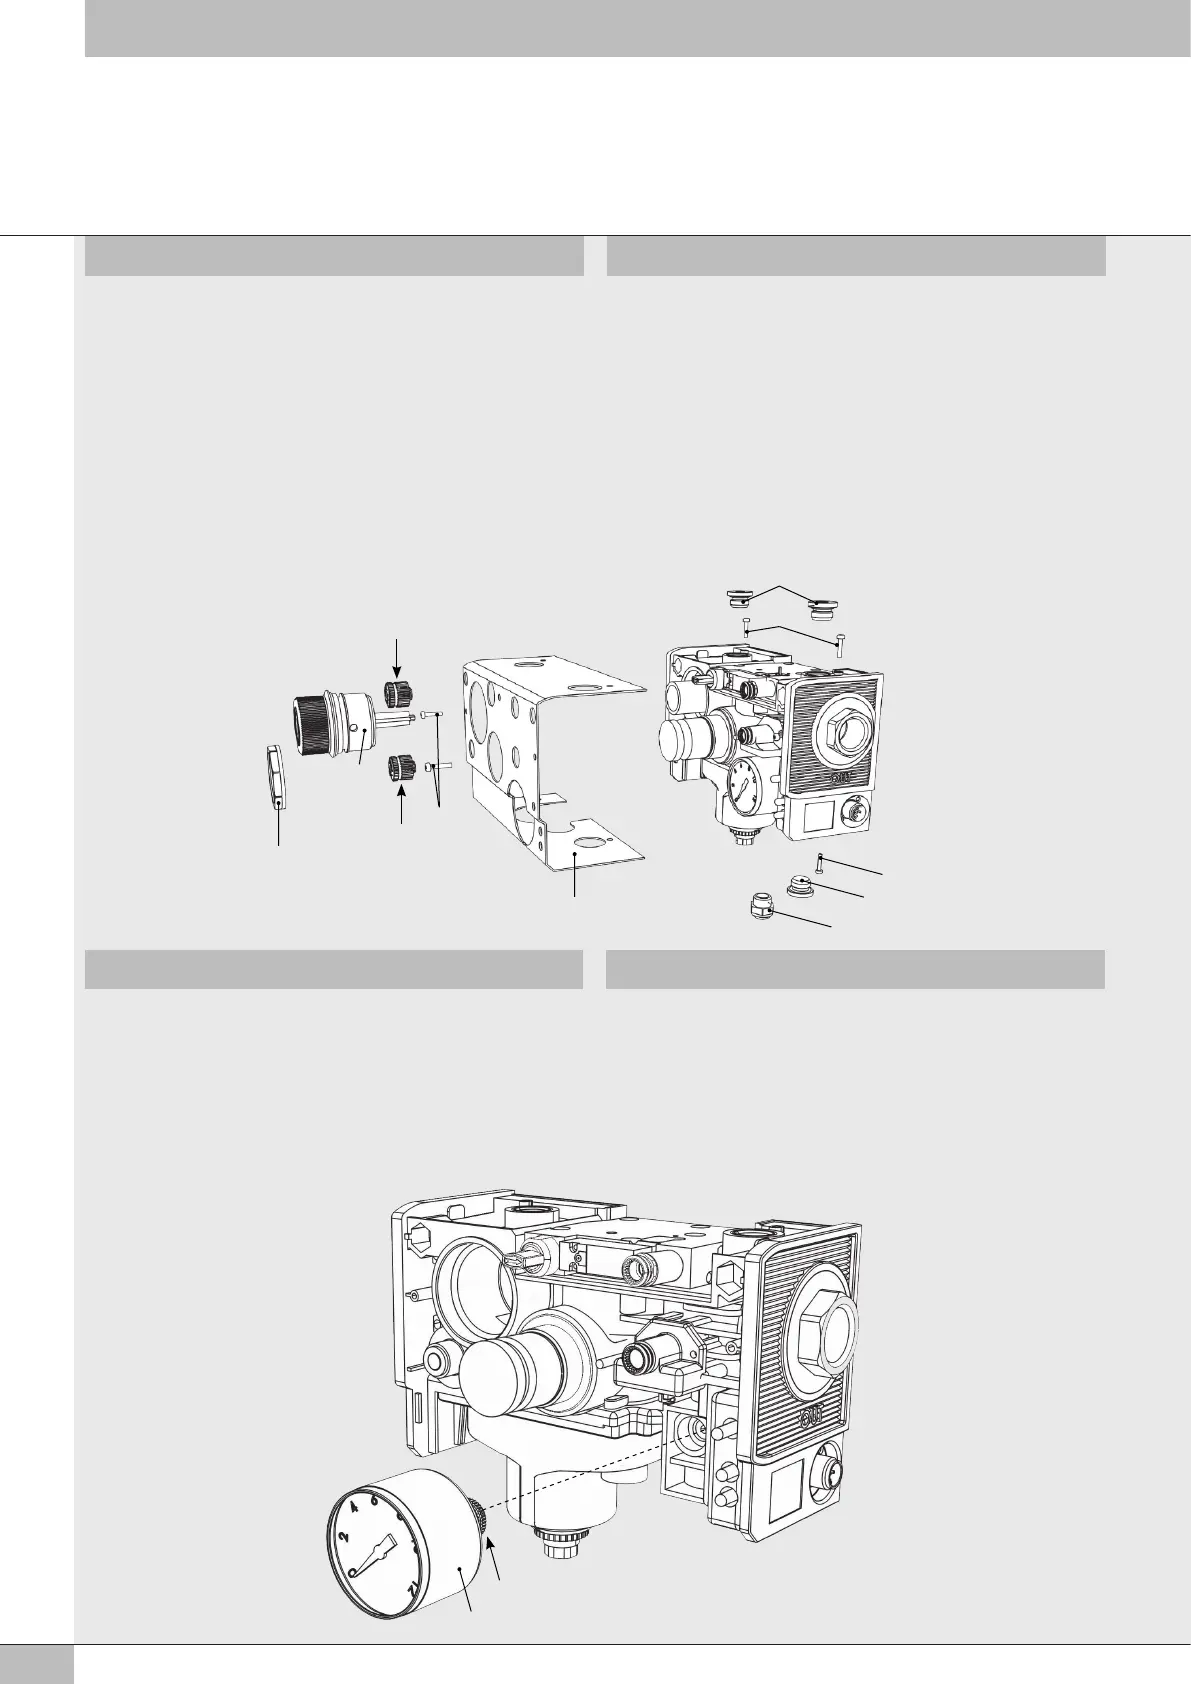
1. DIe Abdeckung entfernen
2. Das Manometer herausschrauben (A)
3. Einen geeigneten Dichtwerkstoff an dem neuen Manometergewinde
anbringen (B) z.B. Loctite
®
242E oder 542
4. Das neue Manometer einschrauben, wobei auf Ausrichtung der
Nulllage zu achten ist
5. Abdeckung wieder montieren
MANOMETERWECHSEL REPLACING THE PRESSURE GAUGE
1. Remove the guard
2. Unscrew the pressure gauge (A)
3. Apply some removable sealant on the thread of the spare pressure
gauge (B) for example Loctite
®
242E or 542
4. Screw on the new pressure gauge, making sure the markings are
horizonta
5. Remount the guard
B
A
G
D
G
H
E
F
G