■■■■■■■■■■■■■■■■■■■■■■
5 Operation
800 Dosino
■■■■■■■■
23
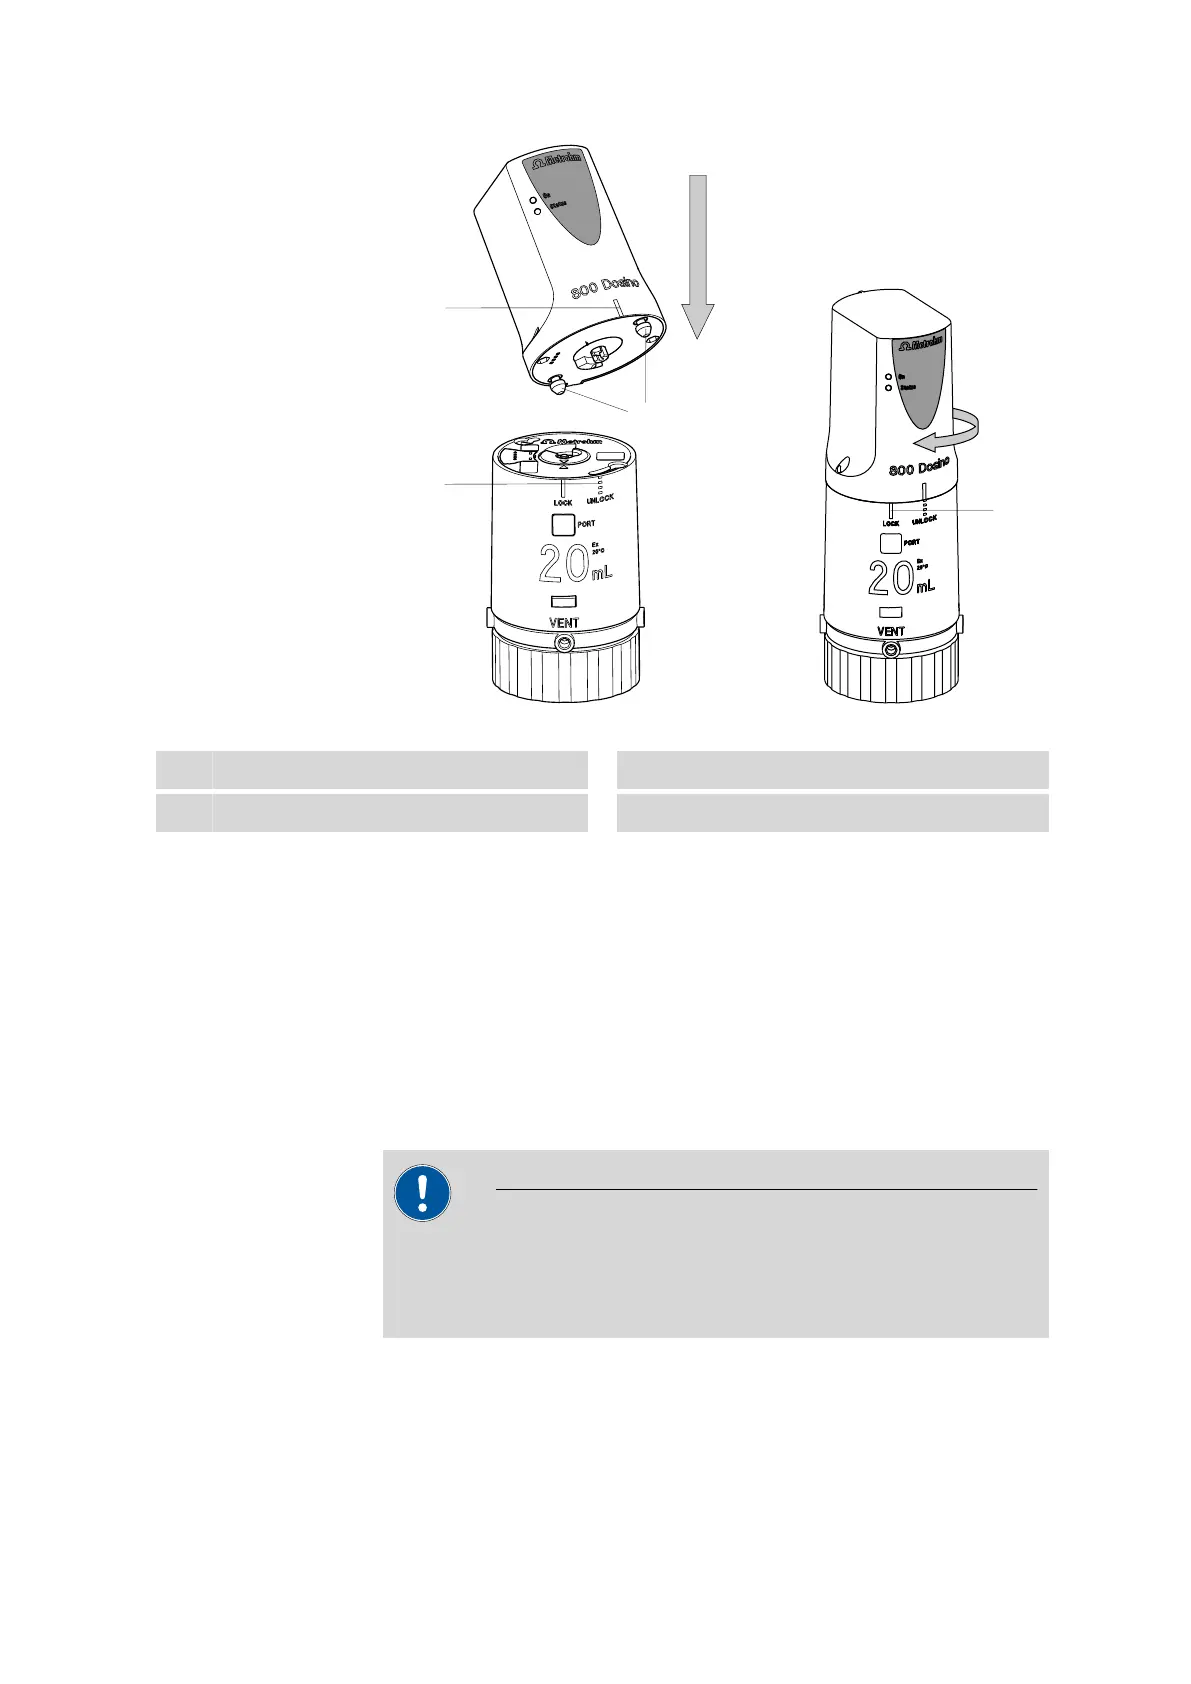
Figure 16 Mounting the 800 Dosino onto the 807 Dosing Unit
1
Green line marking
2
Guide pins
3
UNLOCK position
4
LOCK position
■ Attach the dosing drive on the dosing unit with a slight offset.
■ Insert the guide pins of the Dosino into the openings on the dos-
ing unit provided for this purpose.
The green line marking of the Dosino must come to rest on the
dotted white line marking (UNLOCK position) of the dosing
unit. It is only then that the guide pins are inserted correctly.
■ Rotate the dosing drive to the left until it stops.
The green line marking of the Dosino now lies on the exten-
ded white line marking (LOCK position) of the dosing unit.
■ Check the correct seating of the 800 Dosino.
CAUTION
After the 800 Dosino has been attached to a dosing unit, the Status
LED must light up when the control device is switched on. If this does
not occur, then the dosing drive is not attached correctly.
 Loading...