5.4 Reagent exchange
■■■■■■■■■■■■■■■■■■■■■■
26
■■■■■■■■
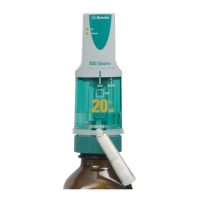
800 Dosino
2
Check whether the Status LED of the dosing drive is lit up.
3
Rotate the Dosino to the right (in counterclockwise direction).
The dosing drive mounted on the dosing unit is unlocked.
The green line marking of the Dosino now lies on the dotted
white line marking (UNLOCK position) of the dosing unit.
4
Lift the Dosino upward.
NOTE
Never readjust the drive pin of the Dosino or the centering tube of the
dosing unit when these are disconnected. Doing so could make attach-
ing the dosing unit more difficult. Observe the explanations on the pre-
vious pages.
5.4 Reagent exchange
As a rule, is not necessary to disassemble and clean the dosing unit when
reagents are changed. The dosing unit is constructed in such a way that
only a small dead volume is present.
Reagent exchange in the dosing unit
Exchange the reagent as follows:
1
Empty the dosing unit with the EMPTY/Emptying function of the
control device.
2
Fill the dosing unit with the PREP/Preparing function.
The PREP/Preparing function rinses the dosing cylinder once before
it is filled with reagent.
If additional rinses are required, then the PREP/Preparing function
must be run again.
If there is a possibility of precipitation or chemical reactions occurring
when old and new reagents are mixed, then an interim rinse with an
inert solvent is to be recommended.
 Loading...