100 ms from 1000 ms to 4000 ms.
Save the chosen delay in ‘Delay’ under the STATUS field by
pressing ENTER (F5). Press CANCEL (F4) to undo.
5. START (F3). When you press on START, the test procedure
will begin, and the text in the field ‘Oper.’ will change from
‘Ready’ to ‘Measuring’. If the unit is set to the position for a
REM test, this text will change from ‘Ready’ to ‘lncr'. res.’
Press STOP (F3) to stop the test procedure.
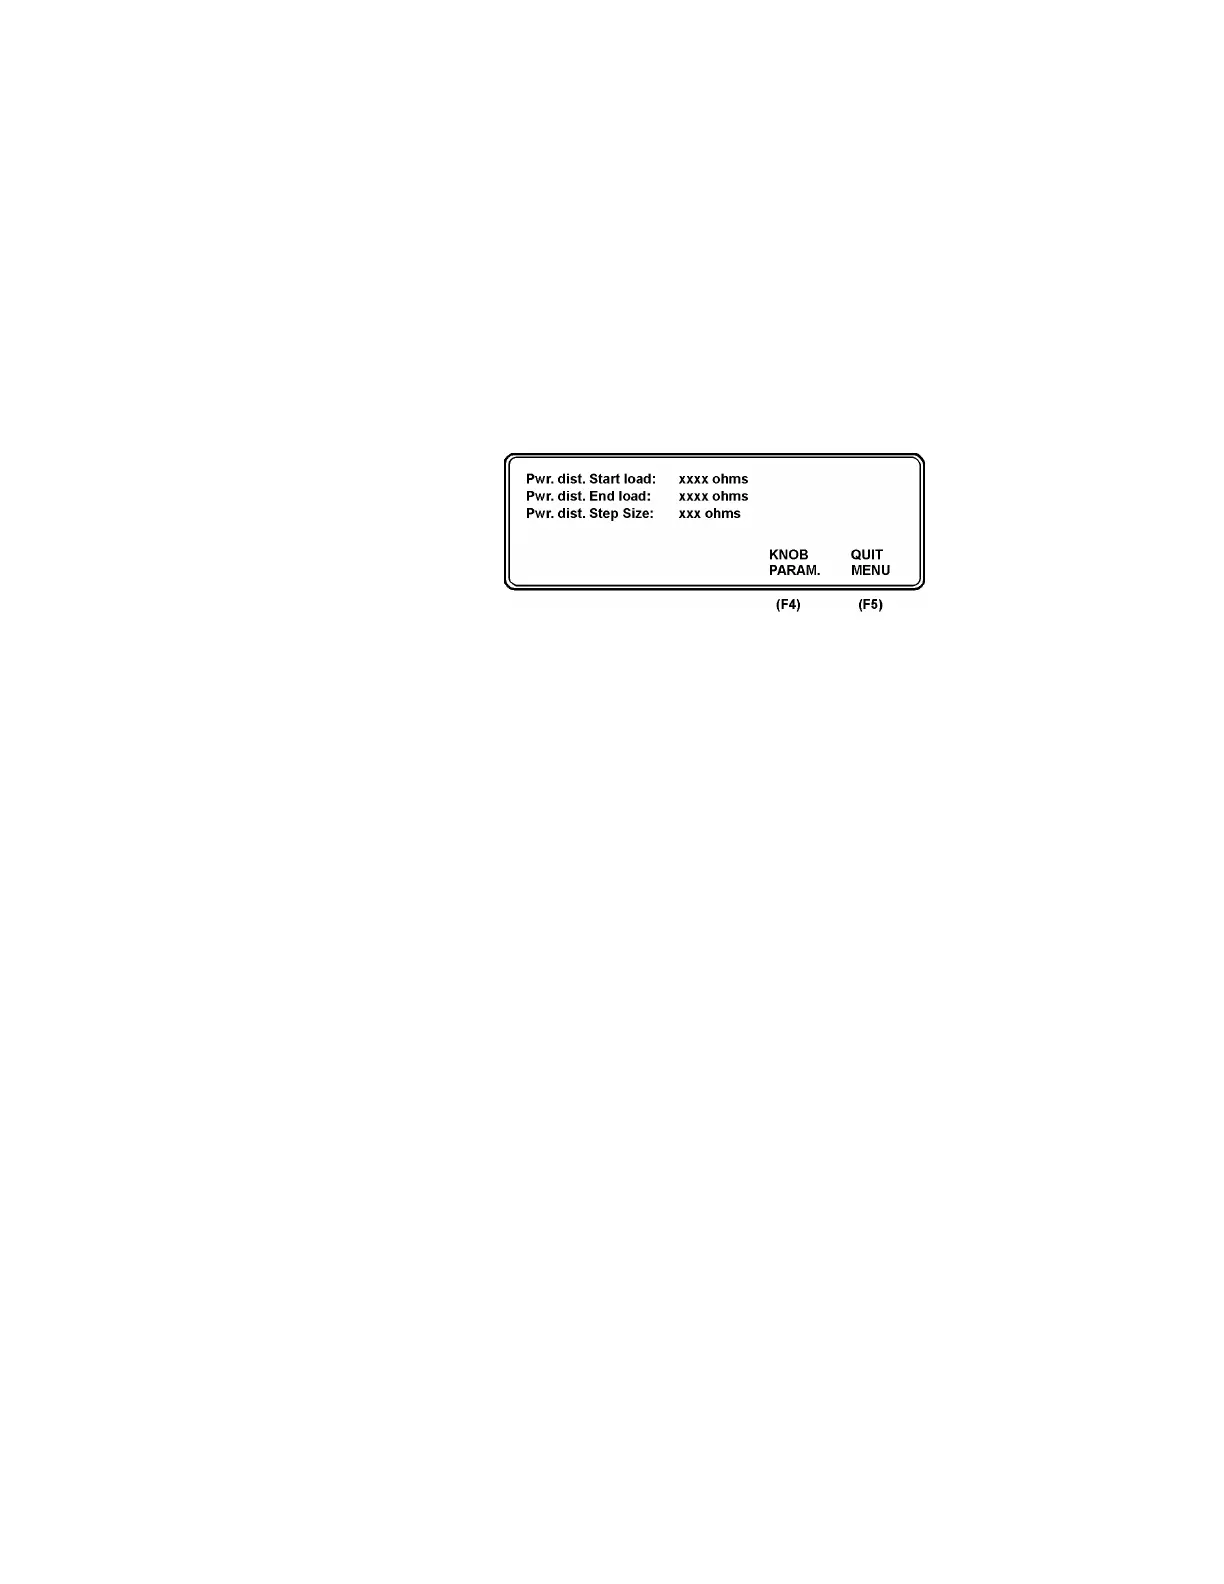
6. SETUP (F4). Here you can set the power distribution level for
start, stop and step in ohms.
Choose the ‘Start load’ by using KNOB PARAM (F4). (see
stars). Use the encoder to set the level. Save the level by press-
ing ENTER (F5). Press CANCEL (F4) to undo. Go to ‘End
load’ and ‘Step Size’ and repeat the same procedure.
Pwr. distr. Start load is the first load to be used during the
measurements; it can be set from 10 ohms to 2100 ohms, with
steps of 25 ohms starting at 25 ohms onwards.
Pwr. distr. End load is the last load used in the measurements;
R can be set from 525 ohms to 5200 ohms, with steps of 25
ohms from 525 to 2500 ohms and step of 100 ohms from 2500
ohms to 5200 ohms
Pwr, distr. Step Size is the load set with steps of 25, 50, 100,
and 200 ohms
Press QUIT MENU (F5) to return to the main menu.
7. PRINT HEADER (F3). Writes a heading for a new test proto-
col.
8. REMOTE CONTR. (F4). Enables you to control the QA-ES
through a PC. Required software: PRO-Soft QA-ES.
5