on the QA-ES. Don't activate any functions. Measure the cur-
rent. Required value:
230±10%: 80mA -10/+20mA
115±10%: 160mA -20/+40mA
2. User Interface and Display. Check that the display and the
user interface are working normally.
3. Cooling Fan. Check that the fan increases speed when you
press on Start (F3) in the main menu and that the speed de-
creases about 10 seconds after you press STOP (F3).
4. Serial and Parallel Interface. QA-ES can be connected to a
printer and a PC. Check that booth the serial and parallel inter-
faces work.
5. Foot Switch. Connect a multimeter to the foot switch output
on the QA-ES (green). Check that the relay for the foot switch
is connected when you press START (F3).
6. Fixed Load. Measure the value of the fixed load with a multi-
meter (blue). Required value: 200 ohms ±10 ohms.
7. Housing Isolation. Use a multimeter to check the isolation be-
tween the housing and the measuring inputs. It is important to
check all of the terminals on the housing: ‘Var. Load', 'Fixed
Load' and 'Foot Switch’.
5.4 Calibration
1. Offset Voltage. Short-circuit the RF input on the sampling unit
(J4). All the measurements and reference values in this section
refer to the sampling unit. Measure the voltage at each of the
following points and adjust them to the following values with
the potentiometers specified between brackets. The voltage
should be set as close to 0V as possible.
TP1 - GND
(no adjust)
TP3 - TP2
(R3)
TP4 - GND
(R2)
TP5 - GND
(R1)
TP6 - GND
(R4)
OmV ∀100
ΦV
O ΦV ∀50
ΦV
O ΦV ∀100
ΦV
O ΦV ∀500
ΦV
OmV ∀5 mV
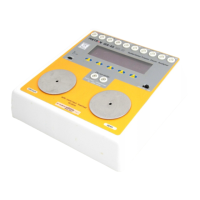
2. Load Resistance. Set the QA-ES in calibration mode by hold-
ing the function key F1 while switching the instrument ON.
Continue to press on the key until the main menu appears. Con-
nect a multimeter (hp 34401A) to the 'Var. Load' input. The re-
sistances are calibrated by turning the small wheel until the dis-
play shows a value as close as possible to the value read. To
calibrate the next resistance, press on UP (F1) or DOWN (F2).
3. Measuring Resistance. Set the QA-ES in calibration mode.
Before mounting it, the measuring resistance R1 on the Load
Board should be measured with hp 34401A. The measured val-
ue should be noted near R1 on the Load Board. Use this value
for R1 in the following equation and for ‘Meas. Reas.’ in the
calibration menu by using the wheel. Press QUIT (F5) to save
calibrated values.
It is important to cali-
brate the resistance of
the measuring leads on
the multimeter itself be-
fore starting the test.
2