Electrical
LAMPS
Parking and To gain access to the parking and direction indicator bulb, unscrew the two
direction
retaining screws (1) and withdraw the lens (2).
indicator
lamps
Fig.
5
Stop,
tail,
Remove the lens retaining screws (1) and slide the lens upwards to gain access
and
direction
to the direction indicator and stop/tail bulbs.
indicator
lamps
Fig. 6
I
Number-plate
,To change a bulb, remove the screw (1), lift and pull the lens
(2)
clear of the lamp
lamp
body and unclip the bulb (3) from its contacts. When refitting ensure that the
Fig. 7 lens engages in the seal lip. '
Side
marker
(1) Front (amber). To renew a bulb, remove the securing screw (1) and lift ofI' the
lamps lamp lens, noting
that
one end is secured by a locating tab (2). When refitting,
Fig. 8 ensure that the
seali
~g
rubber is positioned correctly and that the lens tab (2)
is located beneath the lamp body rim before refitting the securing screw.
I
(2) Rear (red). To gain access to the bulb (3), the rubber lips retaining the chrom
bezel and lamp lens should be eased open with a screwdriver
and
the bezel (1),
and lens (2), removed. When refitting ensure that the thick end of the wedge-
shaped lens faces rearwards.
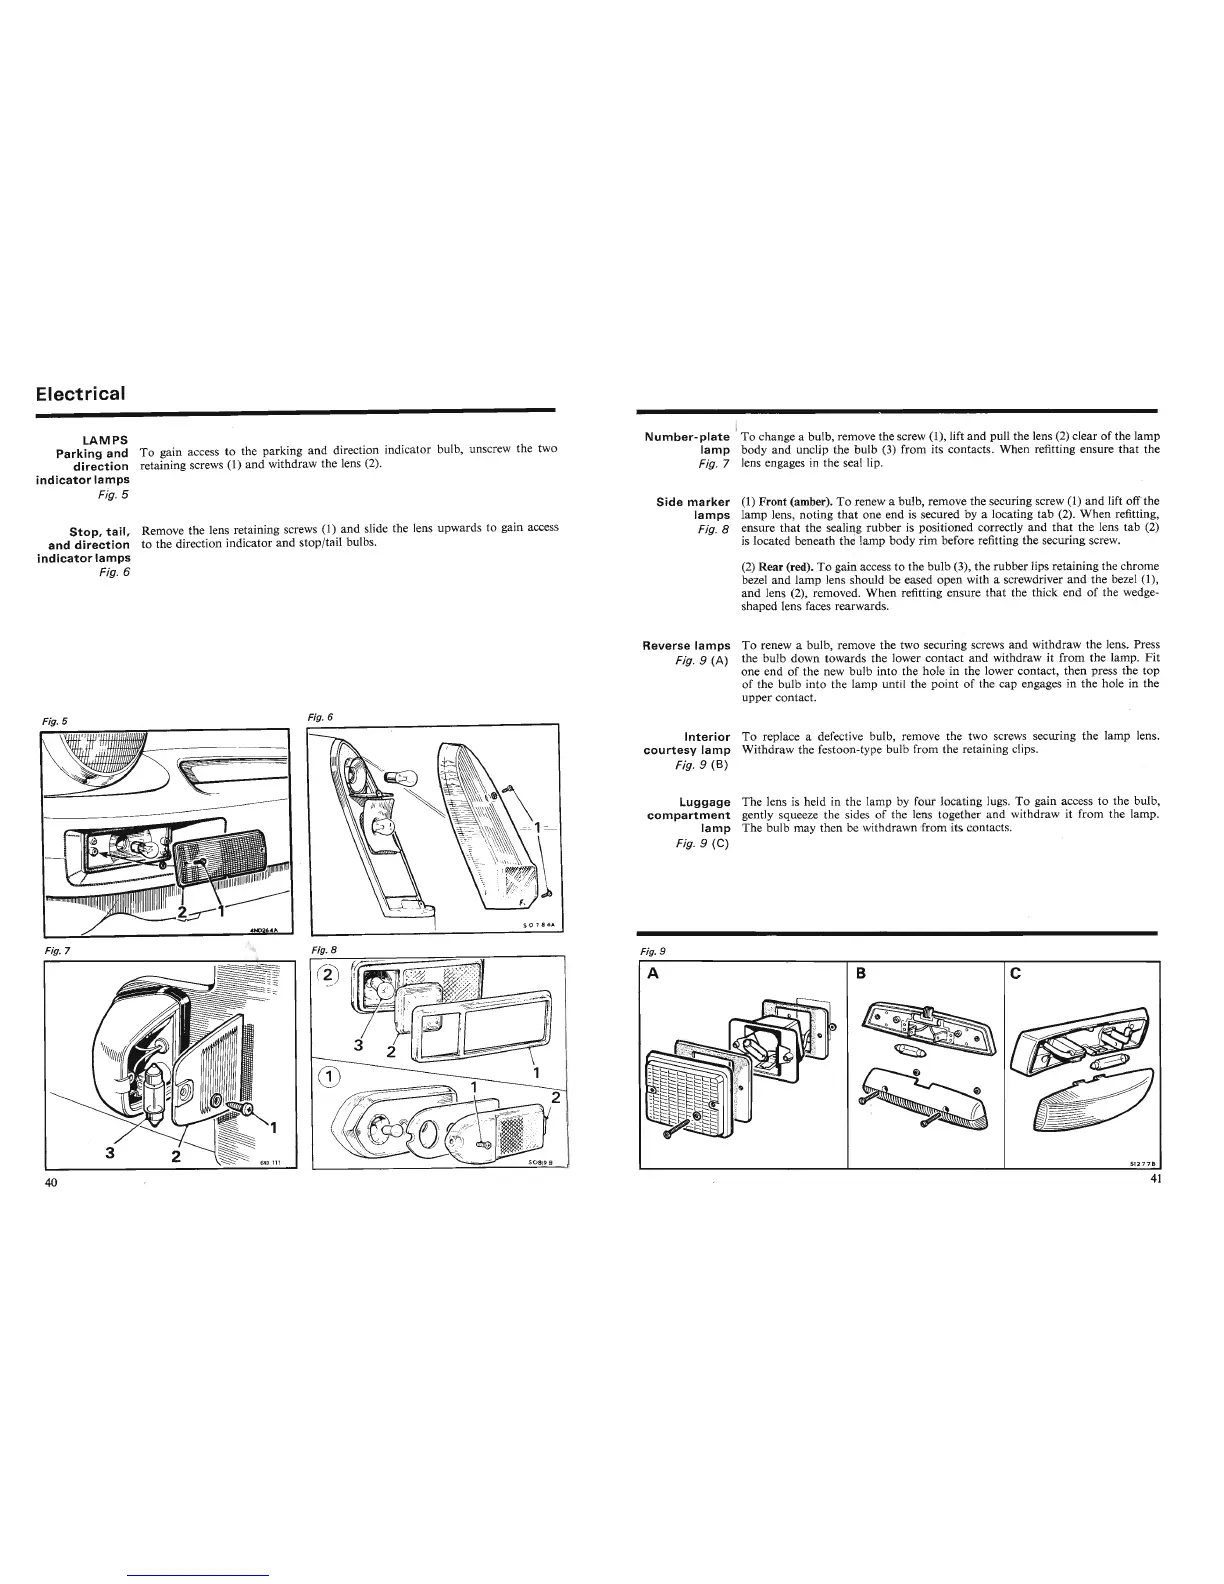
Reverse lamps To renew a bulb, remove the two securing screws and withdraw the lens. Press
Fig. 9 (A) the bulb down towards the lower contact and withdraw it from the lamp. Fit
one end of the new bulb into the hole in the lower contact, then press the top
of the bulb into the lamp until the point of the cap engages in the hole in the
upper contact.
Fig. 5
~-----I
~
-
Fig. 6
Interior
To replace a defective bulb, remove the two screws securing the lamp lens.
courtesy
lamp
Withdraw the festoon-type bulb from the retaining clips.
Fig. 9 ·
(B)
Luggage The lens is held in
the
lamp by four 1 ating lugs. To gain access to the bulb,
compartment
gently squeeze the sides of the I n tog th r and withdraw it from the lamp.
lamp
The bulb may then be withdrawn from it contact .
Fig. 9 (C)
Fig. 7
Fig
.~
Fig. 9
Ie
c
B
A
Fig. 9
so
786
1.