8
Function Keys
At times, ‘actions’ or ‘toggles’ will be displayed on the bottom line of the LCD. The
keys just below the display are then used as ‘function’ keys to perform an action
(A), or to toggle between two possible parameter values (a/b).
Figure 2 illustrates how keys are mapped to actions or toggles shown on the LCD.
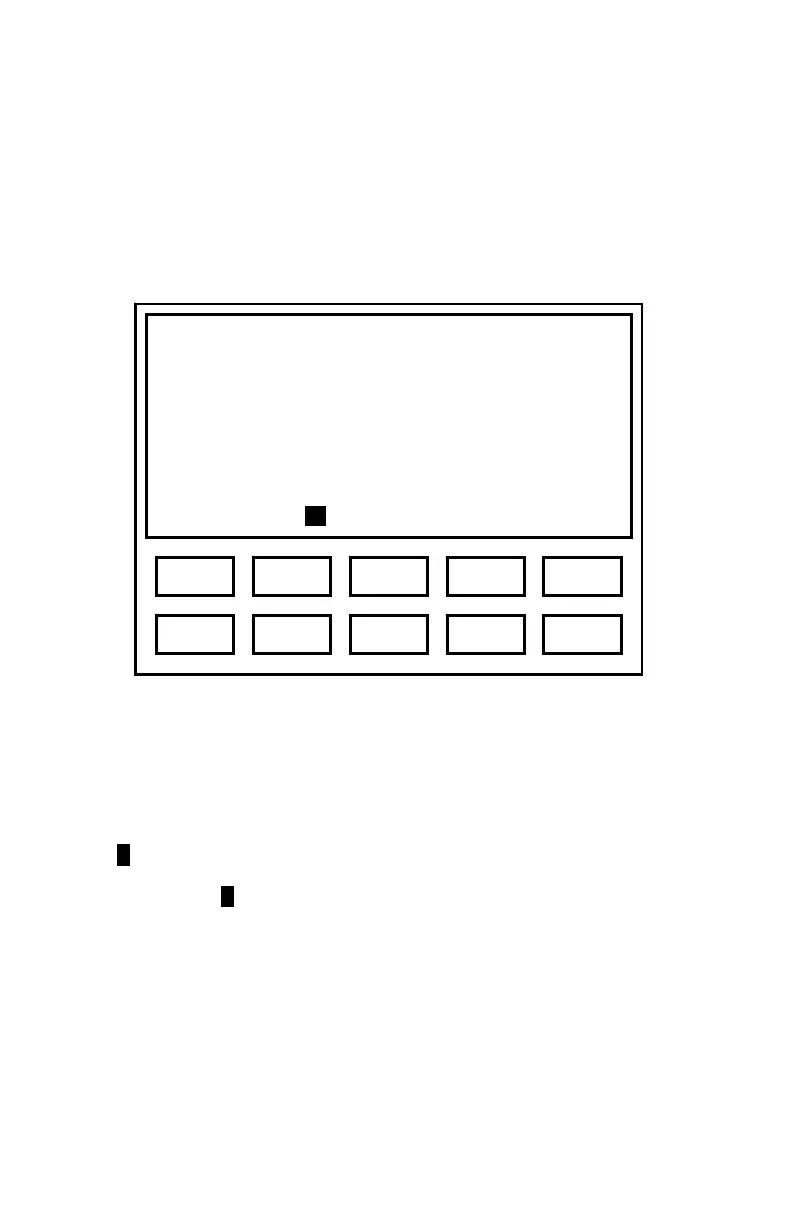
Figure 2. Mapping Function Keys to LCD Text
In this illustrative example, there are four ‘Actions’ (Auto, Send, Clr, and Talk)
assigned to ‘Function’ keys 1, 3, 4, and 5. Press {1} to perform action Auto, {3} to
perform the action Send, {4} to perform action Clr, and {5} to perform action Talk.
The ‘L/R’ shown above {2} indicates an L/R toggle with ‘R’ currently selected.
Pressing {2} will toggle between the two possible states, and the state selected will
be highlighted (e.g., R).
Upper screen area
displays text.
Last line may display
text OR function key
assignment; e.g.,
Auto L/R Send Clr Talk
3 1 5 2 4
8 6 0 7 9