CAN Bus Analyzer User’s Guide
DS50001848D-page 14
2009-2022
Microchip Technology Inc. and its subsidiaries
2.3 HARDWARE INSTALLATION
2.3.1 System Requirements
•Windows
®
XP
• .NET Framework Version 3.5
• USB Serial Port
2.3.2 Power Requirements
• A power supply (9 to 24-Volt) is needed when operating without the PC and when
updating firmware in the USB PIC MCU
• The CAN Bus Analyzer tool can also be powered using the USB port
2.3.3 Cable Requirements
• Mini-USB cable – for communicating with the PC software
• The CAN Bus Analyzer tool can be connected to a CAN network using the
following:
- Via the DB9 connector
- Via screw-in terminals
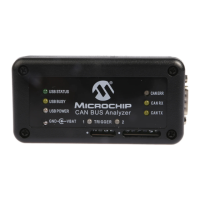
2.3.4 Connecting the CAN Bus Analyzer to the PC and CAN Bus
1. Connect the CAN Bus Analyzer via the USB connector to the PC. You will be
prompted to install the USB drivers for the tool. The drivers can be found in this
location:
C:\Program Files\Microchip Technology Inc\CANAnalyzer_verXYZ
2. Connect the tool to the CAN network using the DB9 connector or the screw-in
terminals. Please refer to Figure 2-1 and Figure 2-2 for the DB9 connector, and
the screw terminals for connecting the network to the tool.
TABLE 2-1: 9-PIN (MALE) D-SUB CAN BUS PINOUT
Pin Number Signal Name Signal Description
1 No Connect N/A
2 CAN_L Dominant Low
3 GND Ground
4 No Connect N/A
5 No Connect N/A
6 GND Ground
7 CAN_H Dominant High
8 No Connect N/A
9 No Connect N/A