13
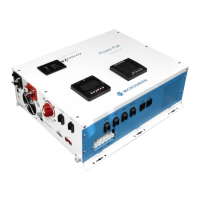
6 Installation
Follow all local regulations when installing the Power Pak.
It is recommended to have at least 2 persons present during installation.
The Power Pak should be installed indoors in a location that is dry, clean and cool. Leave at least 12 inches of
space around all sides of the Power Pak for ventilation. It is recommended to install the Power Pak near the
building’s electrical panel.
Working temperature: ‐10℃ to 40℃
Storage temperature: ‐40 to 70℃
Relative Humidity: 0% to 95%, non-condensing
Installation can be completed in 3-4 easy steps:
1. Wall-mount the Power Pak
2. Install and connect the batteries
3. Install and connect the solar panels (optional)
4. Connect the Power Pak to the electrical panel (optional) and generator (optional)
6.1 Components Not included
The following components must be provided by the user:
• A plywood board – 2 x 3 feet for the MINI or COMPACT models; 2.5 x 3.5 feet for the GRANDE model.
• #12 pan head wood screws (1” min.) for mounting the Power Pak on the plywood. Will require at least 6
screws for MINI or COMPACT; 8 screws required for the GRANDE.
• A set of hardware for mounting the plywood board to the wall
• Appropriate cable to connect to the electrical panel - 3-wire for MINI, 4-wire for COMPACT or GRANDE.
6.2 Tools required
● Drill or Power driver
● Screwdriver
● Multimeter
● Shovel (only if building does not have an existing electrical ground)