29
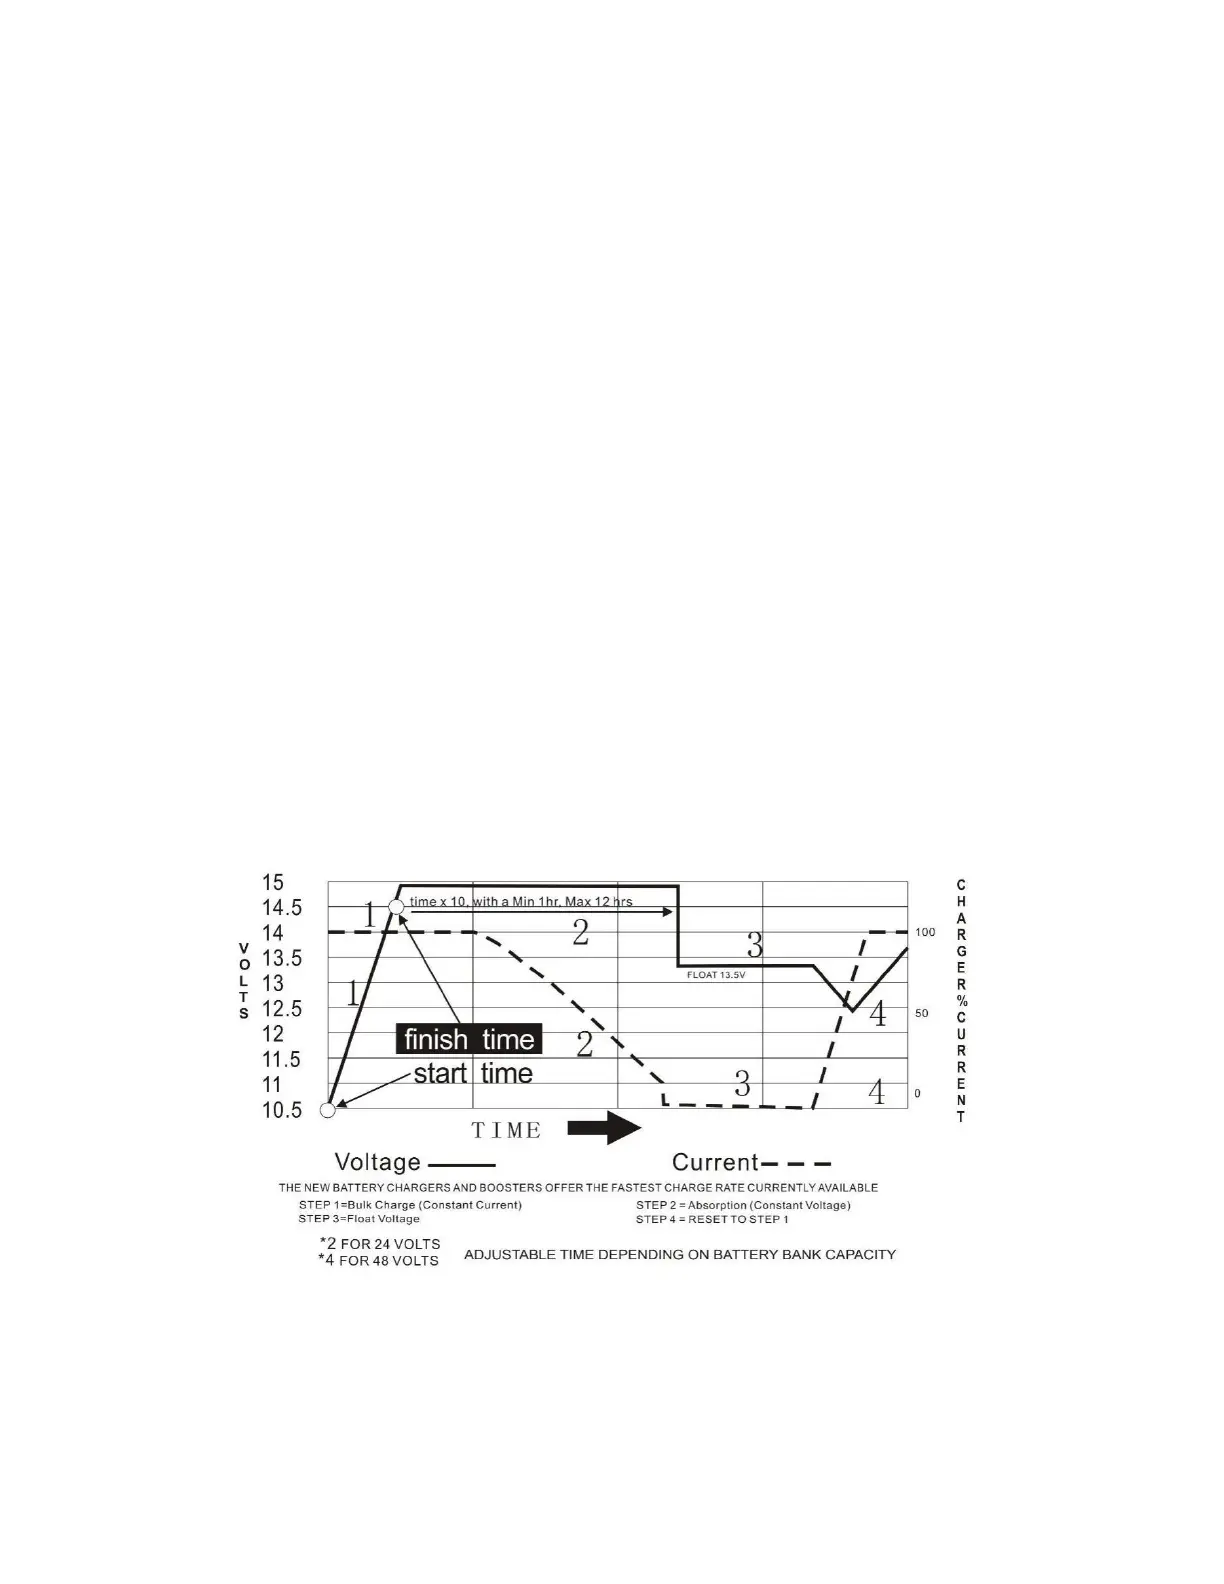
2. Absorb Charging: During the second charging stage the charger provides the batteries with a
constant voltage and reduces the charging current in order to maintain the Fast Charge Voltage
setting. The purpose of this stage is to “top-up” the batteries to full charge while limiting the voltage
to a safe level.
During this stage, the LED labelled Fast CHG will flash.
In this stage, the charger will start a T
1
timer equal to twice the duration of the Fast Charging stage (T
1
= T
0
x 2) and output constant voltage until the T
1
timer has run out. The T
1
timer has a min time of 1
hour and a maximum time of 12 hours. Then the charger will move on to the Float Charge stage.
3. Float Charging: In the third charging stage the charge voltage is reduced to the Float Charge Voltage
(determined by the battery type selection). The purpose of this stage is to keep the batteries fully
charged and ready for use. A very small amount of current is trickled to the batteries to keep them
fully charged at all times.
During this stage, the LED labelled Float CHG will be lit.
4. Reset: If the input power is reconnected or the battery voltage drops below 12/24/48V DC (depending
on the model), the charger will reset the cycle above. If the charge maintains the float state for 10 days,
the charger will automatically reset the cycle to protect the battery.
Figure: Battery Charging Processes
Note: the voltages shown in this graph are for an open lead acid battery. For different battery types,
adjust using the voltages in the table 8.2.1 below.