© Microhard 17
2.0 Quick Start
To connect to an
existing network,
contact your Network
Administrator for valid
network settings.
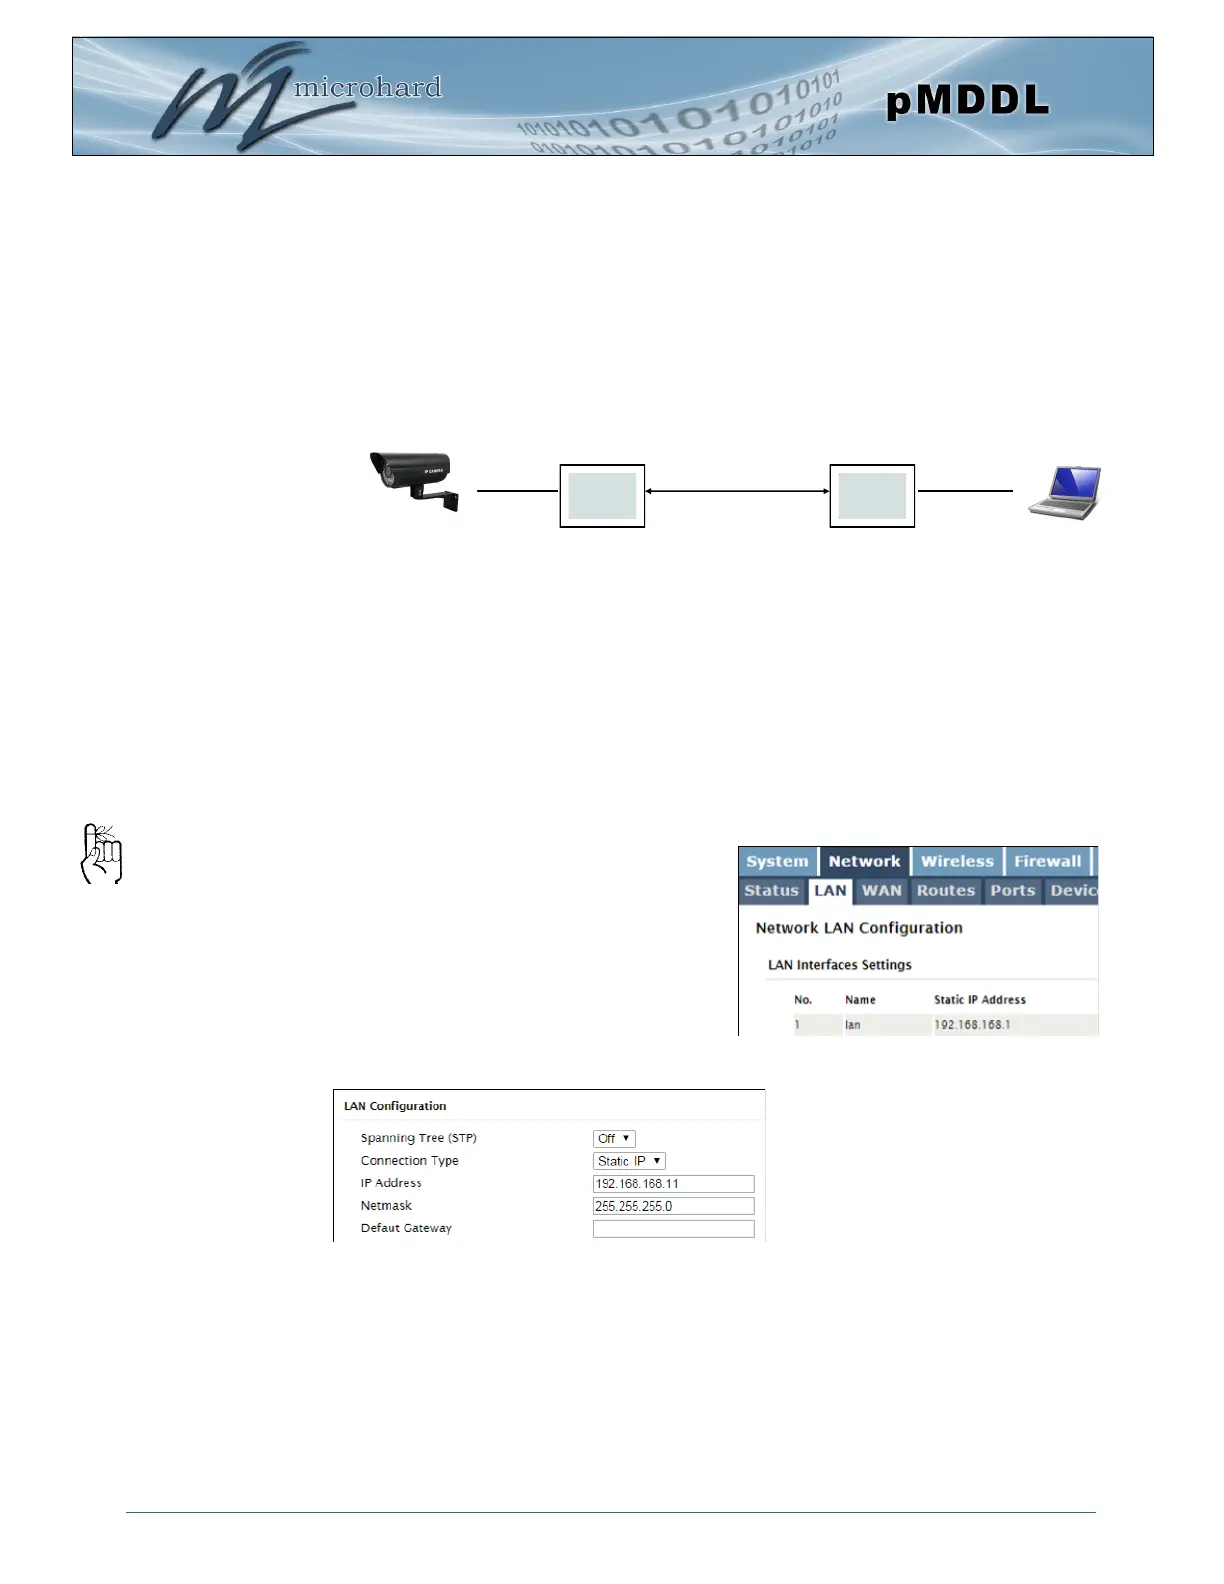
2.3 Simple Master and Slave — Manual Setup
This Quick Start example requires (2) pMDDL units, one will be configured as a
Master (M), the second unit will be configured as a Slave/Remote (S). This example
will show the basic steps required to set up each unit so that a simple network will
be established.
For the best performance it is required to connect the Master to the video source (camera) and
the remote to the video receiver. The pMDDL can support Point-to-Multipoint applications and
multiple remotes could be used to view the video from multiple locations.
2.3.1 Configuring the Master
✓ Use Section 2.1 Getting Started to connect, power up and log in to a pMDDL
unit.
✓ Give the pMDDL unit a unique IP address.
M
S
Wireless
Select Network from the top/main
navigation.
Select LAN from the submenu list.
Select Edit on the LAN interface 1.
Choose Static IP for the Connection
Type.
Enter the following Network
Information:
IP Address: 192.168.168.11
IP Subnet Mask: 255.255.255.0
Click on the Submit button to write the
changes to the pMDDL. The Cancel
button will revert back to last values
saved to the unit.
Once the IP Address is changed,
you will need to type the new ad-
dress into your browser to continue
the configuration.
Refer to Section 5.2.2 LAN for additional
information.
Ethernet Ethernet