13
V. ASSEMBLY
A. Top Panel and Base Pad Assembly
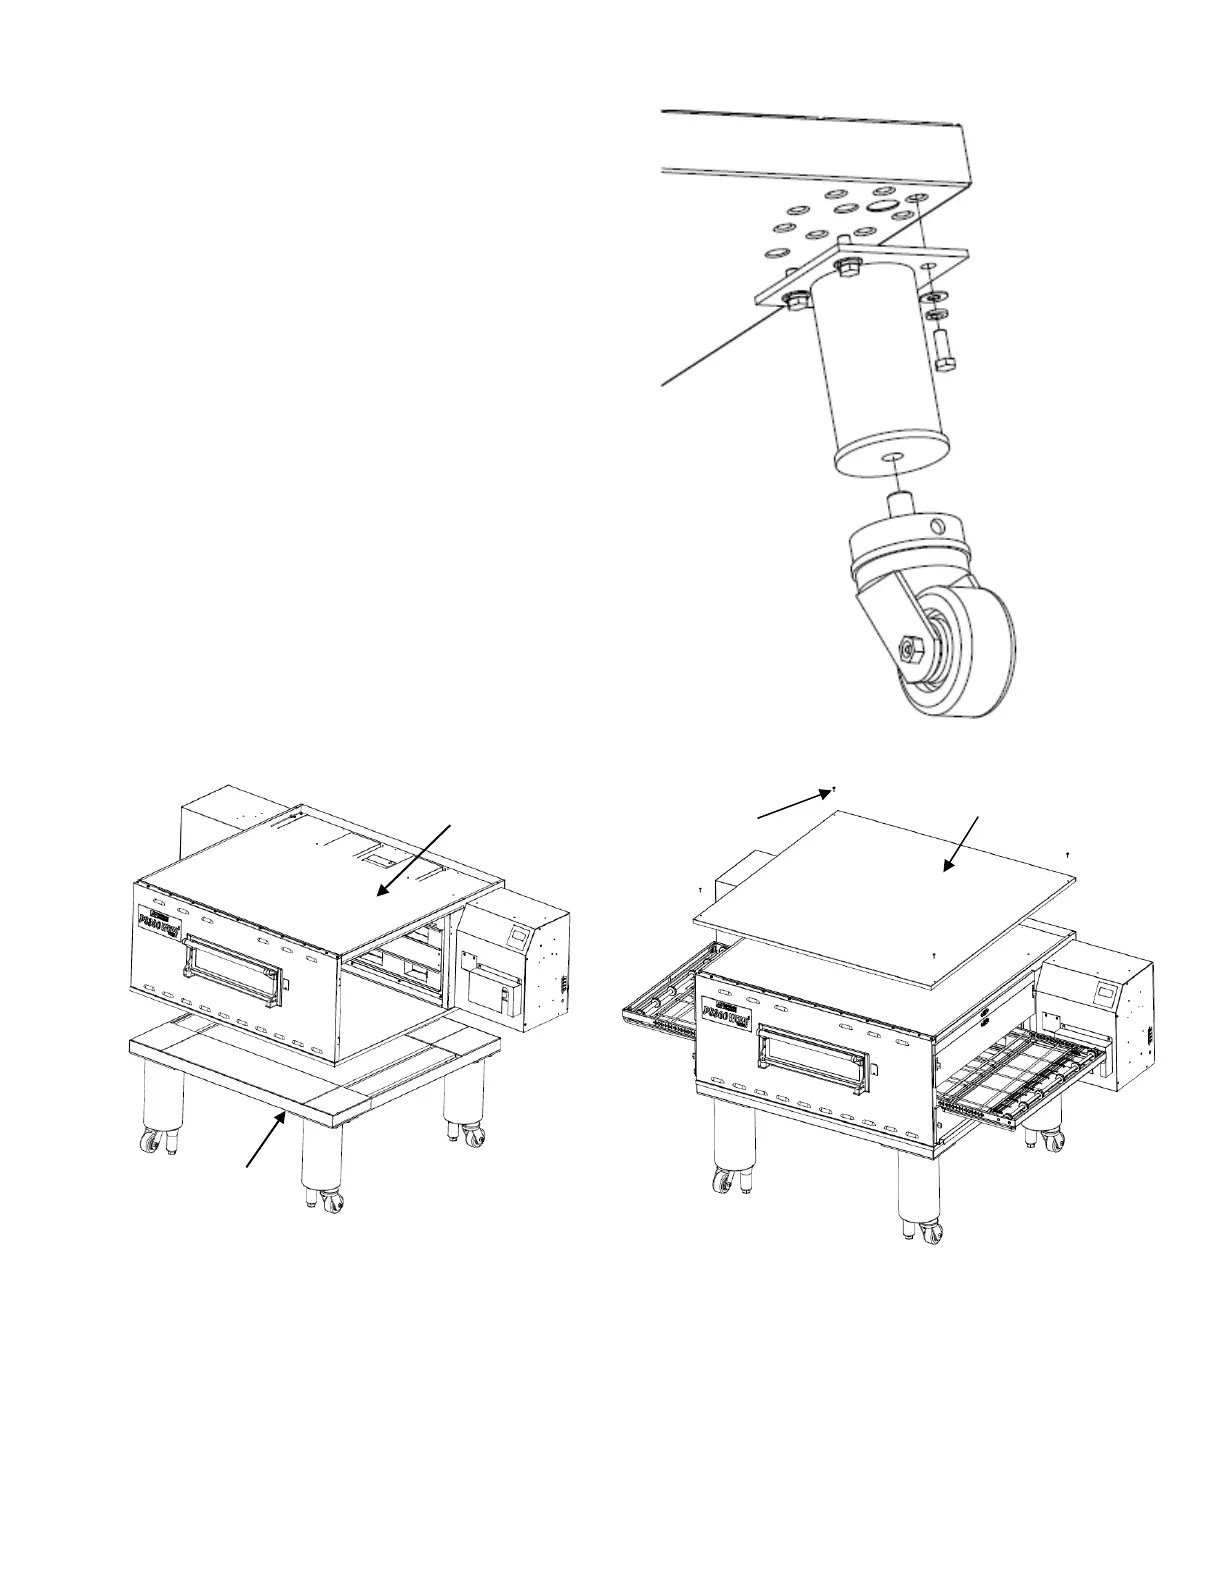
1. Install the four leg extensions onto the base pad using
the 3/8”-16 x 1” screws, 3/8” flat washers and 3/8” lock
washers supplied in the Base Pad Kit. See Figure 2-6.
Install the spring clip for the oven restraining cable to
the hole in the bottom middle of the base pad, see
Oven Base & Top Kit drawings (pages 5-7). This clip
will attach to the restraint cable that keeps the oven
from moving too far when installed on casters.
2. Install one caster or one adjustable 6” leg onto each
leg extension and tighten securely in place.
3. Install the lower oven cavity onto the base pad. See
Fig 2-7.
4. For single ovens ONLY:
Install the top panel using the screws included in the
base pad kit, as shown in Fig 2-8. Then, skip ahead to
Part C, Restraint Cable Installation.
For double or triple ovens:
Continue on to Part B, Stacking. Note that the top
panel should NOT be installed for double and triple
ovens until after stacking the oven cavities.
Fig 2-7. Base Pad Installation
Fig 2-6. Leg Extension and Caster Installation
Figure 2-8. Top Panel Installation
ASSEMBLED
BASE PAD
BOTTOM OVEN
ASSEMBLED
BASE PAD
BOTTOM OVEN
OVEN TOP PANEL
#10-32 X 3/4”
SCREWS
4

 Loading...