Do you have a question about the Middleby Marshall PS520E and is the answer not in the manual?
Critical warnings about flammable materials and proper installation to prevent damage or injury.
Details on warranty validity, authorized service, and use of genuine parts to maintain coverage.
Outlines Middleby Marshall's "No Quibble Limited Warranty" terms for customers in the U.S.A.
Specifies the warranty conditions for Middleby Marshall ovens sold outside the United States.
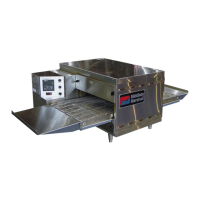
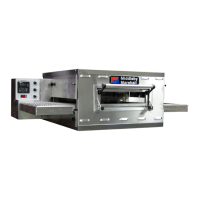
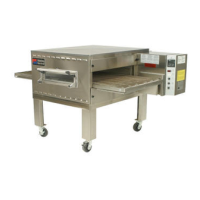
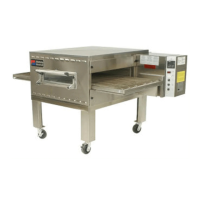
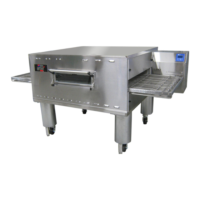
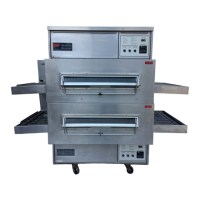
Describes the single, double, and triple oven configurations and how they operate independently.
Lists key physical and operational specs like belt width, dimensions, weight, and temperature range.
Details electrical needs, voltage, phase, amperage, and wiring configurations for various models.
Explains the operation of conveyor motor, blower, cooling fan, air fingers, and electric heaters.
Instructions for inspecting the oven upon arrival and handling potential shipping damage claims.
Details recommended clearances and ventilation requirements for safe operation and servicing.
Lists components included in the installation kit for single and double stack PS520 ovens.
Lists components included in the installation kit for triple stack PS520 ovens.
Illustrates front, bottom, and back views with key dimensions for a single PS520 oven.
Displays dimensional views for double and triple stacked PS520 oven configurations.
Outlines electrical specifications, circuit breaker needs, and supply wiring considerations.
Provides recommendations for proper oven ventilation for optimal performance and safety.
Explains how to check the oven data plate and details electric supply requirements for various voltages.
Describes the junction box connection and general wiring practices for electrical supply.
Identifies main controls: temperature, blower, heat, and conveyor switches.
Warns about hazards from rotating parts and electric shock when operating controls.
Explains the function of the door safety switch and the two-position blower switch.
Details the operation of the heat switch and the PID temperature controller.
Describes how to adjust conveyor speed using the digital control for bake time settings.
Provides a method to verify conveyor speed by timing an item passing through the oven.
Guide for turning on oven, setting controls, and preparing for baking.
Instructions for safe shutdown and actions during a power failure.
Detailed steps for daily operation, including breaker checks, switch settings, and preheating.
Step-by-step guide for turning off the oven, switch positions, and power disconnection.
Explains the meaning of indicator lights (SP Lock, Heat On, Set PT, Actual Temp, Overtemp).
Details the functions of Temperature, Unlock, Set Point, and Arrow keys for adjusting settings.
Lists symptoms like overcooking, no heat, or no airflow and provides corresponding solutions.
Guides through troubleshooting no heat, conveyor speed, or no power problems.
Crucial warnings for electrical hazards and proper shutdown before performing maintenance.
Instructions for safely removing the oven for servicing and its subsequent reinstallation.
Daily cleaning of exterior and inspection of cooling fan grille and intake.
Daily cleaning of conveyor belt and crumb pans to remove food particles.
Advises on cleaning methods, cautions against caustic cleaners or excessive water.
Step-by-step guide on removing the conveyor assembly for thorough cleaning.
Illustrates the process of lifting and sliding the conveyor to remove it from the oven.
Instructions for marking and disassembling air fingers, including blank plates and outer plates.
Guidance on reassembling inner/outer plates, ensuring correct alignment and avoiding pinching.
Steps for pushing fingers back, emphasizing correct marking and tab alignment.
Instructions for reinstalling lower/upper end plugs and ensuring they are tightened correctly.
Steps for positioning the conveyor into the oven and reinstalling the extension.
Procedure for checking conveyor belt tension and guidelines for adjustment.
Step-by-step guide for removing conveyor belt links using pliers, including master links.
Instructions for drive sprocket reassembly, chain attachment, and alignment.
Tasks for 3-month intervals: tightening electrical terminals and checking ventilation.
Tasks for 6-month intervals: conveyor motor brushes and venting system.
Lists essential spare parts in a kit, including control components, motors, and heating elements.
Addresses overcooking, no heat, or insufficient airflow issues.
Guides through troubleshooting no heat, conveyor speed, or no power problems.
Detailed view of the wiring schematic for E208-240V, 50/60 Hz, 1-phase ovens.
Detailed view of the wiring schematic for E380-480V, 50/60 Hz, 1-phase ovens.
Detailed view of the wiring schematic for CE-certified E230-240V, 1-phase ovens.
Detailed view of the wiring schematic for CE-certified E380-400V, 1-phase ovens.
Detailed view of the wiring schematic for CE-certified E380-400V, 3-phase ovens.
Reiterates warnings on installation, servicing, and using authorized parts/personnel.
| Model | PS520E |
|---|---|
| Category | Oven |
| Conveyor Width | 20 inches |
| Belt Width | 20 inches |
| Type | Conveyor Pizza Oven |
| Power Supply | Electric |