25
SECTION 4
MAINTENANCE
G. Conveyor Belt Link Removal
1. Using long nose pliers, an entire link can be
removed with the conveyor assembly either in or out of
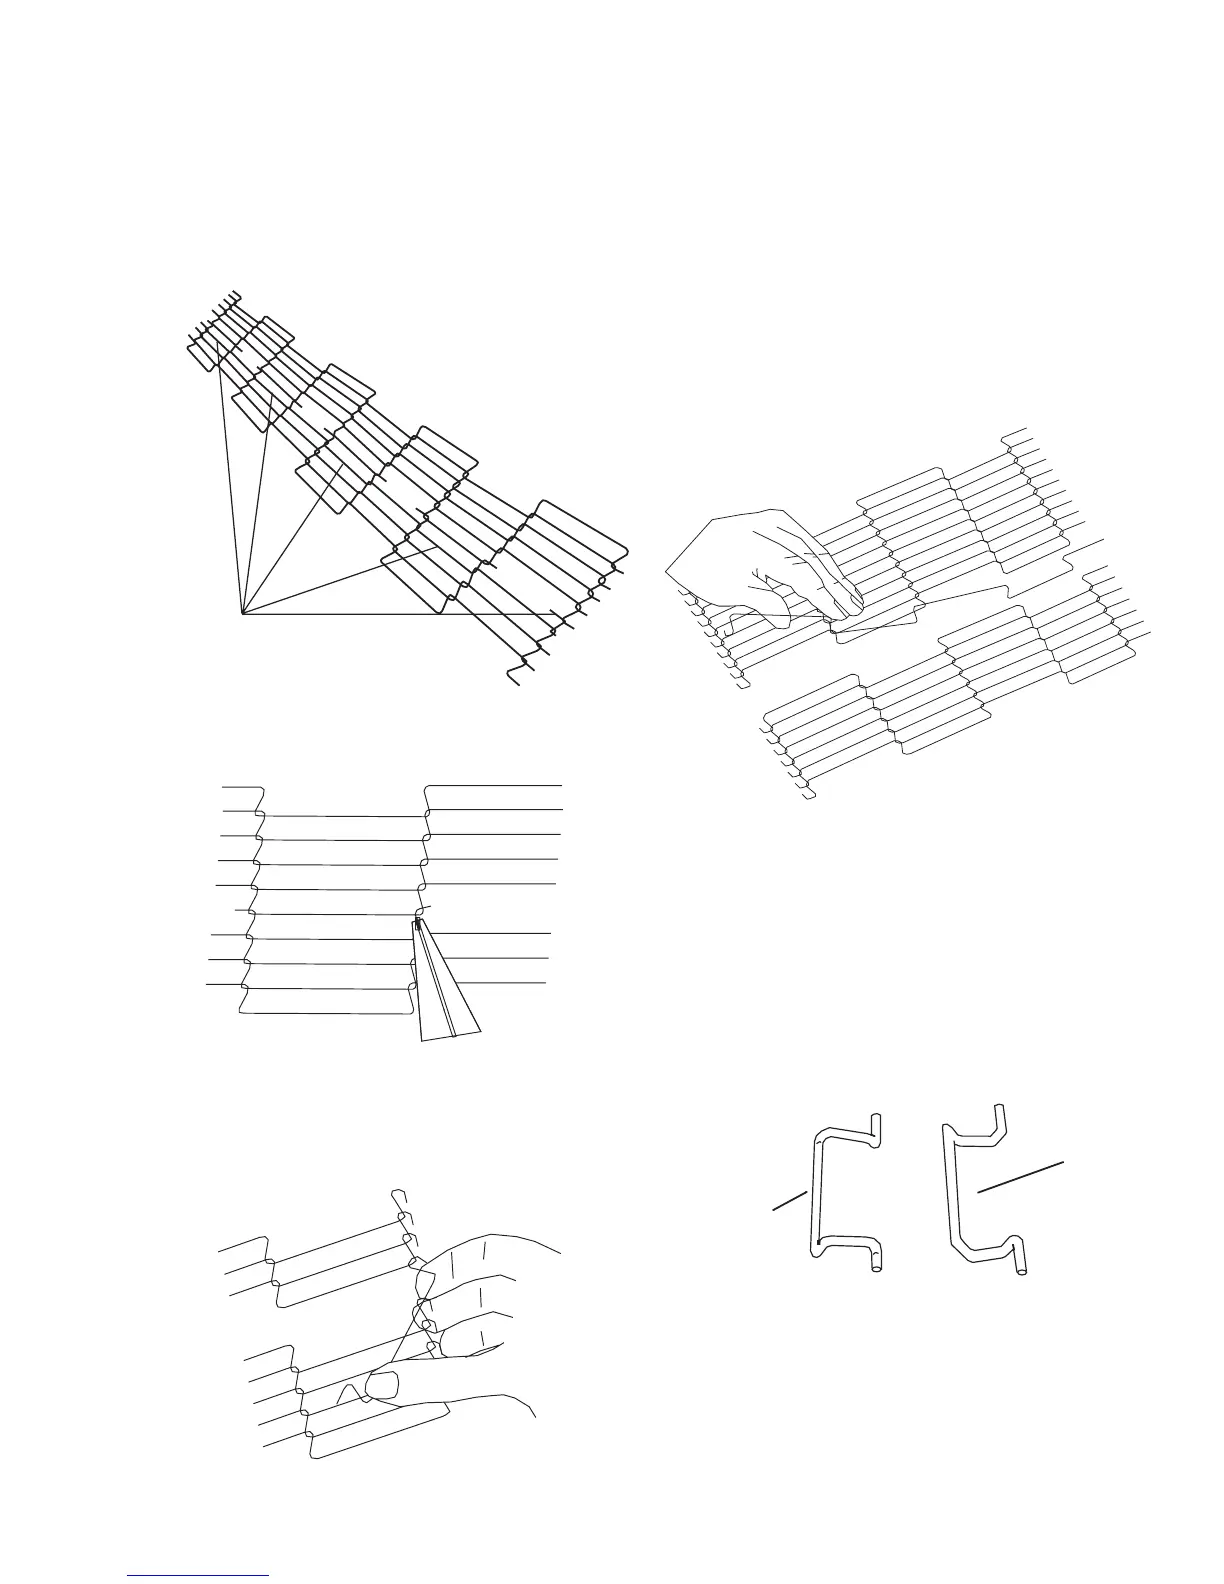
the oven. Position master links at the end of the
conveyor as shown in Figure 4-24.
2. Using long nose pliers, unhook master links at left
end of conveyor as shown in Figure 4-25.
3. Remove the outside master links on the right and
left sides of the conveyor belt as shown in Figure 4-26.
Figure 4-24
Figure 4-25
Figure 4-26
4. Unhook the link to be removed.
5. Pull up on the link section and remove. Do not
discard the link removed as it may be used for making
spare master links.
NOT: If a section of the conveyor is being replaced it
should be done now. Remove the links that need
replacing and use the section of conveyor belt
furnished in the installation kit to replace them.
NOTE: Before connecting the inside master links,
notice that these links have a correct position (Figure
4-28). The link at the right is in the correct (horns up)
position for inserting into the conveyor belt. The horns
facing down are in the incorrect position.
Master
Links
Figure 4-27
Figure 4-28
Correct
Position
Incorrect
Position