GRX-5100 Cable Connections
Click the tabs at the top and side to view each section
Charging ProcessHEV Workstation
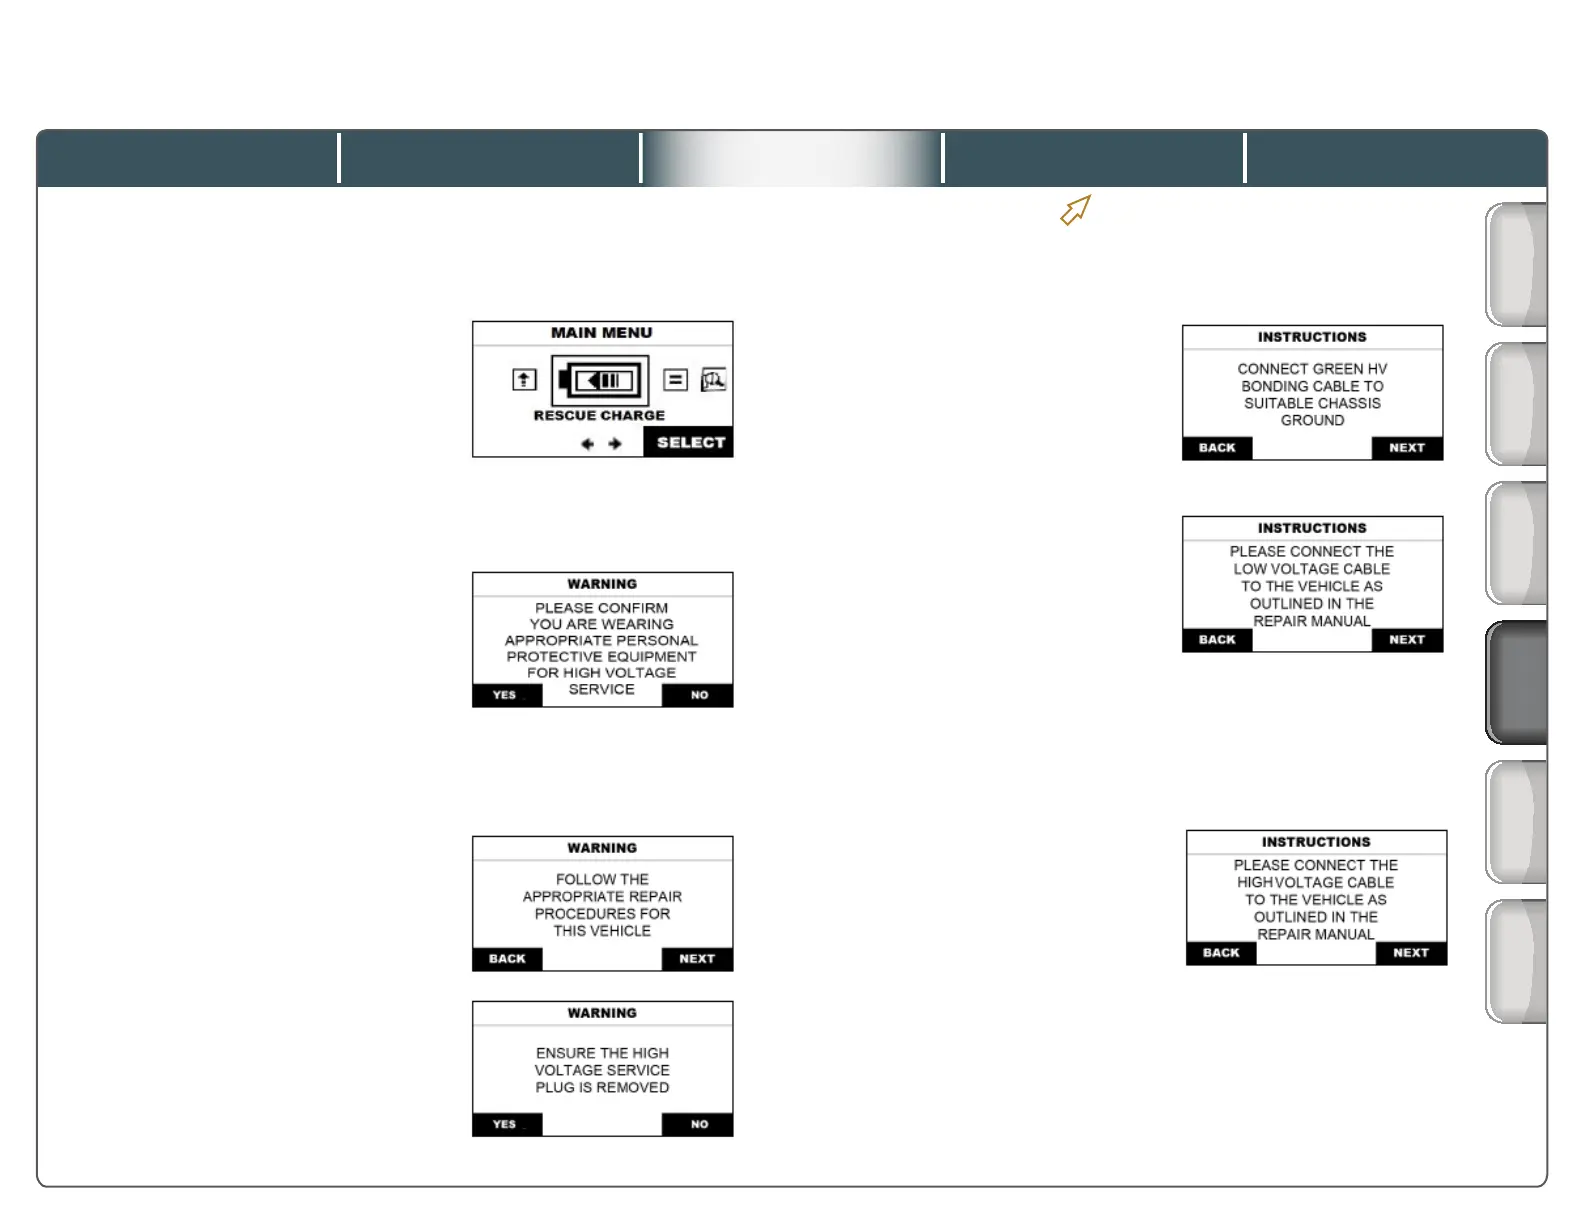
1. Main Menu – Use the left
and right arrow keys on
the control panel to scroll
through the menu choices
until “Rescue Charge” is
highlighted, then press the button
under “Select.”
2. Warning – Conrm you are
wearing appropriate personal
protective equipment by
pressing the button under
“Yes.” Always refer to the
repair information for the specic Toyota
hybrid model you are working with.
3. Warning – Conrm you are
following appropriate repair
procedures by pressing the
button under “Next.”
4. Warning – Conrm that you
have removed the service
plug grip by pressing the
button under “Yes.”
5. Instructions – Connect the
green HV (EV) bonding cable
to the vehicle per the repair
instructions, and then press
the button under “Next.”
6. Instructions – The only
wire in the low voltage
cable (Cable “R”) is the
green bonding wire that was
connected to the vehicle in
Screens, Part 1
These are the screens on the GRX-5100 control panel that you will see when performing a rescue charge.
Battery
Condition
Before
Servicing
Process
Overview
Screens:
Part 1
7. Instructions – Connect the
vehicle-specic high voltage
cable between the vehicle
and the high voltage fuse
box. Then connect the
universal cable between the fuse box and the
GRX-5100. When the high voltage cables are
connected, press the button under “Next.”
the previous step. Therefore, it is only necessary
to now connect the low voltage cable to the GRX-
5100, and then press the button under “Next.”
(See “2001-2009 Pruis” tab for exceptions.)
Battery Charge
Active Test
Toyota NiMH Battery Rescue Charging with the GRX-5100
Quick Training Guide QT015A
Screens:
Part 2
2001-2009
Prius
13 of 21
©Toyota Motor Sales, U.S.A., Inc., December 16, 2015