GRX-5100 Cable Connections
Click the tabs at the top and side to view each section
Charging ProcessHEV Workstation
Screens, Part 2
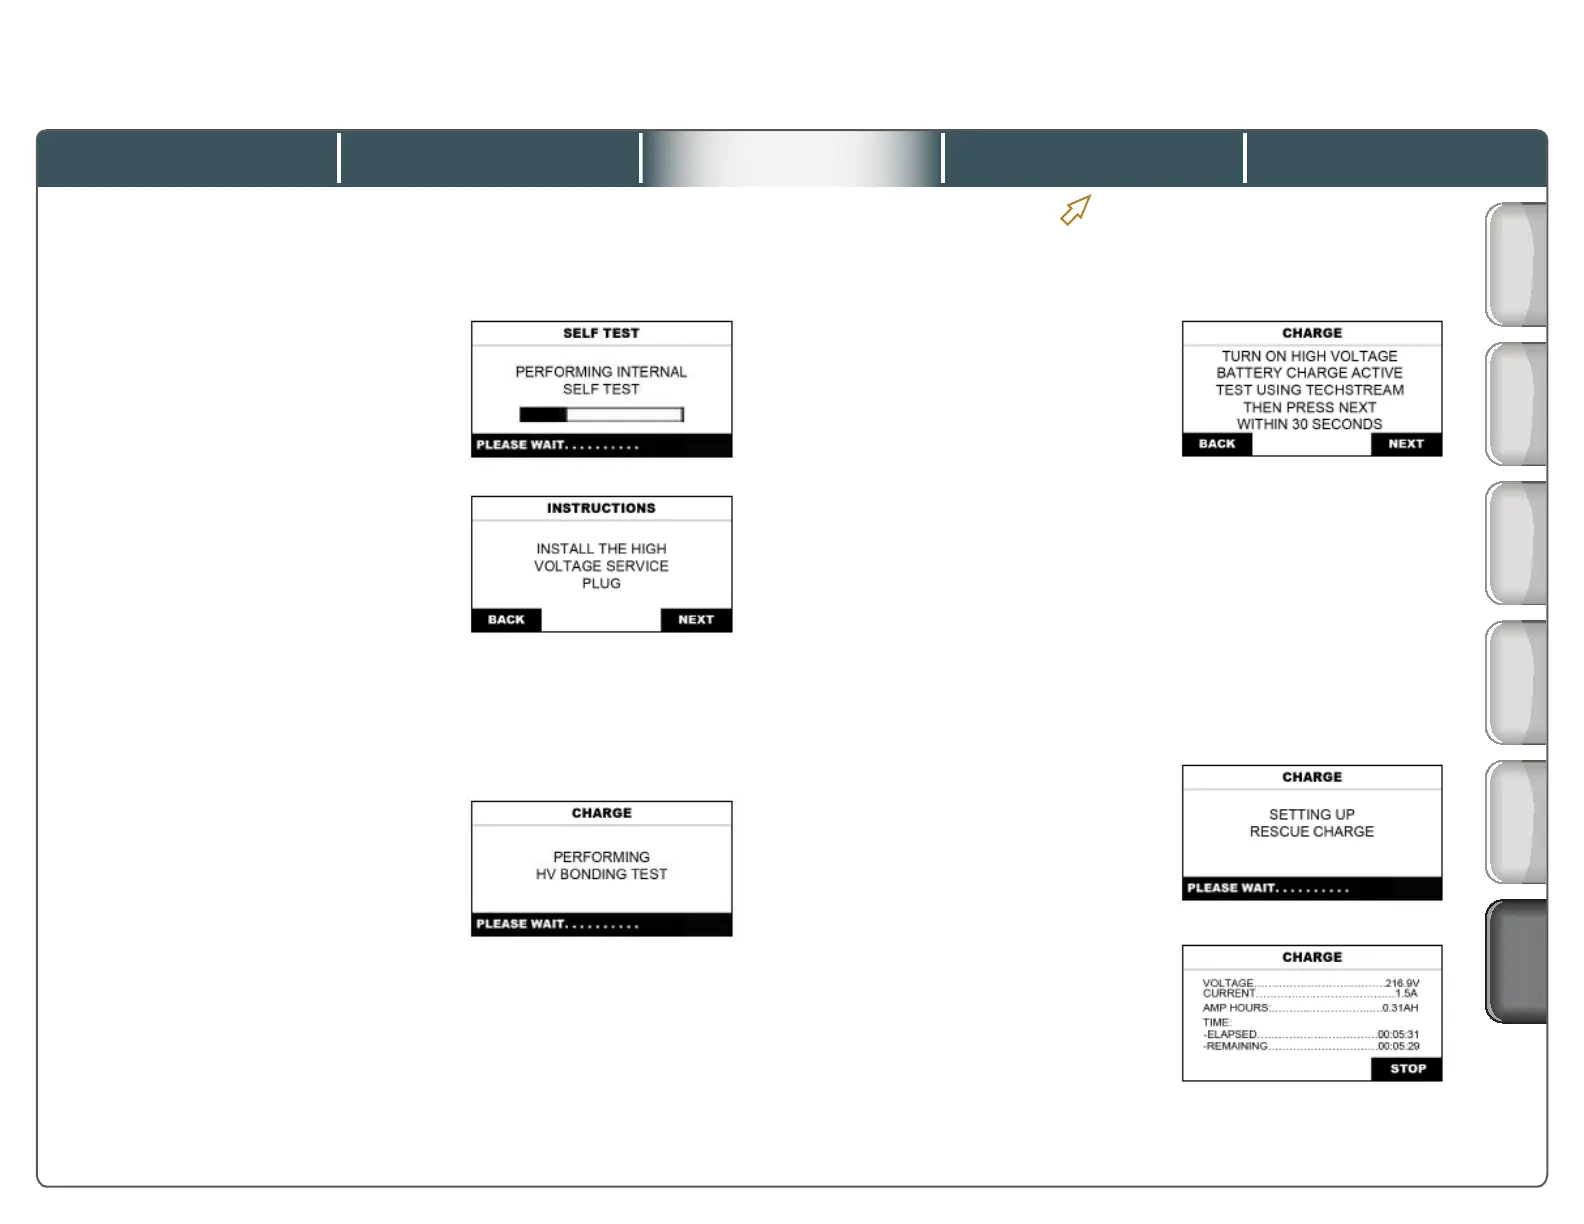
These are the screens on the GRX-5100 control panel that you will see when performing a rescue charge.
Battery
Condition
Before
Servicing
Process
Overview
Screens:
Part 1
Screens:
Part 2
8. Self-Test – Wait while the
GRX-5100 performs an
internal self test.
9. Instructions – Install the
service plug grip, connect
the negative terminal of
the auxiliary battery and
connect a GR8 in power
supply mode. Turn the vehicle power
switch ON and then press the button
under “Next.”
Charge – Wait while the
GRX-5100 performs an HV
bonding test.
Charge – Connect the
Techstream to DLC3 and
navigate to the Battery
Charge Active Test. Turn
the Active Test ON, and
then press the button under “Next” within 30
seconds. Observe the Data List to verify that
SMRB and SMRG are ON.
If you miss the 30-second window, charging
will abort. You will need to cycle the ignition,
and exit and restart Techstream to begin the
procedure again.
Charge – Wait while the
GRX-5100 prepares to
begin charging.
Charge – As charging is
taking place, monitor the
battery voltage.
11.
12.
13.
10.
Battery Charge
Active Test
Toyota NiMH Battery Rescue Charging with the GRX-5100
Quick Training Guide QT015A
2001-2009
Prius
15 of 21
©Toyota Motor Sales, U.S.A., Inc., December 16, 2015