100 nF
20 K
1 M
B
C
D
E
F
G
H
24 VDC
+
PTC 70
100 nF
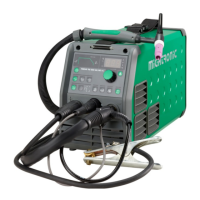
Connection of electrode holder for MMA
The electrode holder and return current cable are
connected to plus tap (6) and minus tap (5). Observe the
instructions from the electrode supplier when selecting
polarity.
CWF Multi (option)
It is possible to connect to the PI with up to 8 CWF Multi
units via dedicated CAN BUS connector placed on the rear
side of machine (option). In order to permit this control
capability, enter the USER Menu and select “Fdr” (feeder),
then access “Act” (Active devices) and set the parameter to
1. (see USER Menu)
Now the PI is ready to control the CWF directly from the
box: for each TIG welding program it is possible to select
what CWF unit must be activated and the relative CWF
program in the range 1 to 20.
Depending from the settings on the CWF, if the unit is in
OFF mode the error message “Fdr” can be displayed on PI
and the welding process stopped. This is to inform the user
the CWF is not responding to start signal from PI.
Connection of remote control
PI can be controlled via a remote control or a welding
robot. The remote control socket (8) has terminals for the
following functions:
A: Input signal for welding current, 0 –
+10V input impedance: 1Mohm
B: Signal ground
C: Arc detect – contact of relay (max.
1Amp), fully insulated
D: N.C.
E: Arc detect – contact of relay (max. 1Amp), fully
insulated
F: N.C.
G: Supply +24VDC. Short circuit protected with PTC
resistor (max. 50mA)
H: Supply ground
A
B
C
H
G
F
E
D
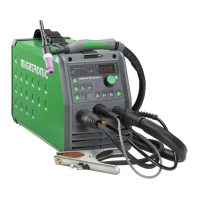
Switch on, press, weld
Welding program setting
• Switch on the welding machine on the main switch (2)
• Select process
See Quickguide.
• Adjust welding current and
secondary parameters.
For more information about
setting the parameters, please
refer to the quick guide
• The machine is ready to weld
t 1 t2
%
V
TIG AC/DC
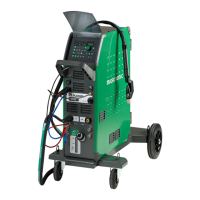
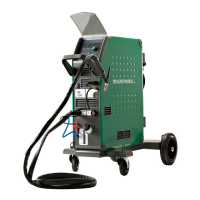
Trolley with automatic mains voltage transition
(Special equipment)
Machines supplied with autotransformer can be connected to the
following mains supplies: 3*230V, 3*400V, 3*440V og 3*500V.
Press the power switch (18) to turn on the autotransformer
(green indicator light). The built-in energy saver function will
automatically turn off the welding machine after 40 minutes of
inactivity. Press the button (17) to turn on the machine again (red
indicator light).
The energy saver function can be permanently disconnected by a
Migatronic technician.
19 Pulse
Key activated = traditional pulse.
20 Pulse setting (traditional)
Press the menu key until the LED shines at:
Pulse time: Welding current period.
Pause time: Base current period.
Base current: %of pulse current.
21 Quick pulse
22 Pulse setting (quick pulse)
Press the menu key until the LED shines at:
Pulse frequency: Pause time + pulse time
Base current: %of pulse current.
23 Synergy PLUS™
Key activated = Synergy PLUS™.
Only mean current can be adjusted.
24 TIG-A-Tack + tack welding function
Key activated = TIG-A-Tack + tack welding
function and setting a tack-welding time
at key 27, allowing TIG-A-Tack welding =
almost invisible tacks.
25 Hotstart (MMA)
Start amp is briefly increased in %of the
welding current.
26 Arc Power (MMA)
Current is briefly increased during short
circuits.
27 Spot time
Time between slope up and slope down.
Tack/TIG-A-Tack time when key 24 is active.
28 Current type
Choice of AC or DC welding.
29 AC-t-balance, time-based
Time balance between positive and
negative half-wave is adjusted in %.
30 AC frequency
Setting of +/- frequency of the AC current.
31 AC-electrode preheating
Automatic electrode preheating.
32 AC-l-balance, amperage-based
The cleaning current of the positive half-
wave is adjusted in %in proportion to the
welding current of the negative half-wave.
33 Choice of secondary parameters
Opens parameters 12-18 and 27.
IGC (12+17)
If IGC (Intelligent Gas Control) is installed
(possible in Pi 350/500), the following
functions are available:
• Synergic gas flow relative to the set
current, if liter is set at less than 4 l
(please refer to the instruction manual
for any adjustment)
• Synergic gas post flow (time) relative to
the set current, if time is set at less than
0 second (please refer to the instruction
manual for any adjustment)
Using IGC requires an inlet pressure to the
welding machine of 1.5-6 bar fromthe gas
supply.
GUIDE PI 200 I 250 I 350 I 500
QUICKGUIDE PI
200 I 250 I 350 I 500
UK
WARNING
When you activate the torch trigger,
there is voltage applied to the
welding wire and electrode
Lift instructions
The lifting points must be
used (please see figure)
when lifting the machine.
The machine must not be
lifted with mounted gas
bottle.
Do not lift the machine by the handle.
Do not step on the handle.
 Loading...