15
Installing the Post Bracket Assembly and Gate Bracket
Step 7
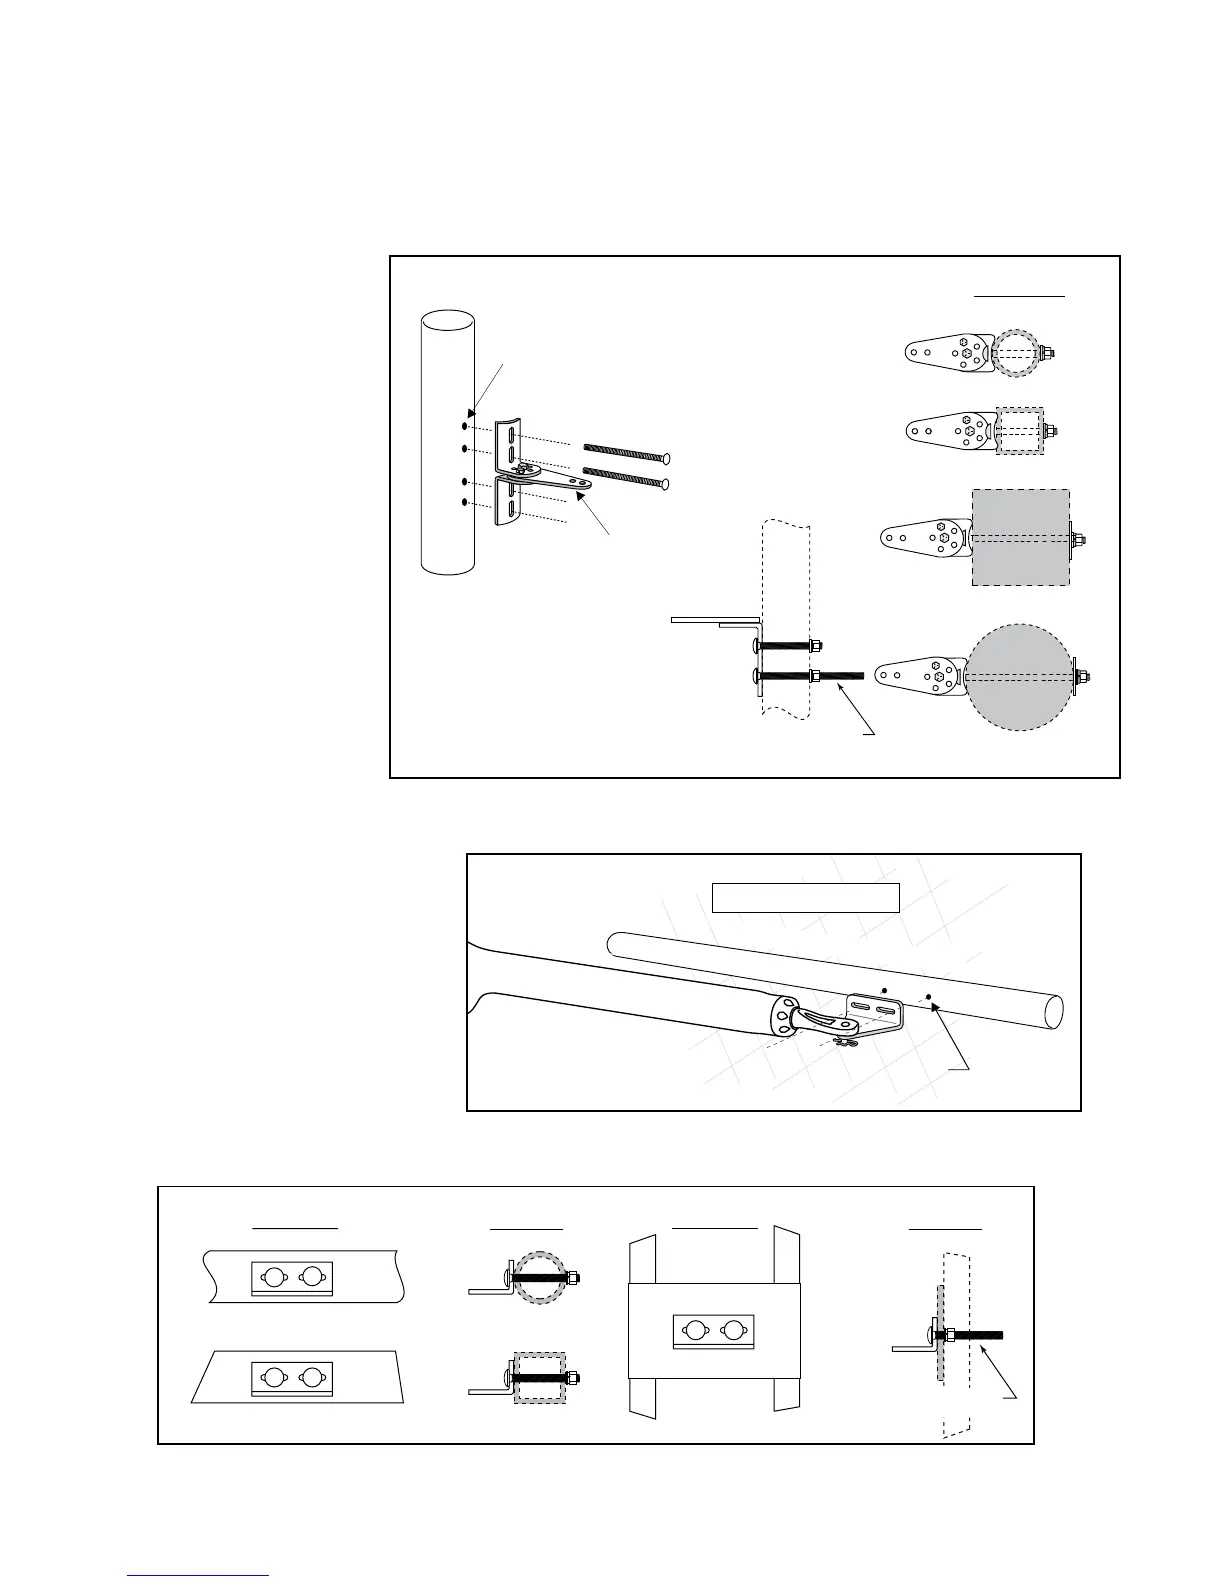
Mark reference points for bolt holes on the fence post through middle of bracket slots. Mark reference points for bolt holes
on the gate cross member through middle of gate bracket slots. After marking your reference points, remove the opener and
brackets from the fence and gate.
Step 8
Drill
3
/8" holes into fence post
as marked.
Step 9
Fasten post bracket assembly to
the fence post using
(4)
3
/8" x 8" bolts, washers,
lock washers, and nuts
(provided).
NOTE: In cases where the
fence post has a diameter larger
than 6", threaded rods or
carriage bolts longer than 8"
(not supplied) must be used.
Step 10
Drill
3
/8" holes into the gate
cross member as marked.
Mount gate bracket using (2)
3
/8" x 2-3/4" bolts, washers, lock
washers, and nuts (provided).
NOTE: After the gate opener installation
is complete and operation of the opener
system has been tested, you should
remove excess bolt length extending
beyond the tightened nuts with a
hacksaw or bolt cutters.
Gate In Open Position
LEVEL horizontal cross member
Mark cross member through middle of
gate bracket slots and drill 3/8" holes
Gate Bracket Mounting Examples
Post Bracket
Assembly
Mark fence post through
middle of bracket slots
and drill 3/8" holes
Round Metal Post
Round Wood Post
Square Metal Post
Square Wood Post
Remove excess bolt length
with hacksaw or bolt cutters
SIDE VIEW
TOP VIEW
EXAMPLES
Round Tube & Chain Link Gate
Square Tube Gate
Mounting Plate
Created for
Decorative Gate
(required but not
supplied)
Remove excess bolt length
with hacksaw or bolt cutters
FRONT VIEW
SIDE VIEW
FRONT VIEW
SIDE VIEW



 To Next Page