10 Mighty Mule MM360 Installation Instructions
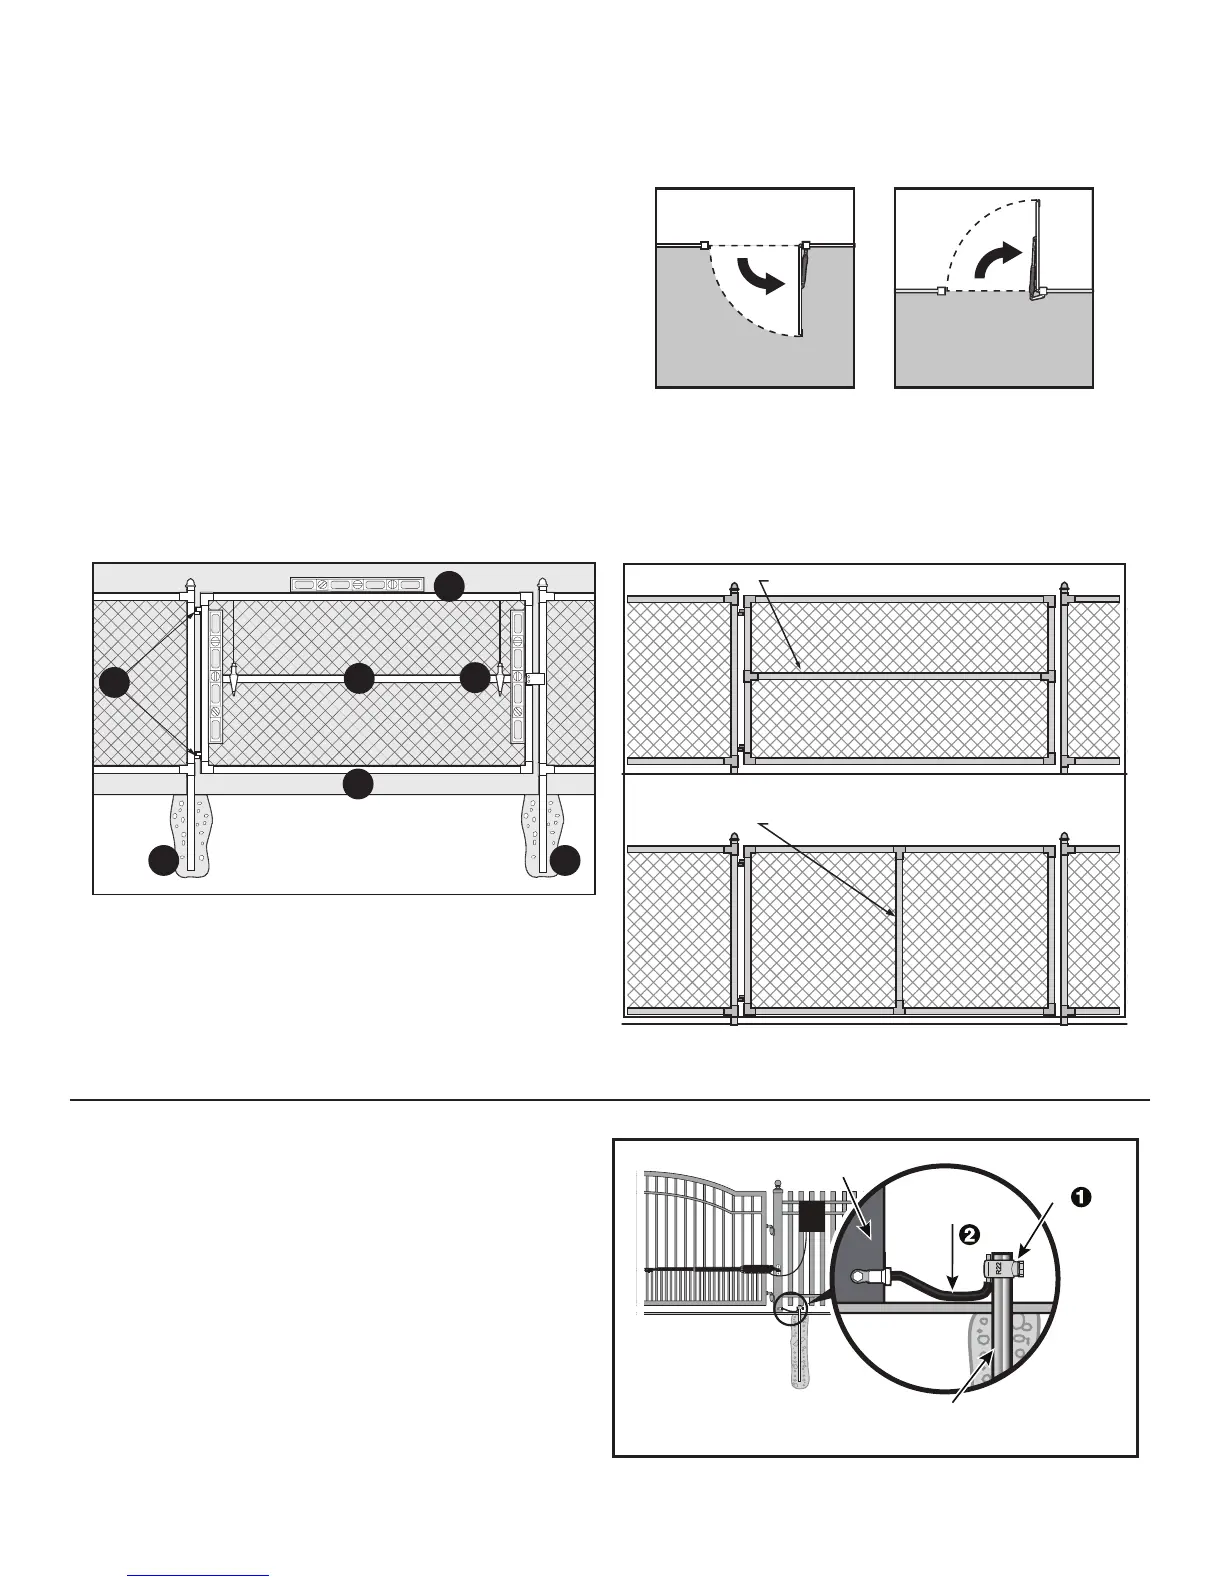
2. Check Direction of Gate Swing
The Mighty Mule Gate Opener is designed for PULL-TO-OPEN installations. PUSH-TO-OPEN installations require a
Push-To-Open bracket [FM148, not included]. Push-to-Open Installation Instructions begin on page 32.
3. Prepare the Gate
• The gate must be plumb, level, and swing freely on its
hinges.
• Wheels must NOT be attached to the gate.
• The gate must move throughout its arcs without
binding or dragging on the ground.
• Note that a gate over 250 lbs. should have ball
bearing hinges with grease fittings.
• The gate post should be secured in the ground with
concrete so it will minimize twist or flex when the
opener is activated.
• Make sure there is a stable area for mounting the gate bracket (this may require the addition of a horizontal or vertical
cross member).
Your Property Your Property
Pull-To-Open
(arm retracts to open)
Push-To-Open
(arm extends to open)
Vertical Cross Member
E
A
B
C
DD
F
A – Level D – Posts Secured in Concrete
B – Plumb E – Centerline Mounting
C – Free Swinging F – Good Working Hinges
Gate Grounding (recommended)
• Shorter wire (6 AWG) is better, 1 to 2 feet recommended.
• Bolt ring terminal at end of cable 4 - 6 inches above ground level.
R4196 Kit Includes:
• Ground Rod Clamp
• 6 AWG Wire (3 feet)
NOTE: No grounding system absolutely protects against lightning
strikes. If installed correctly, a grounding system will help minimize
damage to your gate opener.
Metal Gate
Post
6 AWG Wire
8 Foot Ground Rod
5/8” Copper Clad Steel (not included)
- available at local homecenter and hardware stores -
Ground Rod
Clamp