EasyManua.ls Logo

Miller A-200 Series - User Manual

Miller A-200 Series
28 pages
Print Icon
To Next Page IconTo Next Page
Loading...
Processes
OM-225 428B 2014−07
Visit our website at
www.MillerWelds.com
File: TIG (GTAW)
Hand-Held Air-Cooled TIG
(GTAW) Torch
A-200 Series (WP-26 Series)
A-200
A-200V
A-200FV
A-200F
A-R200F
A-R200FV
(WP-26)
(WP-26V)
(WP-26FV)
(WP-26F)
(WP-R26F)
(WP-R26FV)
TIG (GTAW) Welding
Description

Questions and Answers

  • M
    Melissa MaloneJul 29, 2025
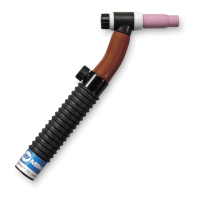
    What to do if there is no shielding gas flow from the Miller A-200 torch?
    • K
      Kathleen WatsonJul 29, 2025
      If you're not getting any shielding gas flow, first ensure the valves on the gas supply are open. Then, check the cable for any kinks or blockages, and tighten all gas supply fittings. Also, inspect the cables and torch for cracked insulation or bad connections, repairing or replacing as needed. Finally, make sure the collet is installed correctly.
  • S
    sharpshawnAug 3, 2025
    Why won't the arc start on my Miller Welding Accessories?
    • B
      Brittney VillarrealAug 3, 2025
      If the arc won't start, check the cable and work connections to ensure the weld circuit is complete. Also, verify that shielding gas is present.
  • C
    Connie WoodsAug 10, 2025
    How to prevent tungsten electrode oxidizing in Miller Welding Accessories?
    • A
      Aaron BurnsAug 10, 2025
      To prevent the tungsten electrode from oxidizing, shield the weld zone from drafts and increase the postflow time. You may also need to increase the gas flow rate, checking the manufacturer’s recommendations. Additionally, check and tighten all gas fittings, and inspect the gas valve and flow meter/regulator. Finally, select the proper size and type of tungsten.
  • G
    gutierrezkristenAug 15, 2025
    What to do if Miller A-200 has difficulty establishing arc?
    • D
      daytammyAug 16, 2025
      If you're having difficulty establishing an arc, select the proper size and type of tungsten. Check the cables and torch for cracks or bad connections, and ensure that torch cables are not close to any grounded metal. Repair or replace parts as necessary. Check the torch consumables, making sure the collet and collet body are correctly installed and tightened. Check the welding power source High Frequency control, and if necessary, check and adjust spark gaps.
  • A
    Anthony BennettAug 22, 2025
    What to do if Miller A-200 torch gas valve is not working properly?
    • C
      Chris LongAug 22, 2025
      Have a Factory Authorized Service Station/Service Distributor check the valve.

Summary

SECTION 1 - SAFETY PRECAUTIONS FOR GTAW TORCHES - READ BEFORE USING

1-1. Symbol Usage

Explains symbols indicating hazards and special instructions.

1-2. Arc Welding Hazards

Details hazards like electric shock, arc rays, fumes, and noise.

SECTION 3 - SPECIFICATIONS

3-1. Specifications

Details amperage rating, cooling method, tungsten size, cable options, and dimensions for various models.

SECTION 4 - INSTALLATION

4-3. Connecting Torch

Provides instructions for connecting the torch with one-piece cable to the power source.

SECTION 5 - MAINTENANCE & TROUBLESHOOTING

5-1. Routine Maintenance

Outlines daily, weekly, and monthly maintenance checks for the torch and its components.

5-2. Troubleshooting

Lists remedies for issues like excessive tungsten consumption, wandering arc, and porosity.

SECTION 6 - SELECTING AND PREPARING A TUNGSTEN FOR DC OR AC WELDING WITH INVERTER MACHINES

SECTION 7 - GUIDELINES FOR TIG WELDING (GTAW)

SECTION 8 - PARTS LIST

WARRANTY

Miller A-200 Series Specifications

General IconGeneral
BrandMiller
ModelA-200 Series
CategoryWelding Accessories
LanguageEnglish

Related product manuals