OM-281136 Page 26
5-13. Installing Air-Cooled Quick Wrap (Continued)
! Do not hang cables on steel
brackets, hangers, or other
mechanisms.
. Position the quick wraps
reasonably close to the weld joint
to decrease the time spent to reach
the desired temperature.
. Heat from the weld process can
damage the heating tool. Slide
heating tool away from joint while
welding or protect with insulation.
. Use a welding blanket to protect
from abrasion and spatter.
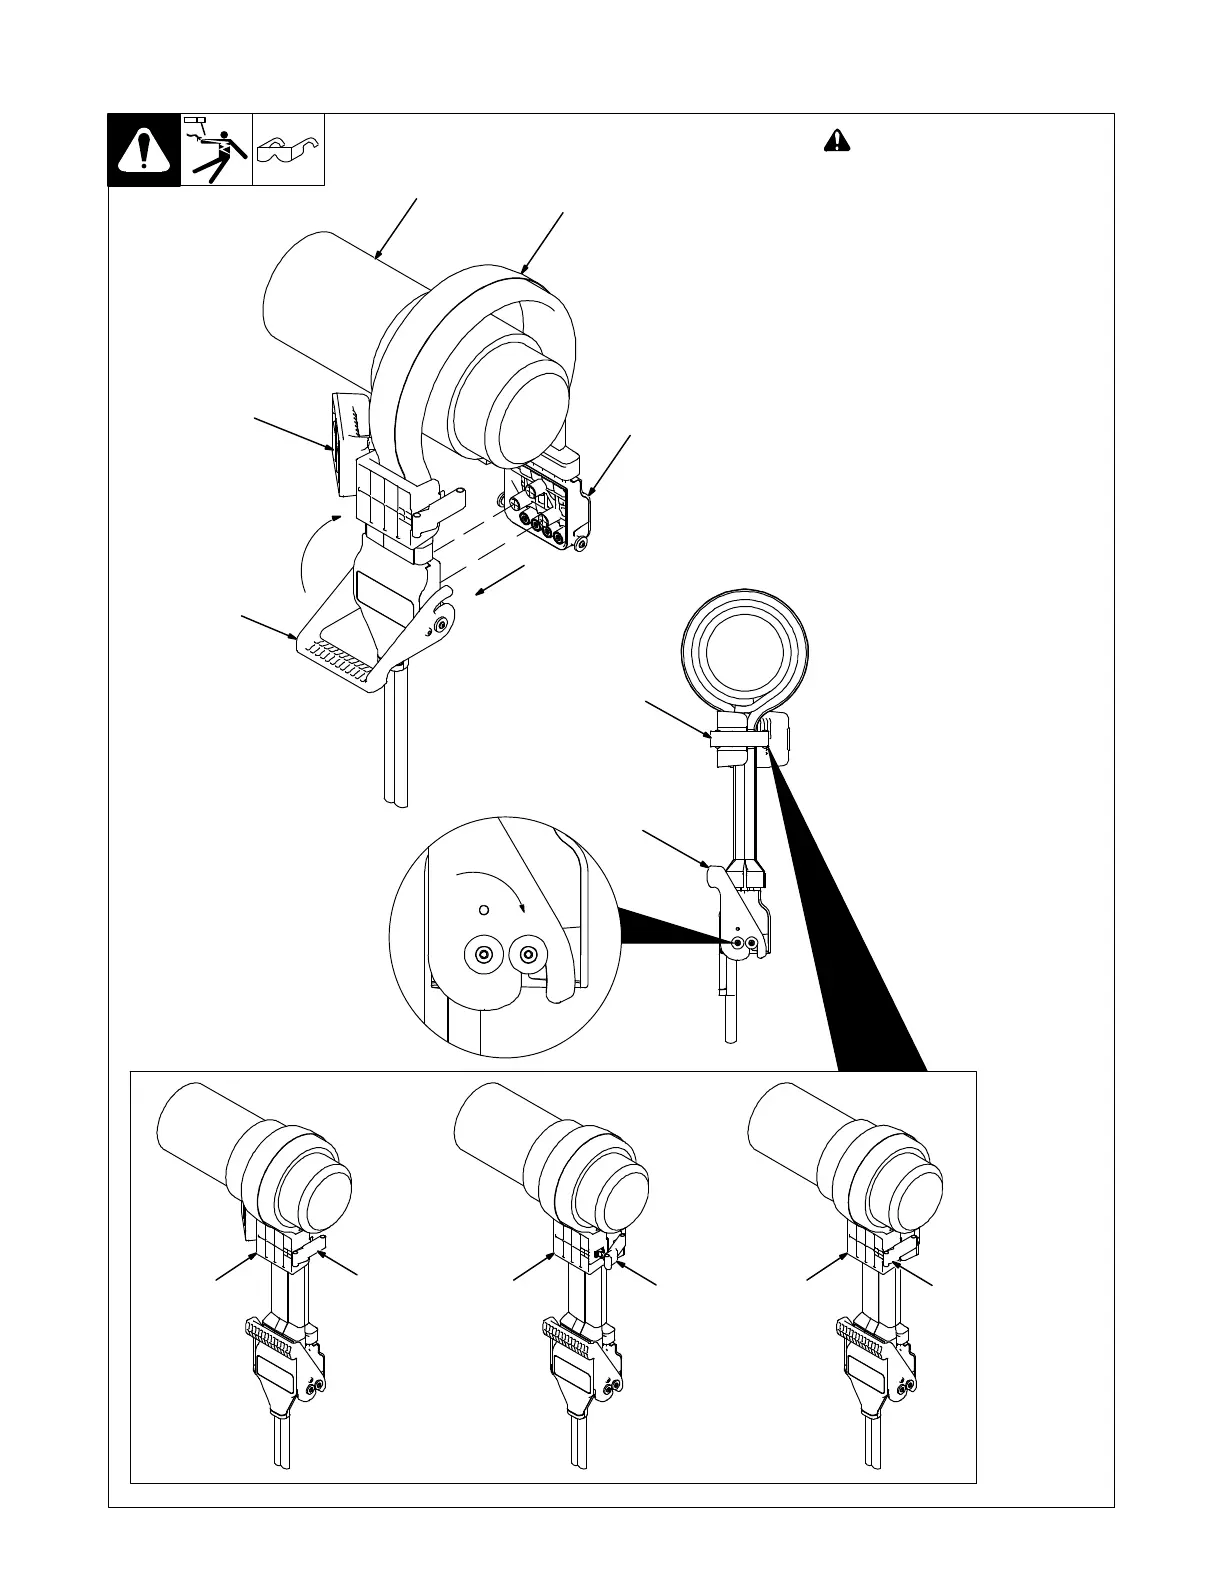
1 Workpiece
2 Air-Cooled Quick Wrap
Place air-cooled quick wrap on pipe to
be heated.
3 Housing Connectors
4 Latching Handle
Align connector housings and fully
engage connector pins.
Close latching handle to hold
connectors together.
5 Cinch Clip
6 Cinch Clip Latch
Hold unused portion of air-cooled quick
wrap together and position the cinch
clip as close to the pipe as possible.
Close cinch clip to hold leads together
and use latch to secure cinch clip in
place.
1
3
2
Ref. 282308-A
4
5
4
5
555
6
66
. Keep cables from
heating tool to extension
cable together.




 To Next Page