Ultrasound Gel Warmer B-3
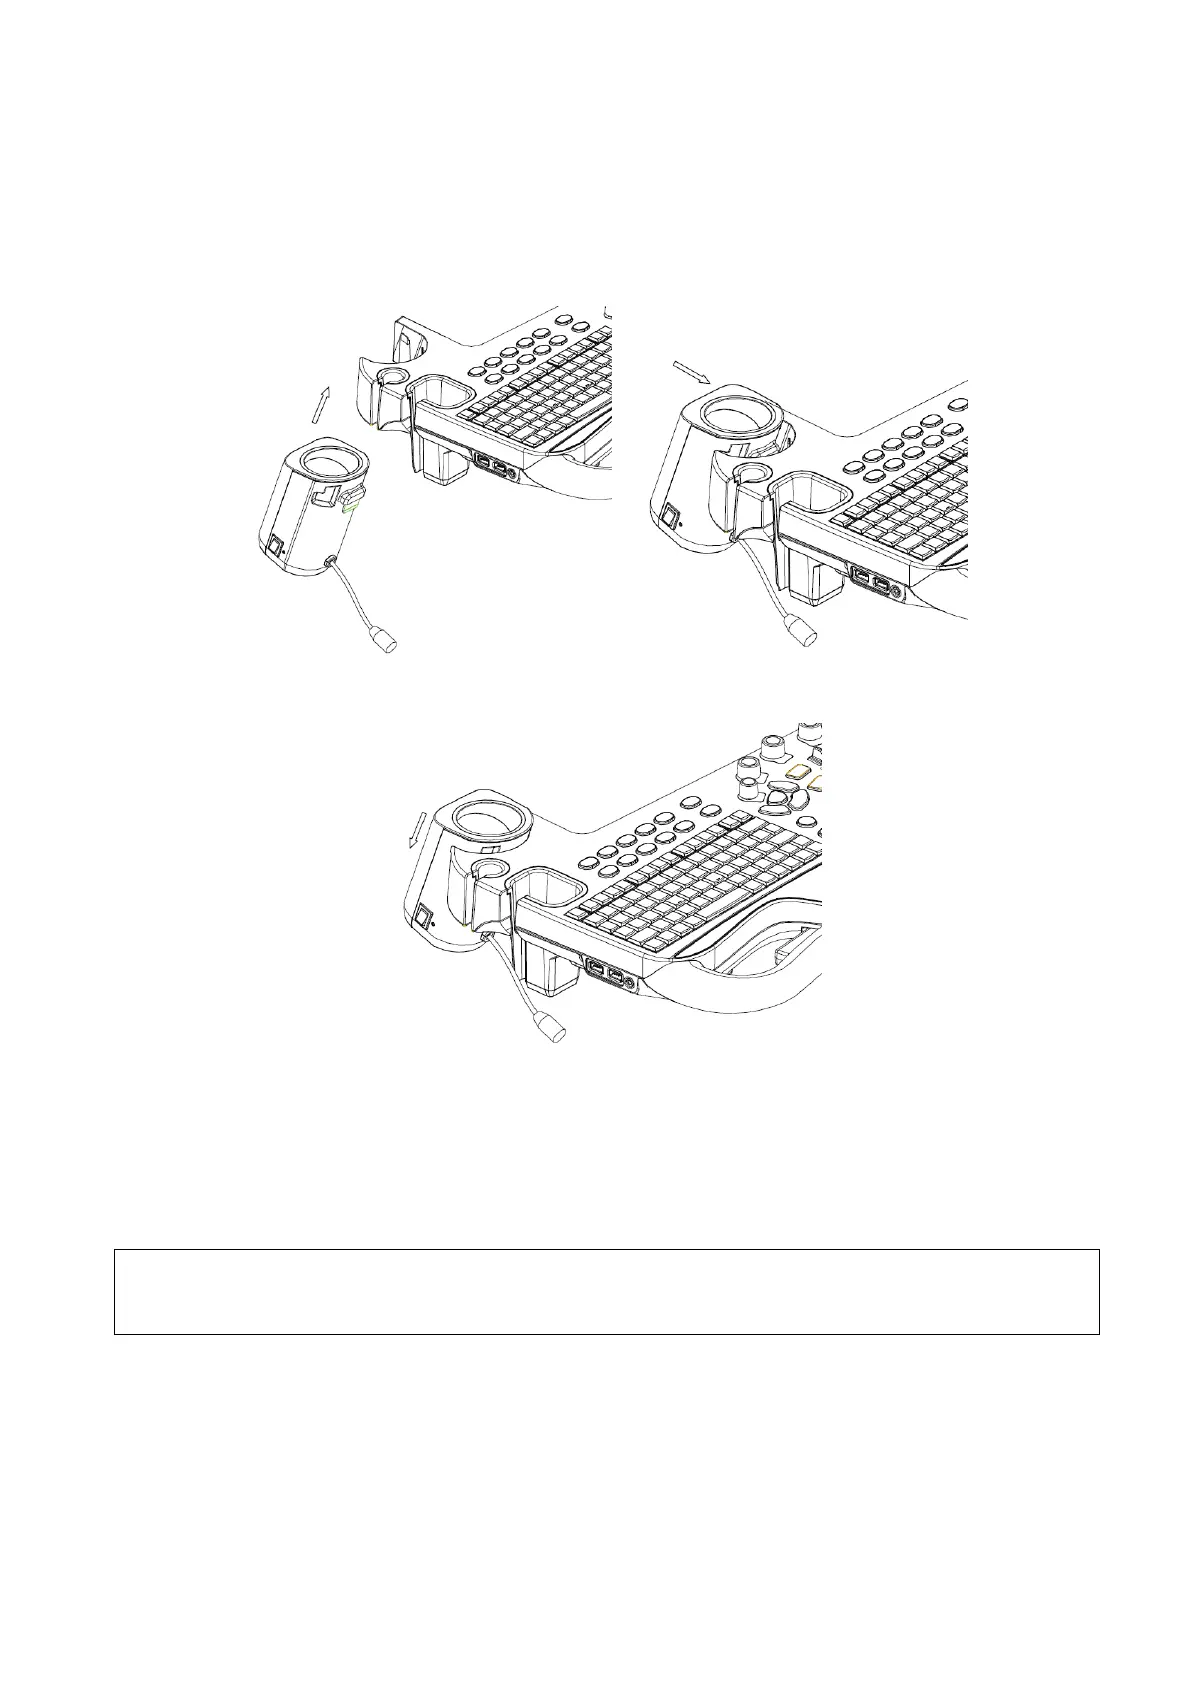
B.5 Install the Warmer
1. As shown in the figure, install the gel warmer as per the arrow direction, to fix the tab of the warmer
to the groove in the control panel.
2. Push the warmer as per the arrow direction until it is tightly fixed, and connect the power cable to
the power socket under the control panel.
3. Insert the power plug of the warmer into the jack in the back side of the control panel.
4. Put the gel inside the warmer, and press the warming control switch, the gel warmer starts to work.
There are three levels of the switch:
II: sets the warmer to 40 ℃.
I: Sets the warmer to 37℃.
O: turn the warmer off.
If the status indicator is off or blinks in orange after connecting the power cord, it means
the gel warmer is not working normally, please turn it off and contract the service
engineer.