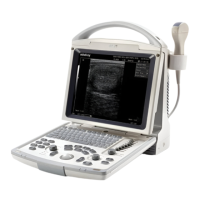
System Introduction
1-11
NO. Key Function
<12> IP Select the combination of image processing parameters, to
adjust the image display effect.
<13> Parameter adjust knob Adjust some value of Puncture, F.Posi, F.Num, A.Power
and IP with combination of corresponding key.
<14> Clear Clear all comments, bodymarks, measurement scales and
general measurement results on the screen
<15> Exit Exit the current work mode
<16> Arrow Enter the arrow comment mode
<17> Set Determine the cursor position for measurement, and
confirm the selected items, and adjust the value or items in
menus etc.
<18> Change Switch between the fixed end and active end in the
measurement.
<19> Back Delete the arrow comment or return to the previous
operation, and adjust the value or items in menus etc.
<20> Trackball Move the cursor or mark during image movement or
measurement.
<21> Menu Open or close the menu on the screen.
<22> Measure Enter/exit the measurement mode
<23> Comment Enter/exit the comment mode
<24> M-Mark Enter/exit the M-Mark mode
<25> BodyMark Enter/exit the BodyMark mode.
<26> Depth/Zoom/Rotation Adjust the viewing depth for display, the zoom mode, and
the arrow rotation of the ultrasound images.
<27> Probe Switch transducers
<28> Freq/THI Adjust the transducer frequency and switch to the
harmonic frequency of 35C50HA.
<29> Cine Enter the manual playback mode.
<30> Zoom Enter the mode of amplifying the image
<31> HRev / VRev Reverse the image horizontally or vertically
<32> B/M/M+B/B+B Select the image mode
<33> Gain Adjust the sensitivity of black/white images.
<34> Freeze Freeze or unfreeze the image. If an image is frozen, the
output of acoustic power is stopped.
<35> Print Activate the printing function for the video printer
connected.