j) Even though the Minn Kota charger is capable of operating in a high ambient temperature environment, a minimum of six inches of unobstruct-
ed area should be allowed on all sides of the unit for proper air circulation and cooling. Proper cooling and circulation will allow the charger to
operate at peak efficiency.
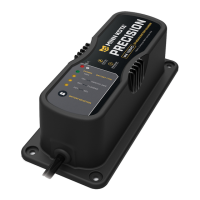
k) MOUNTING THE CHARGER:
Due to the weight of the charger and the impact that boats routinely endure, take the time to securely mount the charger to prevent damage.
Mounting with nuts, bolts and washers is preferable to mounting with screws. Use the largest diameter bolts possible and use all four mount-
ing holes. After marking the locations, set the charger aside and drill the holes. Apply a marine grade silicone sealant in each of the drilled
holes to create a waterproof seal. Then secure the charger in place using the mounting hardware.
l) Your battery charger is supplied with an AC plug holder designed to hold the power cord plug when not in use. Mount the AC plug holder with
four screws in a convenient dry site to prevent corrosion to the AC plug and to prevent the AC plug from making contact with the battery
posts.
5) DC CONNECTION PRECAUTIONS
a) The Minn Kota charger will only charge 12 volt 6 cell lead acid batteries. Do not connect the output of the charger to any other voltage or
type of battery.
b) The charger’s DC output terminals are designed to be permanently mounted and connected to batteries.
c) Connect and disconnect DC output terminals only after disconnecting the AC plug from the electric outlet.
d) The charger output leads must be connected with the correct polarity for the charger to function. The RED lead must be connected to the
POSITIVE terminal of the battery and the BLACK lead must be connected to the NEGATIVE terminal of the battery, as indicated in e(5), e(6)
and f(2), f(3).
e) FOLLOW THESE STEPS WHEN THE BATTERY CHARGER IS INSTALLED IN A BOAT OR VEHICLE. A SPARK NEAR THE BATTERY
MAY CAUSE BATTERY EXPLOSION. TO REDUCE THE RISK OF A SPARK NEAR THE BATTERY:
1) Position AC and DC cords to reduce risk of damage by hood, door, or moving engine parts.
2) Stay clear of fan blades, belts, pulleys and other parts that can cause injury to persons.
3) Check polarity of battery posts. POSITIVE (POS, P, +) battery post is usually larger in diameter than NEGATIVE (NEG, N, -) post.
4) Determine which post of the battery is grounded (connected) to the chassis (if any). If negative post is grounded to the boat hull or chassis
(as in most vehicles), see (5) below. If positive post is grounded to the boat hull or chassis, see (6) below. If neither is grounded, the
order in which the output leads are connected does not matter.
5) For negative-grounded boat or vehicle, connect POSITIVE (RED) output terminal to POSITIVE (POS, P, +) ungrounded post of battery
first. Then connect NEGATIVE (BLACK) output to NEGATIVE (NEG, N, -) grounded post of battery.
6) For positive-grounded boat or vehicle, connect NEGATIVE (BLACK) output to NEGATIVE (NEG, N, -) ungrounded post of battery first.
Then, connect POSITIVE (RED) output terminal to POSITIVE (POS, P, +) grounded post of battery.
7) When disconnecting charger, disconnect AC power cord from electric outlet first.
8) See operating instructions for length of charge information.
f) FOLLOW THESE STEPS WHEN BATTERY IS OUTSIDE BOAT OR VEHICLE. A SPARK NEAR BATTERY MAY CAUSE BATTERY
EXPLOSION. TO REDUCE THE RISK OF A SPARK NEAR BATTERY:
1) Check polarity of battery posts. POSITIVE (POS, P, +) battery post is usually larger in diameter than NEGATIVE (NEG, N, -) post.
2) Connect POSITIVE (RED) output terminal to POSITIVE (POS, P, +) post of battery.
3) Connect NEGATIVE (BLACK) output terminal to NEGATIVE (NEG, N, -) post of battery.
WARNING – MAKE SURE THE CHARGER IS DISCONNECTED FROM AC POWER BEFORE CONNECTING THE BATTERIES TO THE
OUTPUT CORDS.
CAUTION - Before making any connections to batteries in a confined space (such as a battery compartment of a boat), open the door or hatch
of the compartment and allow it to air out for 15 minutes. This allows any gasses that have accumulated in the compartment to escape.
4
CAUTION – Because the body of the battery charger is metallic, do not directly mount the charger to the hull of an aluminum boat. Use a
means of isolation (such as wood or plastic) to prevent the charger body as well as mounting fasteners from coming in contact with the alumi-
num boat structure or hull. Doing so will eliminate any risk of electrolysis that may occur when AC power is connected to the charger.
 Loading...