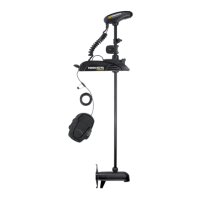
BATTERY CONNECTIONS BATTERIE CONNEXION
11
RACCORDEMENT DE LA BATTERIE
Systèmes 12 V:
1. Assurez-vous que le moteur est éteint (le sélectionneur de vitesse sur “0”).
2. Brancher le câble rouge positif ( + ) sur la borne positive ( + ) de la batterie.
3. Brancher le câble noir négatif ( – ) sur la borne négative ( – ) de la batterie.
4.
Pour la sécurité les raisons n’allument pas le moteur jusqu’à ce que l’hélice soit dans l’eau.
Systèmes 24 V:
1.
Assurez-vous que le moteur est éteint (le sélectionneur de vitesse sur “0”).
2. Utiliser deux batteries de 12 V.
3. Raccorder les batteries en série, conformément au schéma de câblage pour assurer 24 V.
a. Raccordez un câble de connecteur à positif (+) le terminus de batterie 1 et à négatif (-) le terminus de batterie 2.
b. Communiquer positif ( + ) l’avance rouge à positif ( + ) le terminus sur la batterie 2.
c. Communiquer négatif ( - ) le graphite pour enduit à négatif ( - ) le terminus de batterie 1.
4.
Pour la sécurité les raisons n’allument pas le moteur jusqu’à ce que l’hélice soit dans l’eau.
Si une prise est installée, respecter la polarité et suivre les instructions du manuel du bateau.
Voir les schémas de câblage pages suivantes.
BATTERY CONNECTION
12 Volt Systems:
1. Make sure that the motor is switched off (speed selector on “0”).
2. Connect positive ( + ) red lead to positive ( + ) battery terminal.
3. Connect negative ( – ) black lead to negative ( – ) battery terminal.
4. For safety reasons do not switch the motor on until the propeller is in the water.
24 Volt Systems:
1. Make sure that the motor is switched off (speed selector on “0”).
2. Two 12 volt batteries are required.
3. The batteries must be wired in series, only as directed in wiring diagram, to provide 24 volts.
a. Connect a connector cable to positive ( + ) terminal of battery 1 and to negative ( – ) terminal of battery 2.
b. Connect positive ( + ) red lead to positive ( + ) terminal on battery 2.
c. Connect negative ( – ) black lead to negative ( – ) terminal of battery 1.
4. For safety reasons do not switch the motor on until the propeller is in the water.
If installing a leadwire plug, observe proper polarity and follow instructions in your boat owner’s manual.
See wiring diagram on following pages.-0
• IMpropEr wIrIng of 24/36 volT sysTEM
COULD CAUSE BATTERY EXPLOSION!
• KEEp lEaDwIrE wIng nuT ConnECTIon TIghT anD
SOLID TO BATTERY TERMINALS.
• loCaTE baTTEry In a vEnTIlaTED CoMparTMEnT.
• unE ErrEur DE polarITé Dans un CIrCuIT DE 24/36v
PEUT PROVOQUER L’EXPLOSION DE LA BATTERIE!
• vEIllEr à CE quE lEs éCrous papIllons sur lEs
BORNES DE LA BATTERIE SOIENT BIEN SERRÉS.
• plaCEr la baTTErIE Dans un CoMparTIMEnT aéré.

 Loading...