minnkotamotors.com | 19
©2023 Johnson Outdoors Marine Electronics, Inc.
ADVANCED GPS NAVIGATION
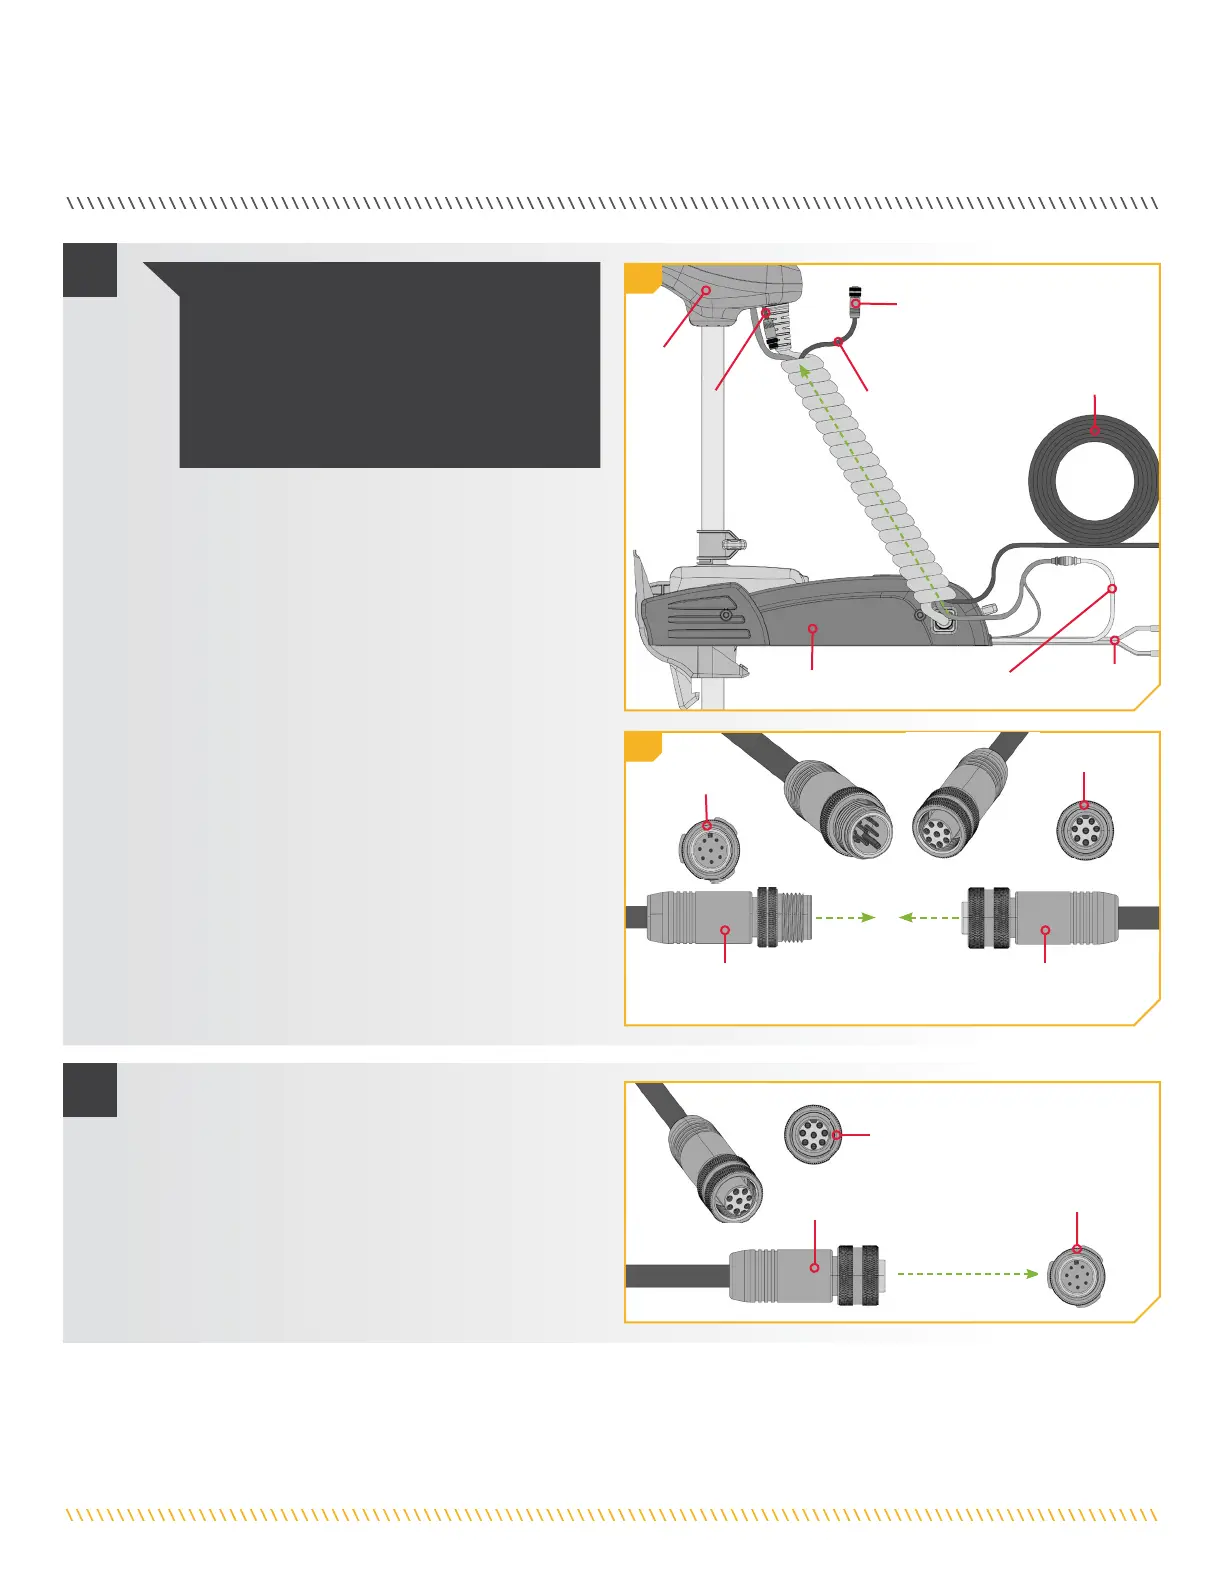
e. To install the Ethernet Cable, align the pins on
the Advanced GPS Ethernet Connector with the
Receptacle on the Ethernet Cable. Notice the keyed
connectors. Press the ends together and tighten the
Collar from the Ethernet Cable to secure
the connection.
f. The Ethernet Cable will plug directly into a Solix
or Apex Fish Finder or directly into a Helix
Adapter Cable.
3
Eight Pin Eight Pin
ConnectorConnector
Ethernet Ethernet
CableCable
Advanced GPS Advanced GPS
Ethernet Connector Ethernet Connector
from Trolling Motorfrom Trolling Motor
Control Control
HeadHead
Advanced Advanced
GPS GPS
Ethernet Ethernet
ConnectorConnector
ReceptacleReceptacle
MountMount
Foot Pedal Foot Pedal
Power ConnectorPower Connector
Power
Leads
Ethernet Cable Ethernet Cable
Ethernet Cable Ethernet Cable
NOTICE: Minn Kota recommends routing the
Ethernet Cable through the Coil Cord when
making the Ethernet connection. The cable will
be installed from the Mount to the Control Head
through the Coil Cord and parallel to the Advanced
GPS Cable. Bypassing the Coil Cord when routing
the Ethernet Cable is not recommended.
3e
g. If installing directly to a Solix or Apex, the
connector will be flat on the back of the fish
finder display.
h. Align the Receptacle on the Ethernet Cable with the
Eight Pin Connector on the Apex or Solix fish finder.
Notice the keyed connectors. Tighten the Collar
from the Ethernet Cable to secure the connection.
Once directly installed to the Solix or Apex, the
connection is complete.
4
Eight Pin Eight Pin
Connector on Connector on
Solix or Apex Solix or Apex
Fish FinderFish Finder
Ethernet Ethernet
CableCable
ReceptacleReceptacle
3e
ReceptacleReceptacle
 Loading...