minnkota.johnsonoutdoors.com | 9 ©2023 Johnson Outdoors Marine Electronics, Inc.
INSTALLING THE ULTERRA
• #2 Phillips Screwdriver
• #3 Phillips Screwdriver
• Drill
• 9/32" Drill Bit
• 7/16" Box End Wrench
• Awl or similar marking tool
• A second person to help
with the installation
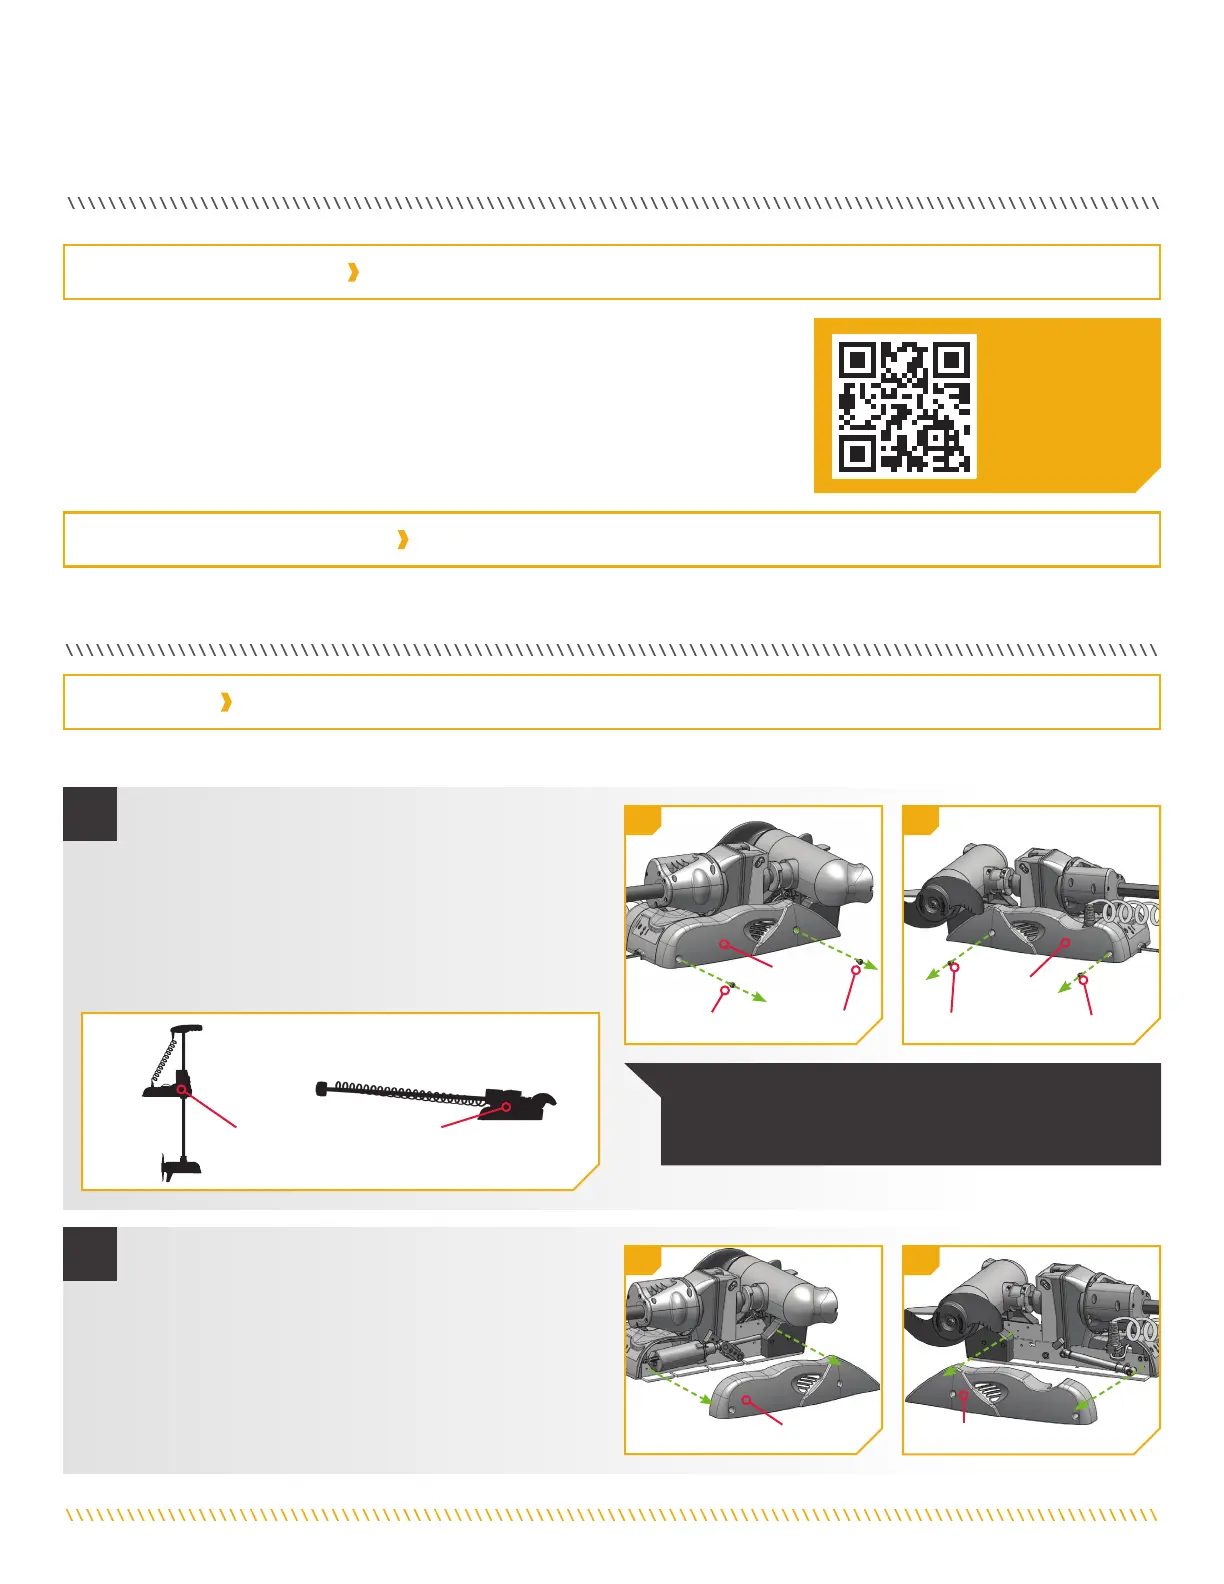
a. Place the Motor on an elevated, level surface such
as a workbench or the tailgate of a pickup. The
motor, as removed from the box, should be in the
stowed position.
b. Remove the four sideplate screws using a #3 Phillips
Screwdriver. Two of these screws will be located on
each side of the Motor Mount.
It is recommended that the motor be mounted as close to the keel or centerline of the
boat as possible. Make sure the area under the mounting location is clear to drill holes
and install nuts and washers. Make sure the motor rest is positioned far enough beyond
the edge of the boat. The motor must not encounter any obstructions as it is lowered into
the water or raised into the boat when stowed and deployed. Consider a quick release or
adapter bracket with the installation of your motor. To view a list of accessories, please visit
minnkota.johnsonoutdoors.com.
Deployed Deployed
StowedStowed
Left SideplateLeft Sideplate
Right Right
SideplateSideplate
Right Right
SideplateSideplate
ScrewScrew
ScrewScrew
Left Left
SideplateSideplate
ScrewScrew
ScrewScrew
INSTALLING THE ULTERRA
MOUNTING CONSIDERATIONS
TOOLS AND RESOURCES REQUIRED
INSTALLATION
1
2
1b
1b
2c
2d
View accessories
available for your
trolling motor
at minnkota.
johnsonoutdoors.com.
NOTICE: This motor weighs approximately 70 lbs.
Minn Kota recommends having a second person help with
the installation.
c. Remove the Right Sideplate to access the
Mounting Slots.
d. Remove the Left Sideplate to access the
Mounting Holes.
 Loading...