74
FOR OWNERS OF THE QUARTZ DATE MODEL
75
FOR OWNERS OF THE QUARTZ DATE MODEL
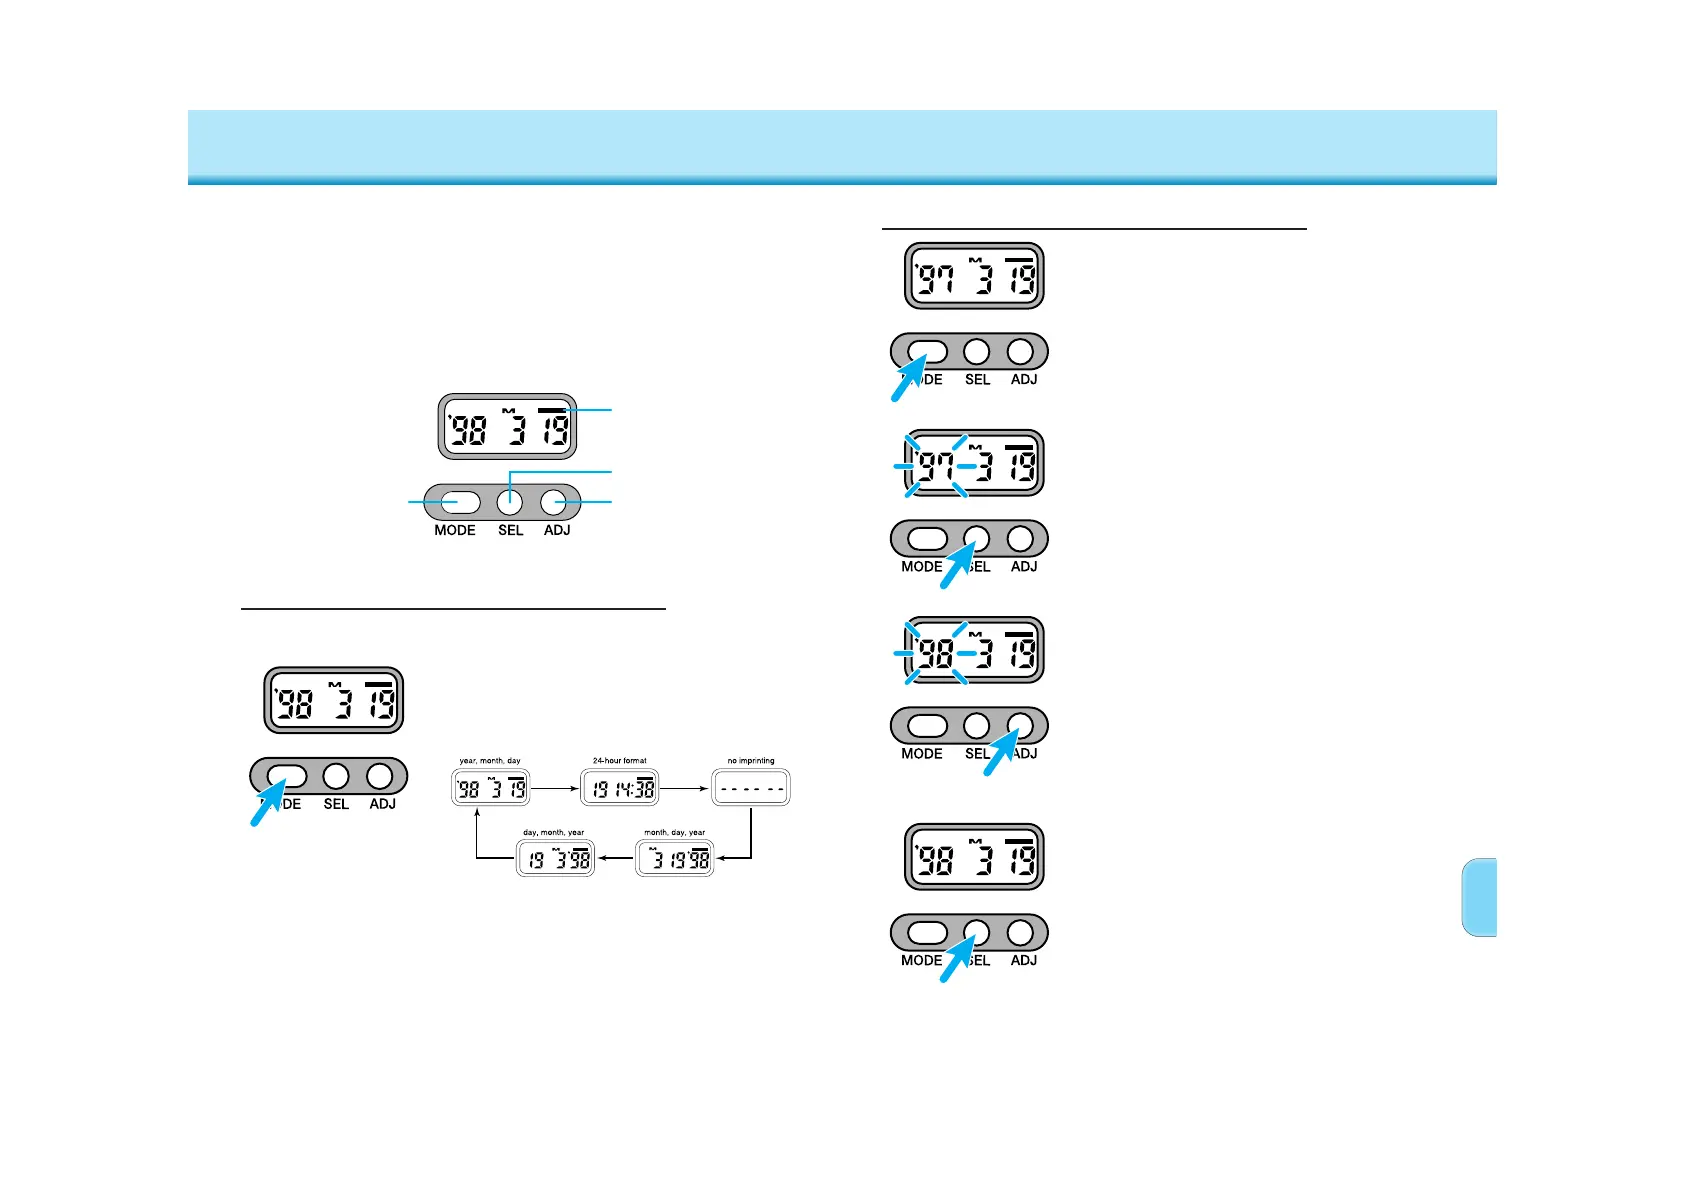
1. Press the mode button to choose
the data imprinting format.
• The display changes as follows:
2. Take the picture.
• If the print indicator blinks after the shutter is
released, the data was exposed.
The Quartz-data function lets you record the date or time onto the
lower-right corner of the photograph. The quartz data back has an
automatic calendar through the year 2019.
• Imprinted data may be difficult to read if the lower-right corner of the
photograph is bright or non-uniform.
• Imprinting size and position may differ according to printing conditions.
• Do not use the data back when temperatures exceed the operating range of
0 to 50 °C (32 to 122 °F).
Exposing the Date/Time
Before taking the picture…
Mode button
Select button
Adjust button
Print indicator
1. Press the mode button to choose
the data imprinting format.
• M will appear above the month.
2. Use the select button (SEL) to
move between different parts of
the displayed data.
• The selected part will blink, indicating that it is
the data to be changed.
3. Press the adjust button (ADJ) to
change the data to the correct
value.
• Data continues changing as long as the button is
held down.
• When the time is displayed and : is blinking,
pressing the adjust button resets the seconds
counter to zero (not shown).
Setting the Date/Time
4. When all data is correct, press the
select button (SEL) until the data
stops blinking.

 Loading...