16
4.3 Setup Mode Settings
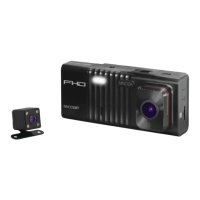
4.3.1 Park Mode
This setting allows the camcorder to automatically power on and record a video clip if the
camcorder detects a collision while parked and is powered off. You can set the sensitivity
level setting in this menu. This setting will only activate if there is sufficient battery power
remaining in the camcorder’s built-in battery. When triggered or when the camcorder thinks
a collision occurred, it will automatically begin recording and the recording will be stored
with a lock icon. The video file will be locked and protected from deletion.
1. In VIDEO or PHOTO modes, press and hold the MODE button to access the settings
menu. Then press the MODE button again to access the Setup mode settings.
1. Select ‘Park Mode’ by using the LEFT or RIGHT buttons. Press the OK button to enter
the ‘Park Mode’ submenu.
2. Press the LEFT or RIGHT buttons again to navigate the submenu and select a setting.
You can select from Off and On.
3. Press the OK button to confirm your selected setting.
4. To exit the settings menu, press the MODE button and your camcorder will return to the
main status screen of the current mode.
Note: When off, your camcorder will still automatically record upon startup if you power it
off.
4.3.2 Date & Time Setup
This setting allows you to set a date and time for display on videos and photos.
1. In VIDEO or PHOTO modes, press and hold the MODE button to access the settings
menu. Then press the MODE button again to access the Setup mode settings.
2. Press the OK button to enter the ‘Date & Time Setup’ submenu.
3. The menu is presented as follows:
Date: YYYY / MM / DD
Time: HH:MM:SS (the time can only be displayed in a 24-hour format)
Date Format: YY/MM/DD (this can be changed to the following – DD/MM/YY or
MM/DD/YY)
4. Press the LEFT or RIGHT buttons to change the highlighted. When you are satisfied
with the highlighted value, press the OK button to confirm that value and proceed to the
next value.
5. Once you are completed, press the MODE button to save your setting and exit.
6. To exit the settings menu, press the MODE button and your camcorder will return to the
main status screen of the current mode.
 Loading...