EasyManua.ls Logo

MINOURA PAIR STAND - User Manual

MINOURA PAIR STAND
2 pages
Print Icon
To Next Page IconTo Next Page
Loading...
!
!
2
3
Lower Support
Angle Adjust Plate
(projection is foreside)
Alloy Stay
Frame Hook
Bicycle display stand “PAIR STAND” instruction manual
Please read this instuctions carefully before use.
Thank you for purchasing Minoura PAIR STAND bike display stand.
This stand can hold up to two bikes horizontally in a space as same as for only one bike.
This stand is designed for standard two wheel bicycles.
Do not use this stand for electric bikes or tandems. The weight
limit for two bikes is 30 kgs. or 66 lbs.
Make sure the stand is used on a level floor.
Failing to set-up and use this stand on a level floor may cause the
stand to fall over and cause damage or injury.
This stand requires some
assembly. You will need a M4
Hex wrench and a 13 mm
spanner in order to assemble
the PAIR STAND completely.
IMPORTANT NOTES
HOW TO ASSEMBLE YOUR PAIR STAND
1
Screw the foot adjuster to the nut located on each leg
end.
Insert four M8x55 bolts into the holes on the bottom of
the Lower Pillar, then put through the legs. The long leg
is for rear section, and the short legs are for front sec-
tion. Be sure to fit the legs to the shape of the horrow of
the bottom plate.
Lower Pillar
Rear Leg
Bottom Plate
Front Leg
(Fig. A)
(Fig. B) (Fig.C)
Install the Reinforcement Arms between the Lower Pillar and
the Front Legs by tightening the M6x14 bolts for the pillar
side, and M6x30 bolts for the leg side. After installing the
Reinforcement Arms, tighten the M8x55 bolts firmly. Wrong
step may make you unable to install the Reinforcement Arms.
Reinforcement Arm
Reinforcement Arm
Rear Leg
Front Leg
Upper Pillar
Lower Pillar
Question and Answer IconNeed help?

Do you have a question about the MINOURA PAIR STAND and is the answer not in the manual?

Summary

Important Usage Notes and Safety

Bicycle Compatibility and Weight Limits

Specifies compatibility with standard bicycles and sets a weight limit of 30 kgs.

Level Floor Requirement

Emphasizes using the stand on a level floor to prevent falls, damage, or injury.

Required Tools for Assembly

Lists M4 Hex wrench and 13mm spanner needed for complete assembly.

How to Assemble Your Pair Stand

Attach Foot Adjusters

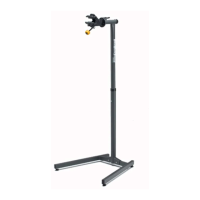
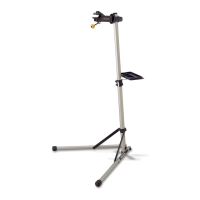
Screw the foot adjuster into the nut located on each leg end.

Secure Lower Pillar to Base

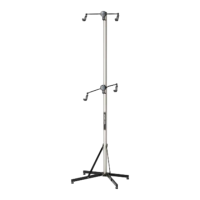
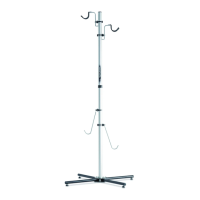
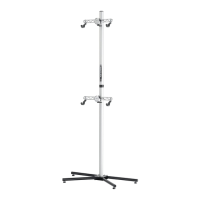
Insert M8x55 bolts into the Lower Pillar bottom and attach legs to the bottom plate.

Install Reinforcement Arms

Install Reinforcement Arms between Lower Pillar and Front Legs using specified bolts.

Assembly Steps and Adjustments

Connect Upper and Lower Pillars

Attach Connecting Plates to the Lower Pillar and connect the Upper Pillar.

Assemble Cradles and Angle Adjust Plate

Assemble cradles, place Angle Adjust Plate, and attach Alloy Stay.

Adjust Frame Hook Spacing

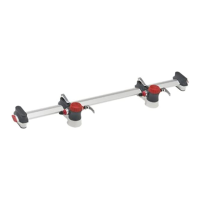
Adjust the distance between plastic frame hooks by loosening and tightening the rear nut.

Install Bike Cradles and Band

Install bike cradles to pillars, securing with stainless band on the upper side.

Tips and Information

Troubleshooting Misaligned Nuts

Guidance on correctly orienting the rectangular nut for stainless band assembly.

How to Mount a Bike

Instructions for placing a bike onto the stand, including alternative support methods.

Contact and Support

Provides contact details for Minoura Japan and Minoura North America for service and information.

MINOURA PAIR STAND Specifications

General IconGeneral
BrandMINOURA
ModelPAIR STAND
CategoryRacks & Stands
LanguageEnglish

Related product manuals