13
1062243-W2-N
Beforettingthecover,makesurethattheappropriatecutoutshavebeenremoved
to suit the supply entering the product.
Thoroughly ush the mains-fed cold water supply pipe. The supply must be
clean and free from debris BEFORE connecting the appliance.
Toushthepipework,turnonthewatersupplyanddrainaminimumof10litres
(2gallons)ofwaterintoabucketorcatchmentarea.Turnothewatersupply.
An installation template is supplied to help you install the Mira Azora.
Puttheinstallationtemplateonthewallandmarkthroughthepositionsofthexing
holes. Make sure that the position of these holes do not come in line with any buried
cablesorpipework.Makesurethatsucientelectricalsupplycableisavailablefor
connection to the terminal block.
Drillandplugthetoptwoxingholes.Securetheappliancetothewallwithappropriate
screws.Drillthebottomxingholewiththeproductinplace.Alternativexings(not
supplied) may be necessary for some wall structures. Avoid drilling into any supply
cable/pipe.
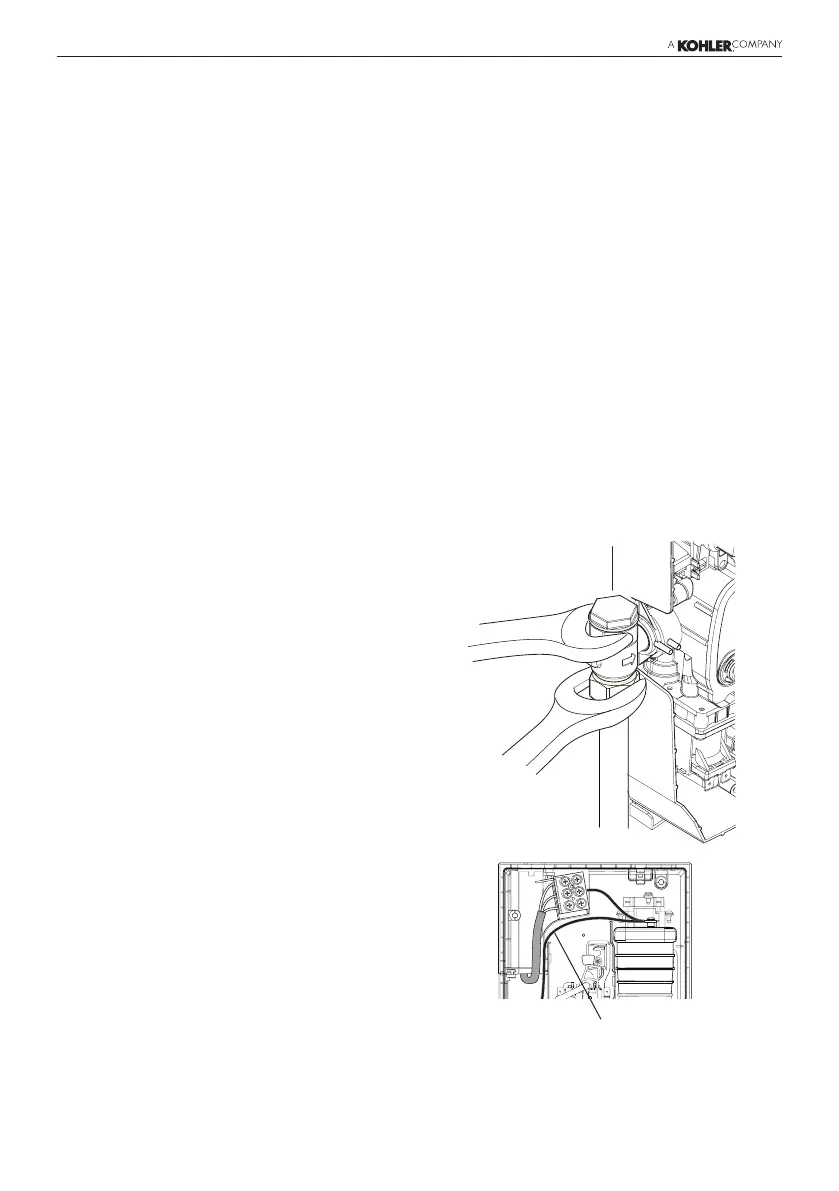
Install the mains-fed cold water supply
pipe. Do not overtighten.
(SeePlumbingInstallationRequirements).
Feed cable into Case. Fit Earth sleeve (not
supplied) and strip insulation.
Do not twist cable cores.
Important! Make sure
that the inlet earth wire is
routed as shown. Failure
to do so may cause
product malfunction.
 Loading...