18
Flow Regulator - Installation
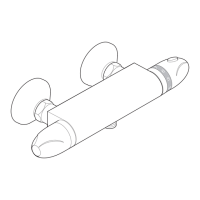
For high pressure installations an optional
flow regulator is supplied. Fitting the
regulator will limit the flow to 10 l/min, and
reduce the spray force to a more
comfortable level. The regulator may also
be fitted if water conservation is a concern.
1. Unscrew the outlet nipple from the RAC
with a 12 mm A/F wrench (not
supplied).
2. Fit the flow regulator as illustrated.
Make sure the ‘O’ seals are fitted and
the regulator is the correct way up.
3. Refit the outlet nipple to the RAC.
‘O’ Seal
Outlet
Nipple
‘O’ Seal
Flow
Regulator
Direction of
Waterflow
RAC
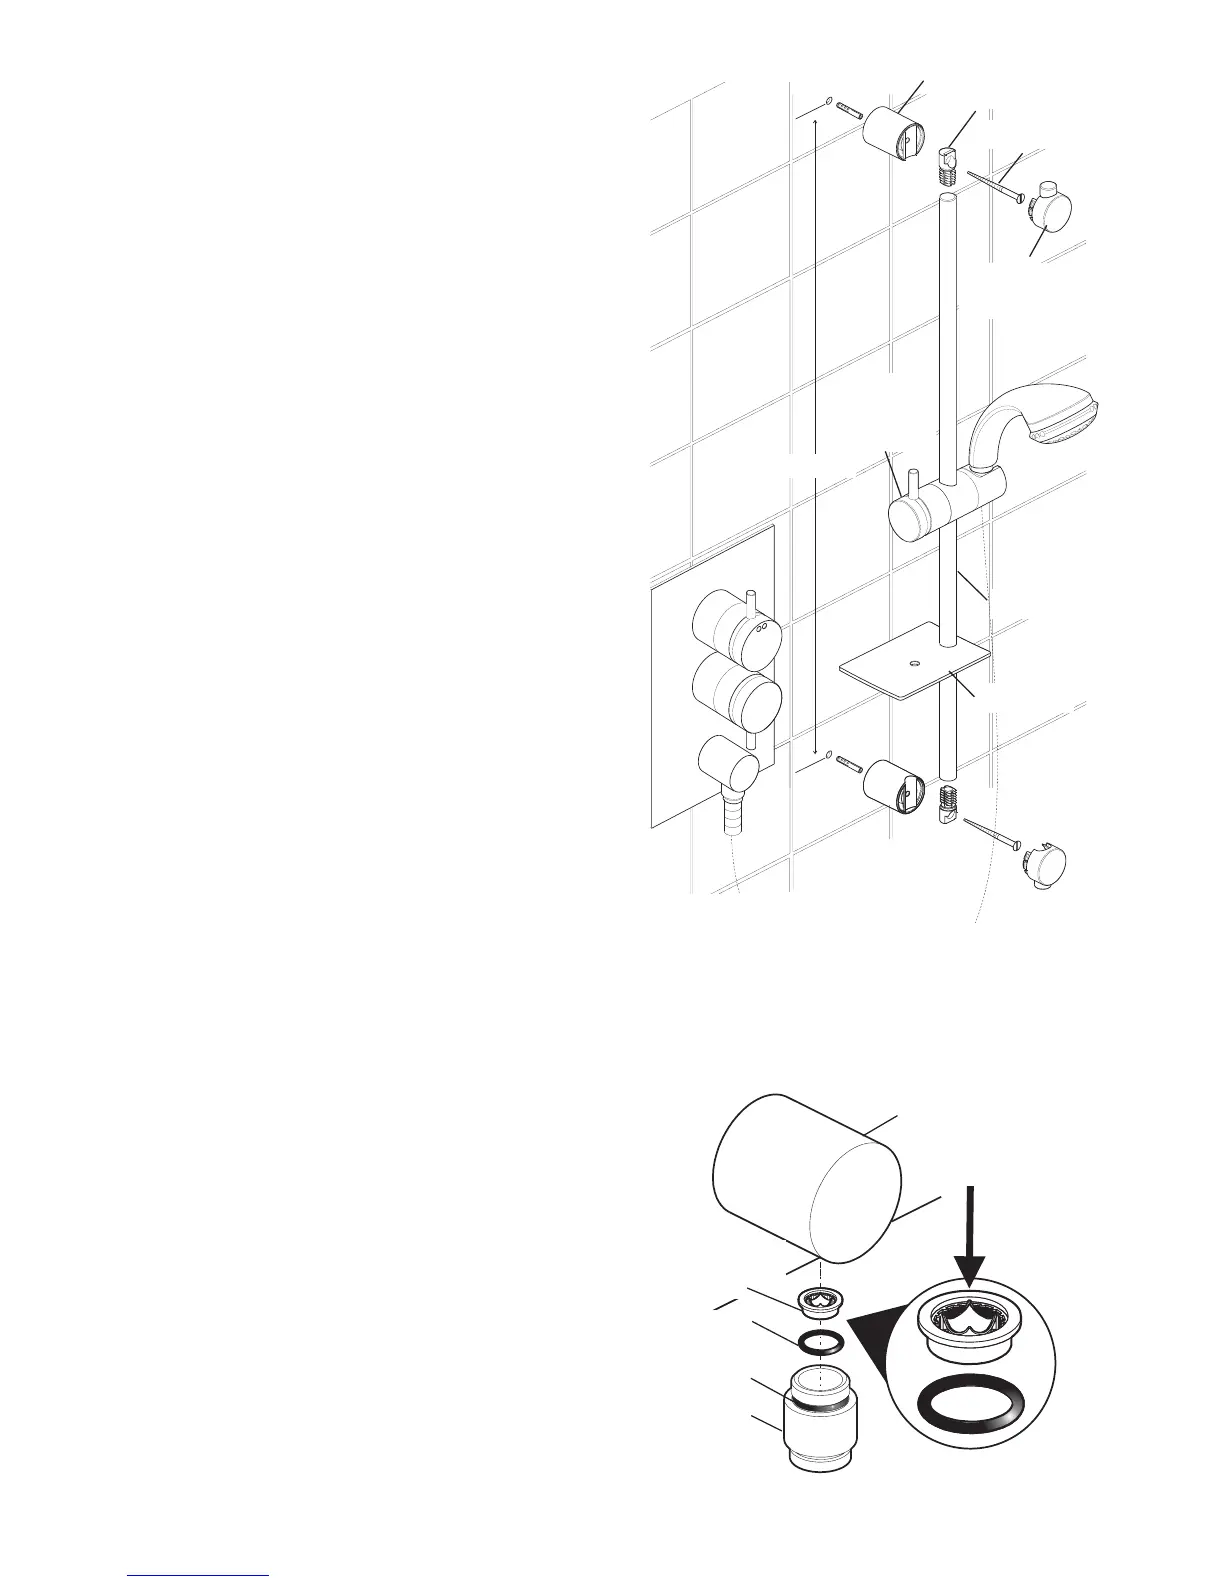
Shower Fittings - Installation
1. Drill the two 7.0 mm fixing holes for
the slidebar at 600 mm centres,
avoiding any buried cables or pipes,
and insert the wall plugs.
2. Assemble the clamp bracket
components. Push the plastic slidebar
ends into the slidebar.
3. Push the slidebar through the clamp
bracket assembly and soapdish.
4. Fit the bottom end support loosely to
the wall. Insert the fixing screw into
the countersunk hole of the slide bar
end and through the slidebar support.
5. Place the screw through the top end
support and fully tighten. Fully tighten
the bottom end support.
6. Fit the end support caps over the ends
of the slidebar end supports.
7. Screw the hose onto the handset and
the outlet of the shower control (Make
sure the hose seals are fitted). Do not
overtighten.
8. Place the handset into the slidebar
clamp bracket.
600mm
End Support
Cap
End Support
Fixing Screw
Slidebar End
Clamp
Bracket
Assembly
Soapdish
Slidebar
Note! The clamp bracket is tapered. The handset will only fit properly from one direction.
If necessary turn the end of the clamp bracket until the handset will fit. If the clamp
bracket pivots downwards under the weight of the handset the central securing screw
in the bracket will require tightening to hold the handset in position.
 Loading...