9
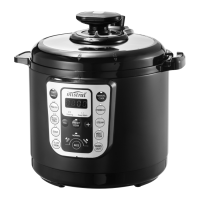
Note: The Pressure Limit Valve should
be correctly positioned, This valve may
appear loose and wobbly but this is
normal. It is secured when it sits right
down.
The Red oat Valve(Pressure Indicator)
adjacent to the Pressure Limit Valve must
be fully down (Black dot in Figure 10)
and level with the lid surface to properly
seal the pot, this can only be achieved
when lid is in fully locked position.
If it sits up and cannot be pushed down,
the lid is not in fully locked position.
Fig.10
6. Plugtheconnectorofthepowercord
suppliedintothebaseofthepressurecooker
andthenplugitintowallpoweroutlet,switch
ONwallpoweroutlet.
TheLEDDisplaywillshow‘OFF’,indicatingitis
instandbymode.
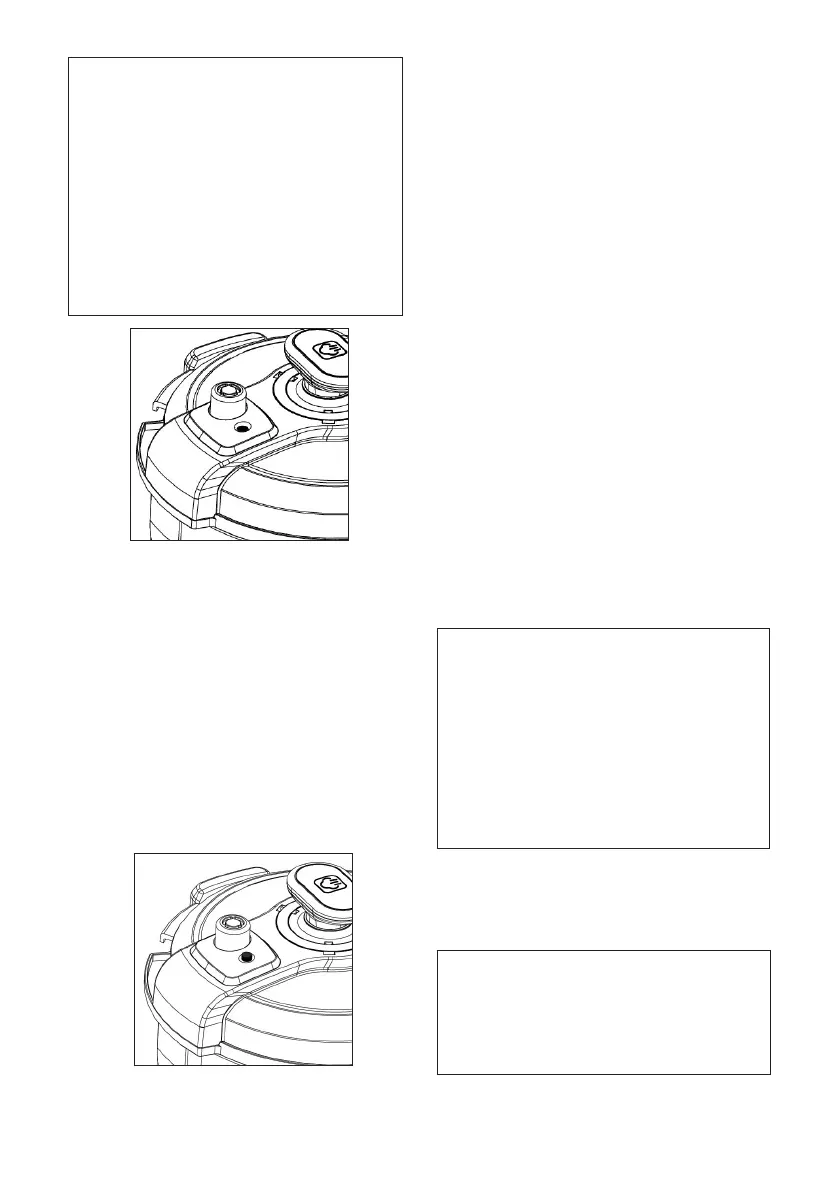
7. Whilepressurecookerisinoperation,the
“Heating”indicatorlightilluminates,the
applianceisheatingup,producingsteam
andslowlypressurizingthecookingpot.
Oncethecookingpotreachesadequate
pressuretheRedoatvalvewillrise,
indicatingthatapplianceisnowpressurized.
(Fig.11,Blackdotingureisredoatvalve)
Fig.11
OperatingInstructions
Prepareingredients/liquidquantitiestollthe
pressurecookercookingpot.
Refertorecipesandcookingtimetablesfurther
inthebooklet.
Placeandclosethepressurecookerlid.
Connectappliancepowersupplycordtothe
boththepressurecookerandwallpoweroutlet
andswitchONatwallpoweroutlet.
TheLEDdisplaywillbeilluminated,thepressure
cookerisnowreadytouse.
Subjecttorecipechosen,eitherselect/press
defaultcookingmodeswithorwithoutdelay
startuptimeorthefullymanualmode(Where
theuserentirelycontrolstheirpreferredcooking
times).
Explanationoffunctionsadditionaltodefault
cookingmodesdetailedbelow:
Preset Cook Function
Pressingthisbuttonselects“TIMER“todelaythe
start-upofthecookingprocess.
Tobeusedinconjunctionwithdedicated
cookingmodeand+/-Buttonstoselectyour
desireddelaystart-uptimefrom0.5-12hoursat
30minutesintervals.
Theunitwillstartcookingbypress“START/
CANCEL”buttonandwhensettimehasexpired.
Note: In order to maintain food freshness
and adhere to safe food handling
practices, you should apply this when
using appliance in conjunction with
delayed start (“Preset Cook”) cooking
modes or extended keep warm times
to ensure that specic ingredients that
spoil quickly are cooked and consumed
before it spoils, particular important
for meat, chicken, eggs or similar
ingredients.
The“SLOWCOOK”functioncanNOTbeusedin
conjunctionwiththe“PRESETCOOK”function,as
delayedcookingwillaffectthefreshnessofthe
liquidsandingredientscontained.
Note: After Delay start-up time is
selected, you must shortly thereafter
select the actual cooking time through
Dedicated cooking mode or Manual
Cook time, delay in doing so will revert
the appliance back to Stand By mode.