‘\
3
14.3 Scribe or use a marker to make marks around the bolts and
hinges on the cargo door
6 Following installation of the door, check the alignment and adjust it, if
necessary. The door lock striker can be adjusted both up-and-down and
sideways to provide positive engagement with the lock mechanism. This
is done by loosening the mounting screws and moving the striker as nec-
essay.
14 Rear cargo door - removal, installation and adjustment
Montero models
Refer to illustrations 14.3 and 14.4
Removal and installation
1
Disconnect any wire harness connectors and push them through the
door opening so they won’t interfere with door removal.
2 Place a jack or jackstand under the door or have an assistant on hand
to support itwhen the hinge bolts are removed.
Note:
Ifajackorjacksfand
is used, place a rag between it and the door to protect the door’s painted
surfaces. Note: Remove the spare tire to help lighten the door weight.
3 Scribe around the door bolts
(see illustration).
4 Remove the hinge-to-door bolts and carefully lift off the door (see
il-
lustration).
5 Installation is the reverse of removal.
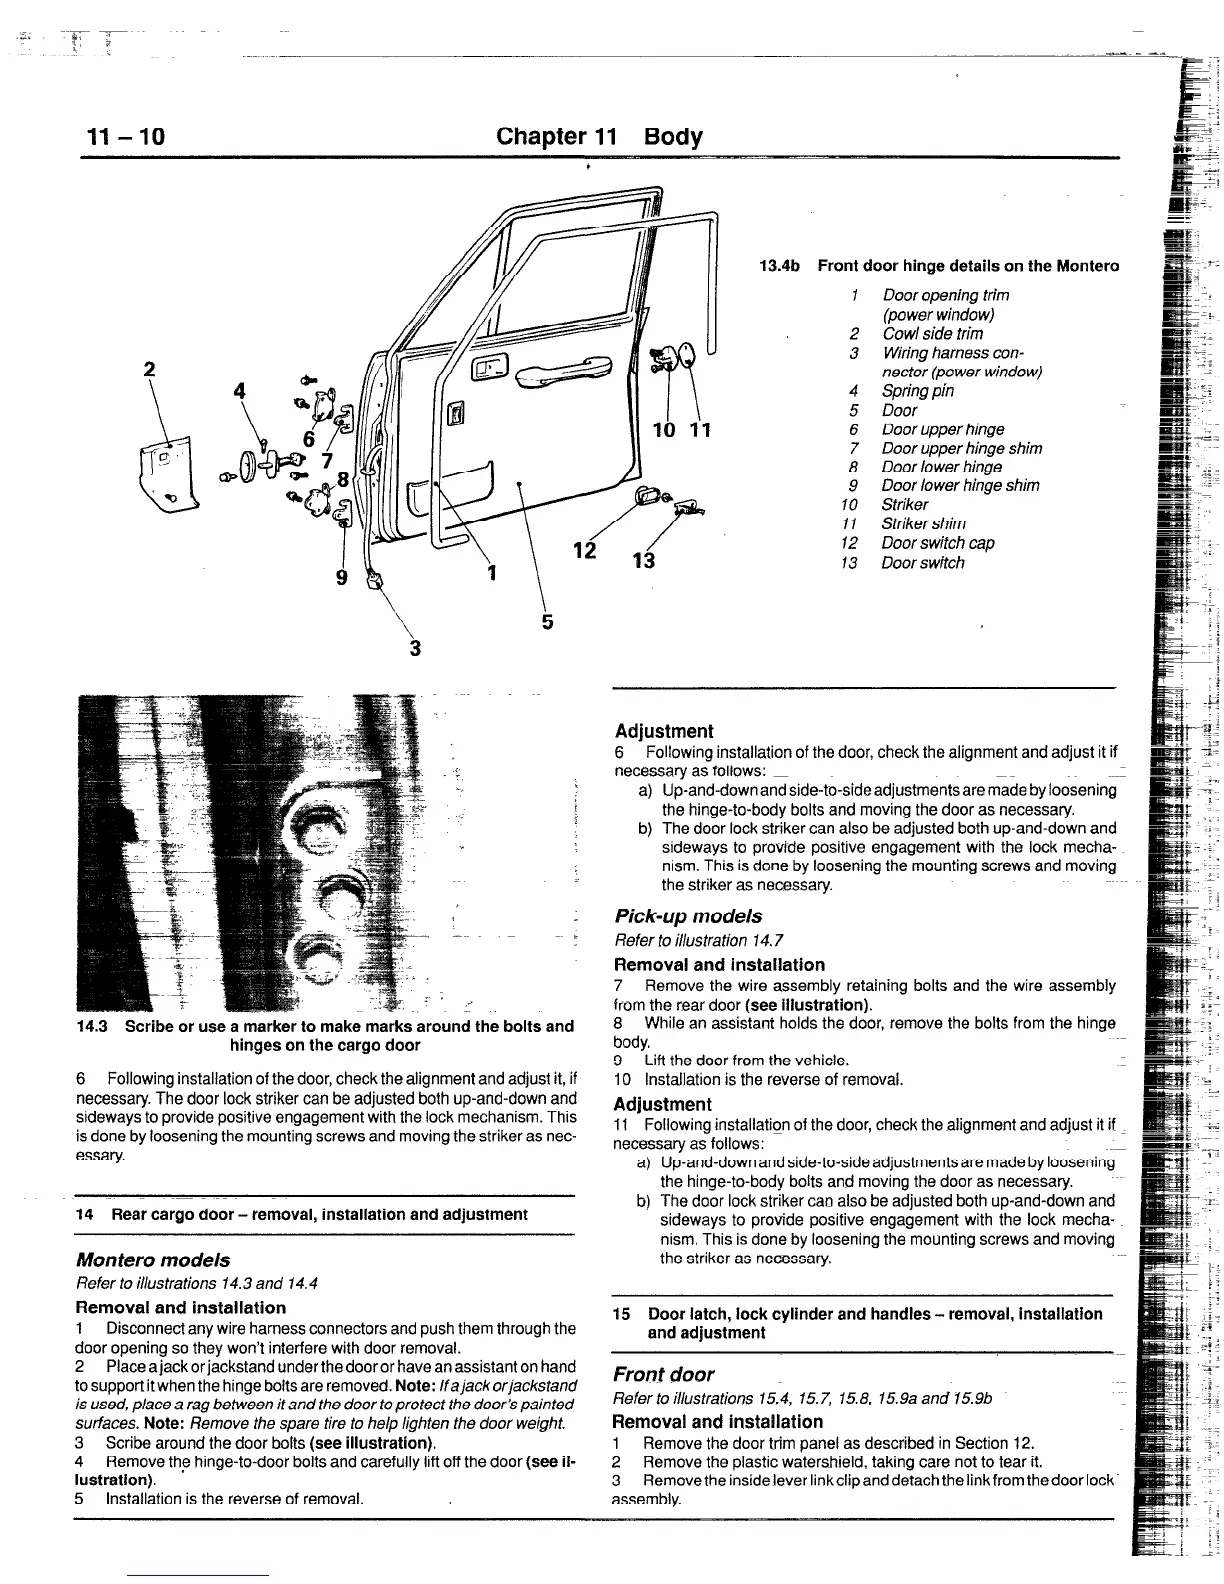
13.4b Front door hinge details on the Montero
1
2
3
4
5
6
7
8
9
10
11
12
13
Door opening trim
(power window)
Co WI side trim
Wiring harness con-
nector (power window)
Spring pin
Door
Door upper hinge
Door upper hinge shim
Door lower hinge
Door lower hinge shim
Striker
Striker shim
Door switch cap
Door switch
Adjustment
6 Following installation of the door, check the alignment and adjust it if
necessary as follows: ~
a) Up-and-down and side-to-side adjustments are made by loosening
the hinge-to-body bolts and moving the door as necessary.
b) The door lock striker can also be adjusted both up-and-down and
sideways to provide positive engagement with the lock mecha-
nism. This is done by loosening the mounting screws and moving
the striker as necessary.
Pick-up models
Refer to illustration 14.7
Removal and installation
7 Remove the wire assembly retaining bolts and the wire assembly
from the rear door
(see illustration).
8 While an assistant holds the door, remove the bolts from the hinge
body.
9 Lift the door from the vehicle.
10 Installation is the reverse of removal.
Adjustment
11 Following installation of the door, check the alignment and adjust it if _
necessary as follows:
a) Up-and-down and side-to-sideadjustmentsare made by loosening
the hinge-to-bodv bolts and moving the door as necessary.
b) The door lock striker can also be adjusted both up-and-down and
sideways to provide positive engagement with the lock mecha-
nism. This is done by loosening the mounting screws and moving
the striker as necessary.
15 Door latch, lock cylinder and handles - removal, installation
and adjustment
Front door
Refer to illustrations 15.4, 15.7, 15.8. 15.9a and 15.9b
Removal and installation
1 Remove the door trim panel as described in Section 12.
2 Remove the plastic watershield, taking care not to tear it.
3 Removethe insidelever linkclipanddetachthelinkfrom thedoor lock.
assembly.
 Loading...


